Unlock Authentic Flavors: Your Guide to the Best Homemade Teriyaki Chicken
Ever wonder how to recreate that irresistibly glossy, sweet-and-savory Teriyaki Chicken you savor at your favorite restaurant, right in your own kitchen? The secret lies not in complex techniques, but in fresh ingredients and a few simple steps. Preparing Teriyaki Chicken at home isn’t just about saving money; it’s about controlling the quality of your ingredients, customizing flavors to your preference, and enjoying the immense satisfaction of a homemade meal. This comprehensive guide will empower you to master this beloved dish, bringing the authentic taste of Japanese recipes straight to your dining table.
Ingredients & Kitchen Tools
Crafting the perfect Teriyaki Chicken requires a few essential items. Here’s what you’ll need:
- 1 ½ lbs Boneless, Skinless Chicken Thighs or Breasts: Thighs offer richer flavor and tenderness, while breasts are leaner.
- ½ cup Soy Sauce (low sodium recommended): The base of our teriyaki sauce; low sodium helps control saltiness.
- ¼ cup Mirin: Japanese sweet cooking wine, crucial for authentic flavor and glaze.
- 2 tbsp Sake (optional for cooking): Adds depth and tenderizes the chicken; dry sherry can be a substitute.
- 2 tbsp Brown Sugar (packed): Balances the savory notes with a touch of sweetness.
- 1 tbsp Fresh Ginger (grated): Pungent and aromatic, a key flavor enhancer.
- 2 cloves Garlic (minced): Adds a robust, savory undertone.
- 1 tbsp Cornstarch: Thickens the sauce, giving it that signature glossy finish.
- 2 tbsp Water: To create a cornstarch slurry.
- 1 tbsp Vegetable Oil: For searing the chicken.
- Sesame Seeds (for garnish): Adds texture and a nutty aroma.
- Chopped Green Onions/Scallions (for garnish): Provides freshness and a pop of color.
- Large Skillet or Wok: For cooking the chicken and sauce.
- Whisk: For making the sauce and slurry.
- Measuring Cups & Spoons: For accurate ingredient portions.
- Cutting Board & Knife: For preparing chicken and aromatics.
- Tongs: For handling the chicken during cooking.
Prep Time & Cooking Schedule
- Prep Time: 15 minutes (Includes chopping, grating, and sauce preparation)
- Marinating Time (Optional): 30 minutes to 2 hours (for enhanced flavor, especially with chicken breasts)
- Cook Time: 15-20 minutes
- Resting Time: 5 minutes (after cooking the chicken, before slicing)
This recipe is designed for efficiency, allowing you to have a delicious meal on the table in under an hour, making it perfect for weeknights. If you choose to marinate, factor that into your overall planning.
Step-by-Step Instructions
1. Prepare the Chicken: Pat the chicken thighs or breasts dry with paper towels. Cut them into 1-inch bite-sized pieces. Season lightly with salt and pepper.
2. Make the Teriyaki Sauce: In a medium bowl, whisk together the soy sauce, mirin, sake (if using), brown sugar, grated ginger, and minced garlic. In a separate small bowl, combine cornstarch and water to create a slurry; set aside.
3. Sear the Chicken: Heat vegetable oil in a large skillet or wok over medium-high heat. Add the chicken pieces in a single layer, making sure not to overcrowd the pan. Cook for 3-4 minutes per side, until lightly browned. The chicken doesn’t need to be fully cooked through at this stage. Remove the chicken from the skillet and set aside.
4. Simmer the Sauce: Pour the prepared teriyaki sauce into the same skillet. Bring to a gentle simmer, stirring occasionally.
5. Thicken the Sauce: Once simmering, whisk in the cornstarch slurry. Continue to whisk and cook for 1-2 minutes until the sauce thickens and becomes glossy. It should coat the back of a spoon.
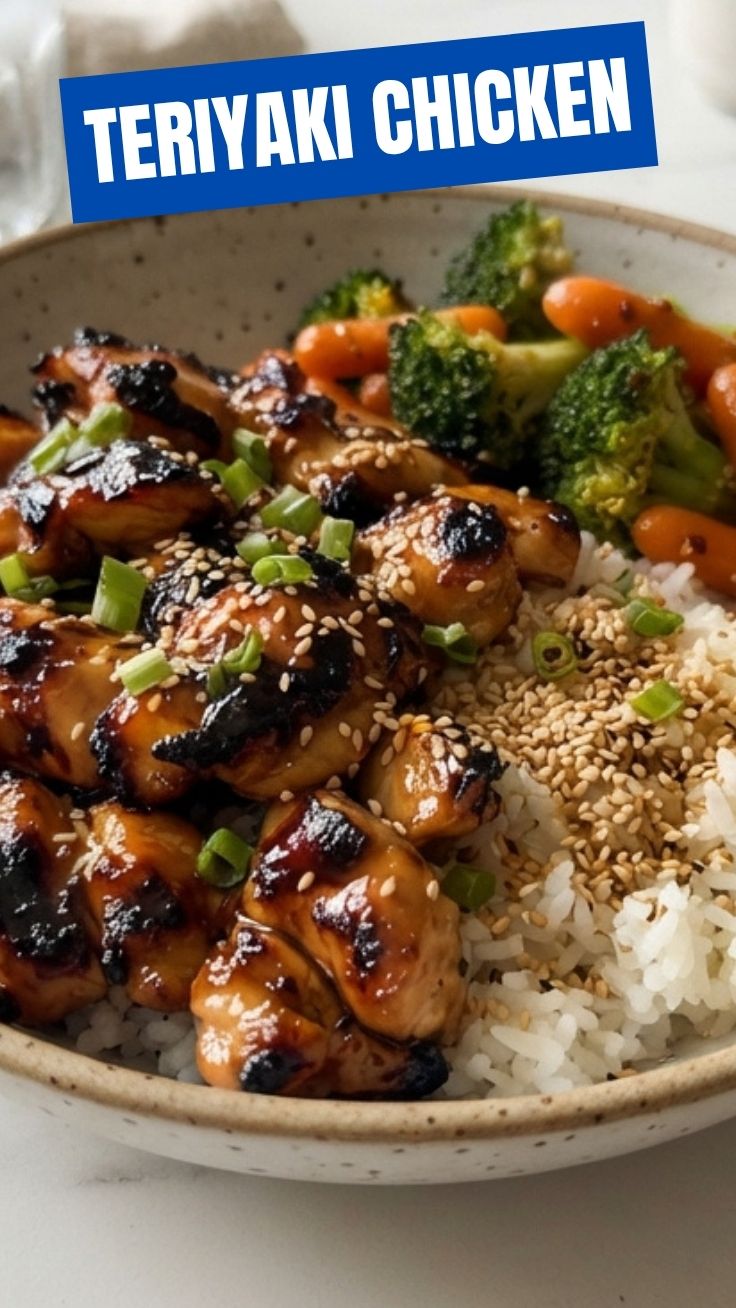
6. Combine & Garnish: Return the seared chicken to the skillet, tossing to coat evenly with the thickened teriyaki sauce. Cook for another 2-3 minutes, ensuring the chicken is fully cooked through and wonderfully glazed. For a truly authentic experience, pair this gorgeous Teriyaki Chicken with a side of steamed rice and explore other delightful Japanese recipes for a complete meal.
7. Serve: Garnish generously with sesame seeds and chopped green onions. Serve hot over rice, noodles, or with your favorite steamed vegetables.
Nutritional Benefits & Advantages
This homemade Teriyaki Chicken offers a powerhouse of nutrients. Chicken is an excellent source of lean protein, essential for muscle repair and growth. Ginger and garlic provide powerful antioxidants and anti-inflammatory benefits. By making it at home, you can control the amount of sugar and sodium, making it a healthier alternative to many store-bought or restaurant versions. Opting for low-sodium soy sauce and reducing the brown sugar can further enhance its dietary advantages, fitting into various healthy eating plans.
Tips, Variations & Cooking Advice
- Spice It Up: Add a pinch of red pepper flakes or a dash of sriracha to the sauce for a spicy kick.
- Vegetable Boost: Stir in broccoli florets, bell peppers, or snap peas during the last 5 minutes of cooking for an all-in-one meal.
- Gluten-Free: Substitute regular soy sauce with tamari for a gluten-free version.
- Sugar Alternatives: Use honey or maple syrup in place of brown sugar for a slightly different sweetness profile.
- Grilling Option: Marinate chicken pieces for at least 30 minutes, then grill until cooked through, brushing with the sauce during the last few minutes for a smoky flavor.
Common Mistakes to Avoid
- Overcrowding the Pan: This lowers the pan’s temperature, steaming the chicken instead of searing it, leading to less flavor and an unappealing texture. Cook in batches if necessary.
- Overcooking the Chicken: Teriyaki chicken can become dry and tough if cooked too long. Ensure it’s cooked through but still juicy.
- Skipping the Slurry: The cornstarch slurry is crucial for thickening the sauce. Without it, your teriyaki will be watery.
- Not Tasting the Sauce: Always taste and adjust seasonings (salt, sweetness) as needed before adding the chicken back into the sauce.
Storage & Meal Prep Tips
- Refrigeration: Store leftover Teriyaki Chicken in an airtight container in the refrigerator for up to 3-4 days.
- Freezing: This dish freezes well. Freeze cooked chicken and sauce separately or together in freezer-safe containers for up to 2-3 months. Thaw overnight in the refrigerator before reheating.
- Reheating: Reheat gently on the stovetop over medium-low heat or in the microwave until warmed through. Add a splash of water or chicken broth if the sauce has thickened too much.
Conclusion
Mastering homemade Teriyaki Chicken is a culinary triumph that opens the door to a world of delicious Japanese recipes. With this guide, you now have all the tools and knowledge to create a dish that is not only incredibly flavorful and satisfying but also customizable to your preferences. Don’t be afraid to experiment with variations and make this recipe truly your own. We encourage you to try this recipe tonight and share your fantastic results – your taste buds will thank you!
FAQs
Q1: Can I use chicken breast instead of thighs?
A: Yes, boneless, skinless chicken breasts work perfectly. They are leaner, but ensure you don’t overcook them to keep them tender.
Q2: What can I substitute for Mirin?
A: If you don’t have mirin, you can use dry sherry or a touch of rice vinegar mixed with a pinch of sugar, though the authentic flavor profile might be slightly altered.
Q3: How can I make the sauce thicker or thinner?
A: For a thicker sauce, add a bit more cornstarch slurry (mixed with water first). For a thinner sauce, add a splash of chicken broth or water.
Q4: Can I marinate the chicken overnight?
A: While 30 minutes to 2 hours is usually sufficient, you can marinate chicken thighs overnight for even deeper flavor. Chicken breasts should not be marinated much longer than 2-4 hours to avoid a mushy texture.
Q5: What are good side dishes to serve with Teriyaki Chicken?
A: Steamed white rice, brown rice, stir-fried noodles, roasted broccoli, sautéed snap peas, or a simple cucumber salad are all excellent accompaniments.