Unlock Flavor: Your Guide to Perfect Lemon Garlic Chicken at Home
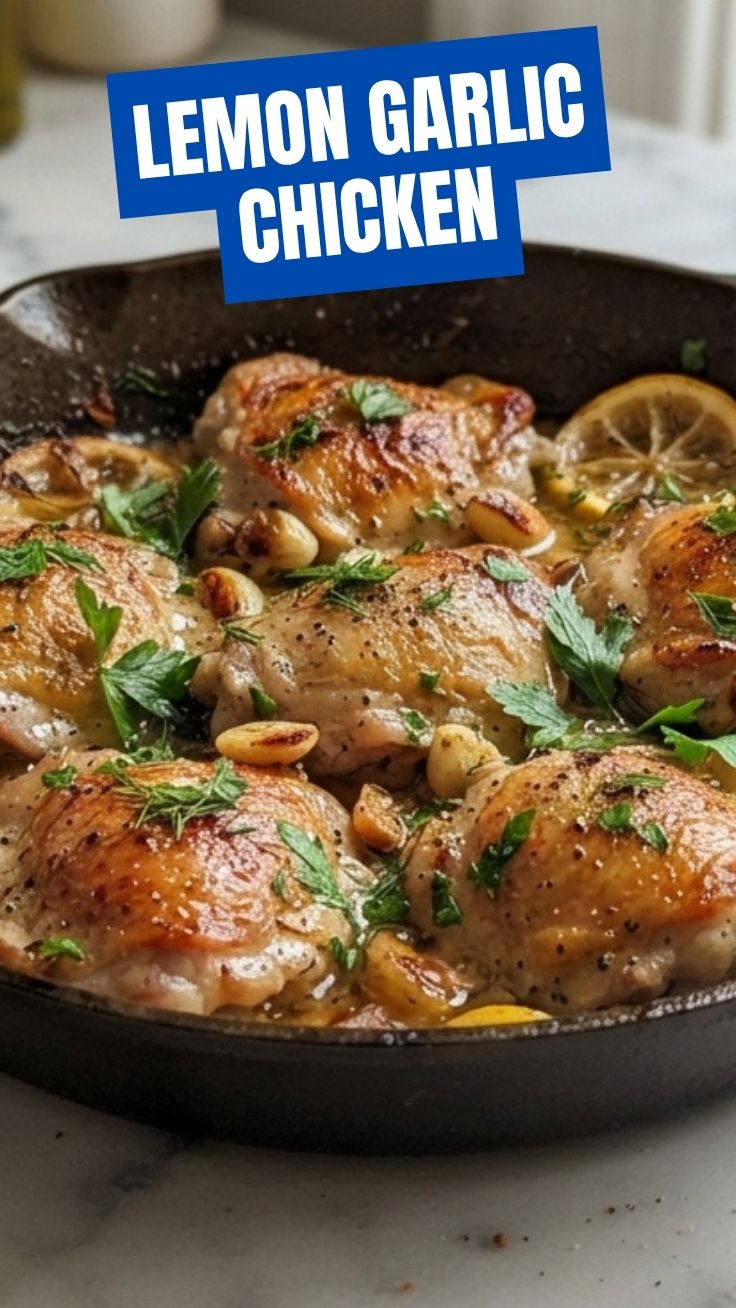
Are you tired of bland weeknight meals and craving a dish that’s both vibrant and comforting? Imagine serving a dish so irresistibly aromatic and flavorful that your family begs for seconds. Preparing delicious meals from scratch, like a succulent Lemon Garlic Chicken, is not just about saving money; it’s about controlling your ingredients, personalizing flavors, and creating unforgettable culinary experiences right in your own kitchen. This comprehensive guide will walk you through every step of crafting the perfect Lemon Garlic Chicken, ensuring a juicy, tender, and incredibly satisfying result every time. Pair it with a side of roasted vegetables or a fresh salad, and you’ll instantly elevate your dinner game, perhaps even inspiring you toward other savory chicken creations like a smoky garlic herb chicken.
Ingredients & Kitchen Tools
- Whole Chicken (3-4 lbs): Opt for a fresh, free-range chicken for best flavor and texture. Can substitute with bone-in, skin-on chicken pieces (thighs, drumsticks, or breasts) if preferred.
- Lemons (2-3): Fresh lemons are crucial for bright flavor. One for slices, the others for juice and zest.
- Garlic Head (1 whole): Minced or smashed cloves provide intense garlic flavor.
- Fresh Rosemary (2 sprigs): Adds an aromatic, earthy note. Dried rosemary can be used in a pinch (use 1/2 tsp dried per sprig).
- Fresh Thyme (4-5 sprigs): Complements the lemon and garlic beautifully. Dried thyme (1/2 tsp dried per sprig) is also an option.
- Olive Oil (3 tbsp): Helps to crisp the skin and carry flavors.
- Salt (1-2 tsp, or to taste): Coarse sea salt or kosher salt is recommended for seasoning.
- Black Pepper (1/2 tsp, or to taste): Freshly ground black pepper enhances the overall taste.
- Chicken Broth/White Wine (1/2 cup, optional): Adds moisture and a richer sauce.
- Roasting Pan: A sturdy pan large enough to hold the chicken without overcrowding.
- Meat Thermometer: Essential for ensuring the chicken is cooked through to a safe internal temperature (165°F / 74°C).
- Cutting Board & Sharp Knife: For preparing ingredients.
- Mixing Bowl: For preparing the marinade or seasoning rub.
- Pastry Brush (optional): For basting.
Prep Time & Cooking Schedule
- Prep Time: 20 minutes (includes chopping herbs, slicing lemons, and creating the rub).
- Marinating Time (Optional but Recommended): 30 minutes to overnight in the refrigerator. Marinating deeply infuses the flavors into the chicken, resulting in a more succulent and flavorful dish. If you’re short on time, even 30 minutes at room temperature can make a difference.
- Cook Time: 60-90 minutes, depending on the size of your chicken and oven calibration. A 3-4 lb chicken typically takes around 75 minutes.
- Resting Time: 10-15 minutes after cooking. This crucial step allows the juices to redistribute, ensuring a tender and moist chicken. Do not skip this!
Step-by-Step Instructions
1. Prepare the Chicken: Pat the chicken dry with paper towels – this helps achieve crispy skin. If using a whole chicken, remove any giblets from the cavity.
2. Make the Lemon Garlic Herb Rub: In a small bowl, combine minced garlic, lemon zest from one lemon, fresh rosemary and thyme (roughly chopped), olive oil, salt, and black pepper. Mix until well combined.
3. Season the Chicken: Gently loosen the skin over the chicken breasts and thighs and rub about two-thirds of the lemon garlic herb mixture directly onto the meat under the skin. This ensures maximum flavor penetration. Rub the remaining mixture all over the outside of the chicken, including the cavity.
4. Stuff and Truss (Optional): Slice the zested lemon into quarters and place them inside the chicken cavity along with a few extra sprigs of herbs. Trussing the chicken (tying the legs together) helps it cook more evenly and retain its shape.
5. Preheat Oven & Prep Roasting Pan: Preheat your oven to 400°F (200°C). If using, pour chicken broth or white wine into the bottom of your roasting pan. Place the chicken, breast-side up, in the pan.
6. Roast the Chicken: Roast for 60-90 minutes, or until a meat thermometer inserted into the thickest part of the thigh (avoiding bone) reads 165°F (74°C). For even browning and to prevent the skin from burning, you can loosely tent the chicken with foil after 45 minutes if it’s browning too quickly.
7. Baste (Optional): During the last 15-20 minutes, you can baste the chicken with the pan juices to enhance crust and flavor.
8. Rest and Serve: Once cooked, remove the Lemon Garlic Chicken from the oven, transfer it to a cutting board, and tent with foil. Let it rest for 10-15 minutes before carving. This resting period is critical for juicy results. While the chicken rests, consider preparing a quick side like roasted potatoes or a fresh salad. Serving this with a fragrant garlic herb chicken accompaniment elevates the meal.
Nutritional Benefits & Advantages
Chicken is a lean protein source, essential for muscle repair and growth. This recipe, relying on natural ingredients like fresh lemon and garlic, packs a nutritional punch. Lemons are rich in Vitamin C, an antioxidant that boosts immunity. Garlic, a natural anti-inflammatory, is known for its cardiovascular benefits. Fresh herbs like rosemary and thyme add not only flavor but also additional antioxidants. By roasting, you’re avoiding excessive fats often found in fried preparations, making this a wholesome and healthy meal option for your entire family.
Tips, Variations & Cooking Advice
- Crispy Skin Secret: For extra crispy skin, pat the chicken very dry, use plenty of salt, and add a teaspoon of baking powder to your rub. Make sure your oven is fully preheated.
- Flavor Boosts: Add a teaspoon of smoked paprika or a pinch of red pepper flakes to the rub for an extra layer of flavor or a subtle kick.
- Vegetable Medley: Roast potatoes, carrots, onions, or asparagus alongside the chicken in the same pan during the last 30-40 minutes of cooking. They will absorb the delicious pan drippings.
- Spatchcocking: For faster, more even cooking, consider spatchcocking (butterflying) the chicken. This reduces cooking time significantly.
- Dairy-Free/Gluten-Free: This recipe is naturally dairy-free and gluten-free, making it suitable for many dietary needs.
Common Mistakes to Avoid
- Not Drying the Chicken: A wet chicken skin will steam, not crisp. Always pat it thoroughly dry.
- Undercooking/Overcooking: Use a meat thermometer! This prevents dry, overcooked chicken and unsafe, undercooked chicken.
- Not Resting the Chicken: Cutting into the chicken immediately after roasting causes all the juices to spill out, leading to dry meat. Patience is key!
- Skimping on Seasoning Beneath the Skin: The meat itself needs seasoning, not just the skin.
- Overcrowding the Pan: If roasting chicken pieces along with vegetables, ensure there’s enough space for air circulation to prevent steaming.
Storage & Meal Prep Tips
Leftover Lemon Garlic Chicken can be stored in an airtight container in the refrigerator for up to 3-4 days. It’s perfect for meal prepping! Shred the leftover chicken for salads, sandwiches, tacos, or even a quick chicken noodle soup base. To reheat, gently warm in the oven at 300°F (150°C) until heated through, or in a microwave with a damp paper towel to prevent drying out. Freezing cooked chicken is also an option; it will maintain quality for up to 3 months. Thaw overnight in the refrigerator before reheating.
Conclusion
Mastering a perfectly roasted Lemon Garlic Chicken is a kitchen essential, offering a blend of zesty vibrancy and comforting warmth that’s hard to beat. By following these detailed steps and embracing the power of fresh ingredients, you’re not just cooking a meal; you’re crafting an experience. We hope this guide inspires you to try this fantastic recipe and perhaps explore other similar dishes such as a savory garlic herb chicken. Share your creations with us in the comments – we’d love to see your culinary triumphs!
FAQs
Q1: Can I use boneless, skinless chicken breasts for this recipe?
A1: Yes, you can! Adjust cooking time accordingly, as boneless breasts will cook faster. Reduce the roasting time by about 20-30 minutes, ensuring an internal temperature of 165°F (74°C). Marinating for at least 30 minutes is highly recommended to keep them moist.
Q2: How can I make the pan juices into a gravy?
A2: After removing the chicken, pour the pan juices into a saucepan. On medium heat, whisk in a tablespoon of flour or cornstarch mixed with a little cold water to create a slurry. Simmer until thickened to your desired consistency, scraping up any browned bits from the pan for extra flavor.
Q3: What if I don’t have fresh herbs?
A3: If fresh herbs aren’t available, you can substitute dried herbs. Use about 1/3 of the amount of fresh herbs (e.g., 1/2 teaspoon dried rosemary for 1 sprig fresh). Remember that dried herbs are more potent.
Q4: My chicken skin isn’t getting crispy. What am I doing wrong?
A4: Ensure your chicken is very dry before seasoning. Also, make sure your oven is fully preheated and avoid overcrowding the roasting pan. Roasting at a higher temperature initially (e.g., 425°F/220°C for 15-20 minutes) before reducing can also help crisp the skin. Make sure not to baste constantly, as this can prevent crisping.
Q5: Can I prepare this recipe ahead of time for meal prep?
A5: Absolutely! You can prepare the chicken with the rub and let it marinate in the refrigerator for up to 24 hours. This deepens the flavor and cuts down on prep time on the day you plan to cook. The cooked chicken also reheats wonderfully.