Unlock Unforgettable Flavor: Your Guide to the Perfect Homemade Garlic Butter Chicken
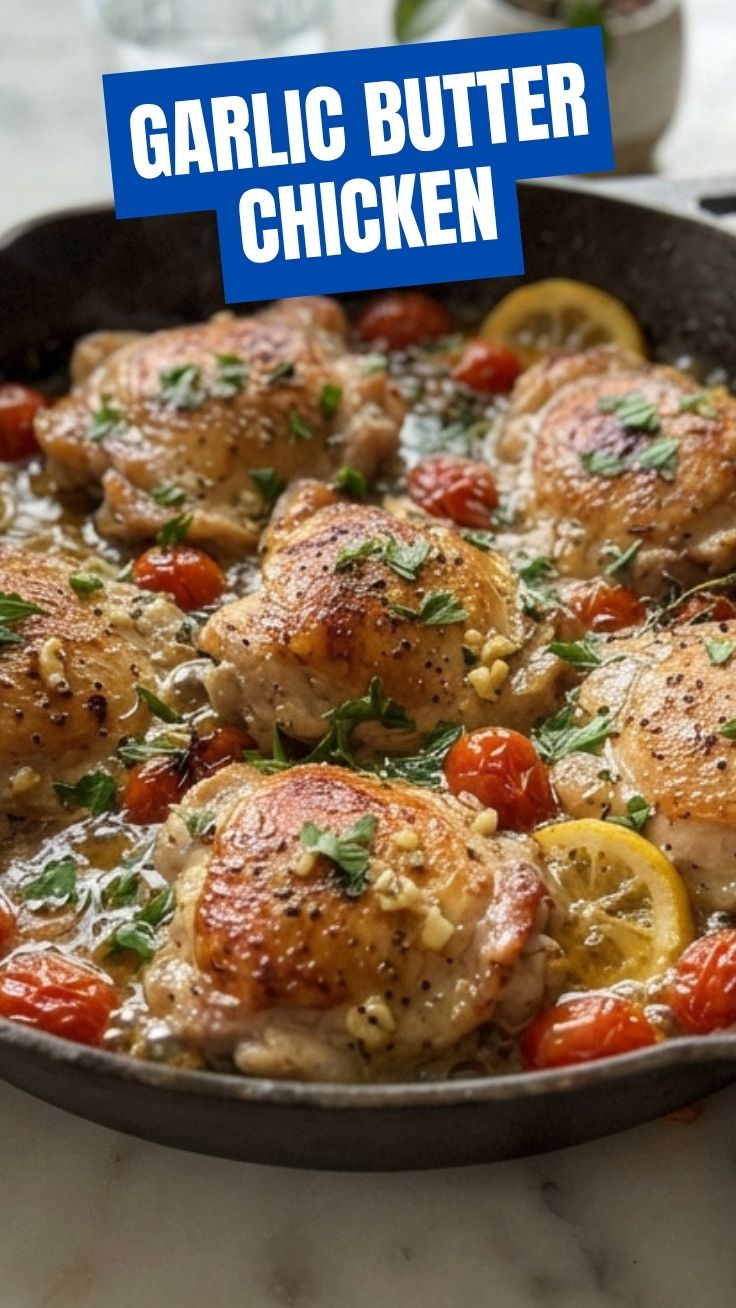
Ever wonder how to transform humble chicken into a weeknight masterpiece that tantalizes the taste buds and leaves everyone asking for more? Look no further! Today, we’re diving deep into the world of succulent, aromatic chicken dishes, and there’s one in particular that consistently steals the show: Garlic Butter Chicken. Preparing this classic at home offers an unparalleled level of control over fresh ingredients, allowing you to customize flavors and eliminate unnecessary additives found in pre-made options. Imagine tender chicken infused with rich garlic and creamy butter – a culinary dream within reach. This comprehensive guide will walk you through every step to master the art of the Garlic Butter Chicken Recipe, ensuring a dish that’s both delicious and impressive.
Ingredients & Kitchen Tools
To embark on your flavorful journey, gather these essential components:
Protein:
- Chicken Thighs (bone-in, skin-on or boneless, skinless): 1.5 – 2 lbs (about 4-6 pieces). Thighs offer richer flavor and juicier results than breasts.
Aromatics & Flavor:
- Garlic: 6-8 cloves, minced. The heart of our flavor profile.
- Butter (unsalted): 4 tablespoons, divided. Provides richness and aids in browning.
- Olive Oil: 2 tablespoons. For searing and preventing butter from burning.
- Chicken Broth (low sodium): 1/2 cup. Adds liquid and deepens flavor.
- Fresh Parsley (chopped): 2 tablespoons, for garnish and freshness.
- Lemon Juice: 1 tablespoon, freshly squeezed. Brightens and balances the rich flavors.
- Dried Thyme: 1/2 teaspoon. Adds an earthy, aromatic note.
- Red Pepper Flakes (optional): 1/4 teaspoon, for a subtle kick.
Seasoning:
- Salt: To taste. Enhances all other flavors.
- Black Pepper: To taste. Provides a fragrant warmth.
Kitchen Tools:
- Large Skillet (oven-safe, cast iron recommended): Essential for searing and finishing in the oven.
- Tongs: For easy handling of chicken.
- Measuring Spoons & Cups: For accurate ingredient quantities.
- Cutting Board & Sharp Knife: For preparing chicken and aromatics.
- Small Bowl: For mixing seasonings.
Prep Time & Cooking Schedule
- Prep Time: 15 minutes. This includes mincing garlic, chopping parsley, and seasoning the chicken.
- Cook Time: 25-30 minutes total.
* Searing: 6-8 minutes (3-4 minutes per side).
* Baking: 15-20 minutes, depending on chicken thickness and bone presence.
- Resting Time: 5 minutes. Crucial for juicy, tender results.
* Context: This recipe is perfect for a weeknight dinner as it comes together relatively quickly. The oven-safe skillet method streamlines the process, minimizing cleanup and maximizing flavor development. Plan to start your prep about 45 minutes before you want to serve dinner.
Step-by-Step Instructions
1. Prepare the Chicken: Pat your chicken thighs dry with paper towels. Season generously with salt and pepper on both sides. This step is crucial for achieving crispy skin and well-flavored meat.
2. Heat the Skillet: In your large, oven-safe skillet, melt 2 tablespoons of butter with 2 tablespoons of olive oil over medium-high heat. The olive oil helps prevent the butter from burning.
3. Sear the Chicken: Once the butter is melted and sizzling, carefully place the chicken thighs skin-side down (if using skin-on). Sear for 3-4 minutes per side, until deeply golden brown and crispy. This develops a beautiful crust and locks in moisture.
4. Add Aromatics: Reduce heat to medium. Add the minced garlic and dried thyme to the skillet, stirring for about 30 seconds until fragrant. Be careful not to burn the garlic.
5. Deglaze and Finish: Pour in the chicken broth and add the remaining 2 tablespoons of butter. Stir gently, scraping up any browned bits from the bottom of the skillet – this is where all the flavor hides! Bring to a gentle simmer.
6. Bake to Perfection: Transfer the skillet to a preheated oven at 375°F (190°C). Bake for 15-20 minutes, or until the internal temperature of the chicken reaches 165°F (74°C). The juices should run clear. This step ensures the Garlic Butter Chicken is cooked through while remaining incredibly tender.
7. Rest and Serve: Remove the skillet from the oven. Squeeze fresh lemon juice over the chicken and sprinkle with chopped fresh parsley. Allow the chicken to rest for 5 minutes before serving. This allows the juices to redistribute, ensuring a succulent and flavorful experience from your Garlic Butter Chicken Recipe.
Nutritional Benefits & Advantages
Chicken thighs are a good source of lean protein, essential for muscle repair and growth. The healthy fats from butter (in moderation) and olive oil provide energy and aid in nutrient absorption. Garlic, beyond its incredible flavor, boasts significant health benefits, including antioxidant and anti-inflammatory properties. This dish is also naturally low in carbohydrates, making it suitable for various dietary approaches. The fresh herbs and lemon juice contribute vitamins and a refreshing zest.
Tips, Variations & Cooking Advice
- Spice It Up: A pinch of red pepper flakes adds a delightful warmth.
- Herb Power: Experiment with fresh rosemary or oregano alongside thyme for a different aromatic profile.
- Creamy Upgrade: Stir in a splash of heavy cream at the end for an even richer sauce.
- Veggie Boost: Add some spinach or cherry tomatoes to the skillet during the last few minutes of baking.
- Gluten-Free: This recipe is naturally gluten-free!
- Dairy-Free: Substitute the butter with your favorite dairy-free butter alternative.
- Portion Control: Adjust the number of chicken thighs based on your serving needs.
Common Mistakes to Avoid
- Overcrowding the Skillet: This leads to steaming instead of searing, resulting in pale, rubbery chicken. Cook in batches if necessary.
- Not Patting Chicken Dry: Moisture on the skin prevents crisping. Always pat dry!
- Burning the Garlic: Garlic can go from fragrant to bitter quickly. Keep a close eye on it and reduce heat if needed.
- Skipping the Rest: Resting allows juices to redistribute, preventing dry chicken. Be patient!
- Under-Seasoning: Salt and pepper are your friends. Don’t be shy, but taste as you go.
Storage & Meal Prep Tips
Leftover Garlic Butter Chicken can be stored in an airtight container in the refrigerator for up to 3-4 days. For reheating, gently warm in a skillet on the stovetop over low heat, or in the oven at 300°F (150°C) until heated through, adding a splash of broth if the sauce has thickened too much. Freezing is possible for cooked chicken, though the texture of the sauce might change slightly upon thawing. Freeze in airtight containers for up to 2-3 months.
Conclusion
Mastering this Garlic Butter Chicken recipe is a game-changer for any home cook. Its simplicity belies an explosion of flavor, making it a reliable choice for family dinners or entertaining guests. With tantalizing flavors and a surprisingly straightforward cooking process, this Garlic Butter Chicken Recipe is destined to become a beloved staple in your culinary repertoire. Go ahead, give it a try tonight! We’d love to hear about your experience and see your delicious creations in the comments below!
FAQs
Q1: Can I use chicken breasts instead of thighs?
A1: Yes, you can. However, chicken breasts are leaner and can dry out more easily. Cook them for a shorter period and monitor internal temperature closely.
Q2: What can I serve with Garlic Butter Chicken?
A2: This dish pairs wonderfully with mashed potatoes, rice, pasta, roasted vegetables (like asparagus or broccoli), or a simple side salad.
Q3: How can I make the sauce thicker?
A3: If you prefer a thicker sauce, you can remove the chicken from the skillet after baking and simmer the sauce over medium heat for a few minutes, stirring occasionally, until it reduces to your desired consistency. You can also whisk in a small cornstarch slurry (1 tsp cornstarch mixed with 1 tbsp cold water) for a quicker thickening.
Q4: Can I prepare this recipe ahead of time for meal prep?
A4: Absolutely! Cook the chicken completely, then store it in an airtight container with the sauce. Reheat as per the instructions above. It makes for excellent, flavorful leftovers.
Q5: What if I don’t have an oven-safe skillet?
A5: You can sear the chicken on the stovetop in any skillet, then transfer the chicken and sauce to a baking dish to finish cooking in the oven.