Master the Juiciest Roast Turkey: Your Ultimate Guide to a Festive Feast
Ever wondered how to achieve that perfectly golden, impossibly juicy Roast Turkey, leaving your guests clamoring for more? Preparing a show-stopping Thanksgiving dinner from scratch might seem daunting, but with the right guidance, it’s an incredibly rewarding experience. There’s a unique satisfaction that comes from mastering such a quintessential dish, creating lasting memories around the dinner table, and knowing exactly what goes into nourishing your loved ones. This comprehensive guide will arm you with all the knowledge and techniques needed to transform a humble turkey into an unforgettable culinary masterpiece, ensuring your festive celebrations are nothing short of spectacular. This isn’t just about roasting a bird; it’s about crafting an experience.
Ingredients & Kitchen Tools
Here’s everything you’ll need to create your magnificent Roast Turkey:
12-14 lb Fresh or Thawed Whole Turkey: The star of the show. Choose a good quality bird for best results.*
1/2 cup Unsalted Butter, softened: For basting and achieving that golden-brown skin.*
2 Large Onions, quartered: Adds aromatic depth to the cavity.*
4 Celery Ribs, roughly chopped: Another essential aromatic for flavor.*
4 Carrots, roughly chopped: Sweetness and color for the roasting pan.*
1 whole head of Garlic, halved horizontally: Infuses the turkey with earthy notes.*
Fresh Herbs (Rosemary, Thyme, Sage): A generous bunch of each for fragrant seasoning.*
2 cups Chicken or Vegetable Broth: For moisture in the roasting pan and for gravy.*
Salt and Freshly Ground Black Pepper: Essential seasoning, of course!*
Optional Brine Ingredients: Water, salt, sugar, bay leaves, peppercorns, citrus peels – for extra juiciness.*
Kitchen Tools:
Large Roasting Pan with a Rack: Crucial for even cooking and preventing the bottom from getting soggy.*
Meat Thermometer (probe or instant-read): Your best friend for ensuring perfect doneness.*
Basting Brush: For applying butter and pan drippings.*
Kitchen Twine: To tie the legs together for a neater presentation and even cooking.*
Aluminum Foil: For tenting during resting and if the skin browns too quickly.*
Sharp Carving Knife and Fork: For elegant presentation.*
Large Cutting Board: For carving and resting the turkey.*
Optional: Brining Bag or Large Cooler: If opting to brine your turkey.*
Prep Time & Cooking Schedule
- Defrosting (if frozen): Allow 24 hours per 4-5 lbs in the refrigerator. A 12-14 lb turkey will need 3-4 days.
- Brining (optional): 8-16 hours (overnight is ideal).
- Prep Time: 30 minutes (for stuffing aromatics, seasoning, and trussing).
- Cook Time: Approximately 2.5-3.5 hours for a 12-14 lb turkey (roughly 13-15 minutes per pound at 325°F).
- Resting Time: 30-45 minutes. This is crucial for juiciness!
Planning Tip: Start defrosting well in advance. If brining, begin the day before you plan to roast. On the day of, give yourself ample time for prep and ensure the oven is preheated before the turkey goes in. Don’t forget to account for the essential resting period before carving!
Step-by-Step Instructions
1. Prepare the Turkey: If using a frozen turkey, ensure it’s fully thawed. Remove the neck and giblets from the cavity; save for gravy if desired. Pat the entire turkey dry, inside and out, with paper towels. This is key for crispy skin.
2. Brine (Optional, but Recommended): If brining, submerge the turkey in your prepared brine solution per your recipe. After brining, rinse the turkey thoroughly under cold water and pat dry again.
3. Preheat and Prep the Pan: Preheat your oven to 325°F (160°C). Place the rack in your roasting pan.
4. Aromatic Stuffing & Seasoning: In the turkey’s main cavity, place half of the quartered onions, celery, carrots, garlic, and fresh herbs. Spread the softened butter all over the exterior of the turkey. Season generously with salt and black pepper. Don’t forget the cavity!
5. Trussing: Tie the turkey legs together with kitchen twine. This helps the breast cook evenly and keeps the shape neat. Tuck the wing tips under the breast to prevent them from burning.
6. Add Pan Aromatics: Arrange the remaining onions, celery, carrots, garlic, and herbs in the bottom of the roasting pan, around the rack. Pour in the 2 cups of chicken or vegetable broth. This forms the base for your delicious pan drippings.
7. Roast: Place the prepared turkey on the rack in the roasting pan, breast-side up. Insert a meat thermometer into the thickest part of the thigh, making sure it doesn’t touch the bone.
8. Basting & Monitoring: Roast for the estimated time, basting every 45-60 minutes with the pan drippings. If the skin begins to brown too quickly, loosely tent the turkey with aluminum foil.
9. Check Doneness: The Roast Turkey is done when the internal temperature in the thickest part of the thigh (without touching the bone) reaches 165°F (74°C). The juices should run clear when a knife is inserted into the thigh. This ensures a safe and flavorful Thanksgiving dinner centerpiece.
10. Rest: Carefully remove the turkey from the oven. Transfer it to a large cutting board and tent it loosely with aluminum foil. Allow it to rest for 30-45 minutes before carving. This resting period is critical for the juices to redistribute, leading to an incredibly tender and moist bird.
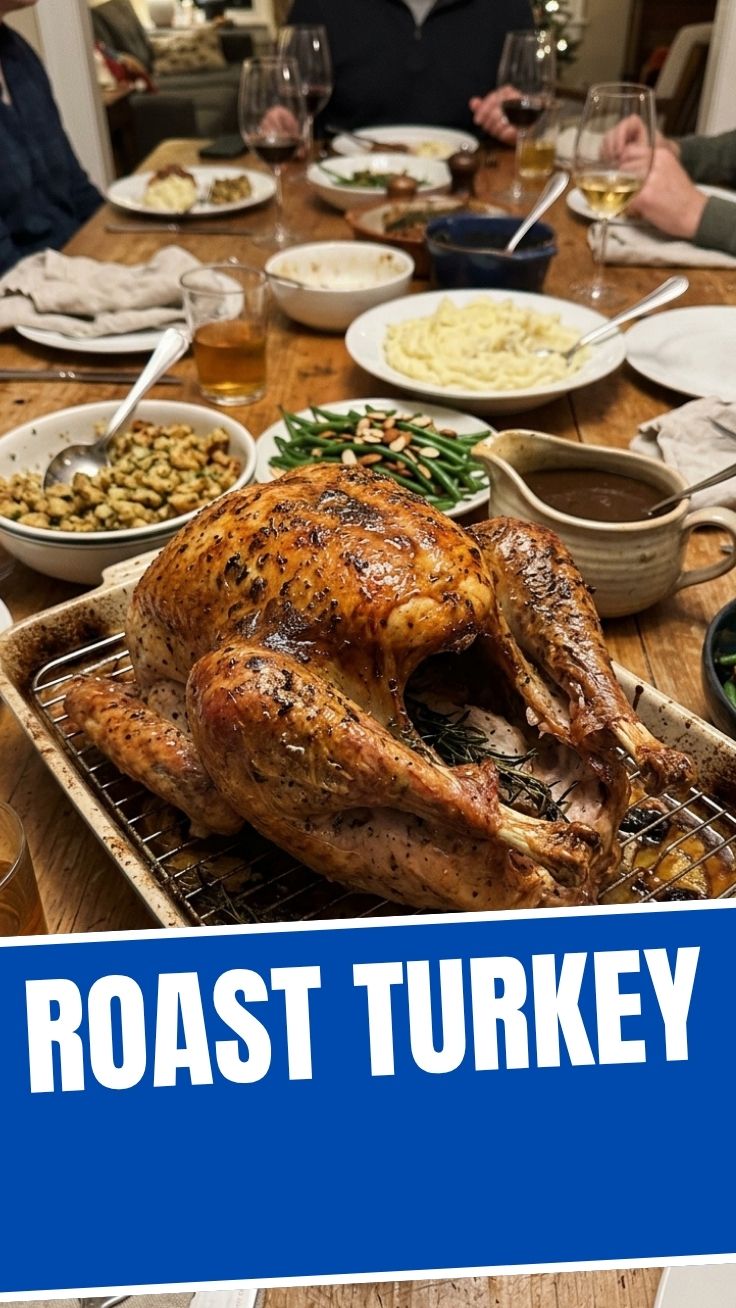
11. Carve and Serve: Carve the turkey and arrange it on a platter. Serve with your favorite side dishes and gravy made from the pan drippings.
Nutritional Benefits & Advantages
Turkey is an excellent source of lean protein, essential for muscle repair and growth. It’s also rich in B vitamins (especially B6 and B12), which are vital for energy metabolism and nervous system function. Furthermore, turkey provides minerals like selenium (an antioxidant) and zinc (important for immune health). Choosing a whole turkey for your festive meal offers transparency – you know exactly what you’re eating, devoid of hidden additives often found in processed meats. Its moderate fat content (especially with the skin removed after cooking) makes it a healthy choice for any celebratory table.
Tips, Variations & Cooking Advice
- Brining for Juiciness: A good brine (salt, sugar, herbs in water) will significantly enhance the moisture and flavor of your turkey. Experiment with different aromatics in your brine.
- Compound Butter: Instead of just plain butter, mix softened butter with minced garlic, fresh herbs (rosemary, thyme, sage), and lemon zest. Rub this under the skin for incredible flavor.
- Roast Vegetables: Add root vegetables like parsnips, sweet potatoes, or quartered butternut squash to the roasting pan for delicious side dishes that cook alongside your turkey.
- High-Heat Start: Some chefs advocate for starting the turkey at a higher temperature (e.g., 400°F/200°C) for the first 30 minutes to get a crispy skin, then reducing it to 325°F (160°C) for the remainder of the cooking.
- Spatchcocking: If you want a faster, more evenly cooked turkey, consider spatchcocking (removing the backbone and flattening the bird). This exposes more skin to direct heat.
- Spice Rubs: For a different flavor profile, try a dry spice rub with paprika, garlic powder, onion powder, and a touch of cayenne.
- Gluten-Free & Dairy-Free: This recipe is naturally gluten-free. For a dairy-free version, substitute butter with olive oil or a plant-based butter alternative.
Common Mistakes to Avoid
- Not Thawing Completely: A partially frozen turkey will cook unevenly and take much longer. Plan ahead!
- Not Patting Dry: Moisture on the skin prevents it from getting crispy. Always pat it very dry.
- Overcooking: The biggest sin! An overcooked turkey is dry and stringy. Trust your meat thermometer, not just the clock.
- Not Resting: Skipping the resting step is a huge mistake. The juices will run out when you carve, leaving you with dry meat.
- Stuffing the Cavity with Bread Stuffing: While traditional, stuffing the cavity with bread-based stuffing prolongs cooking time significantly and can be a food safety risk if the stuffing doesn’t reach 165°F (74°C). Cook stuffing separately.
- Opening the Oven Door Frequently: This drops the oven temperature and prolongs cooking. Resist the urge to peek!
Storage & Meal Prep Tips
After your grand feast, proper storage is key to enjoying leftovers. Allow the carved turkey to cool completely. Store leftover turkey in airtight containers in the refrigerator for 3-4 days. For longer storage, freeze portions of cooked turkey in freezer-safe bags or containers for up to 3 months. Label with the date.
When reheating, add a splash of broth or water to keep the meat moist. Reheat in the oven at a low temperature (around 250°F/120°C) until warmed through, or microwave in shorter intervals. Avoid high heat, as it can dry out the turkey. Leftover turkey is fantastic in sandwiches, salads, soups, stews, or even a delightful turkey pot pie.
Conclusion
Mastering the perfect Roast Turkey is an achievable feat, and with this comprehensive guide, you’re well on your way to creating a truly memorable Thanksgiving dinner. From meticulous preparation to understanding the nuances of temperature and resting, each step contributes to a succulent, flavorful bird that will be the centerpiece of any festive gathering. Don’t be afraid to experiment with brines and seasonings to truly make it your own. We encourage you to try this recipe, share your delicious results with us, and explore our other culinary guides for more inspiration! Happy roasting!
FAQs
Q1: How do I prevent my turkey breast from drying out?
A1: Brining the turkey, basting regularly, avoiding overcooking by using a meat thermometer, and most importantly, allowing it to rest adequately after roasting are all crucial for a juicy breast. You can also cover the breast loosely with foil if it’s browning too quickly.
Q2: Can I prepare my turkey ahead of time?
A2: You can brine the turkey and prepare the aromatic cavity stuffing the day before. On the big day, all you’ll need to do is season, truss, and pop it in the oven. Carving a few hours ahead and storing it covered with pan drippings also works if you need to free up oven space.
Q3: What if I don’t have a roasting rack?
A3: You can create a makeshift rack using a bed of chopped root vegetables (carrots, celery, onions) or by crumpling aluminum foil into several thick “ropes” and arranging them at the bottom of the pan to elevate the turkey.
Q4: How do I make gravy from the pan drippings?
A4: After removing the turkey, pour the pan drippings into a fat separator. Skim off the fat. In the roasting pan, create a roux with some of the fat and flour, then gradually whisk in the defatted drippings and additional broth. Simmer until thickened, seasoning to taste.
Q5: My turkey skin isn’t crispy. What went wrong?
A5: The most common culprit is moisture. Ensure the turkey is thoroughly patted dry before roasting, and avoid covering it with foil for too long during the cooking process. A higher initial oven temperature can also aid in crisping the skin.