Unleash Your Inner Pastry Chef: Crafting the Ultimate Homemade Ice Cream Sandwiches
Ever wondered if you could capture the magic of those childhood nostalgic treats right in your own kitchen? Absolutely! Preparing Ice Cream Sandwiches (Homemade) isn’t just about dessert; it’s about creating cherished memories and delighting your taste buds with unparalleled freshness and customization. Forget the store-bought versions; when you craft these at home, you control every delicious element, from the perfectly chewy cookie to the creamy, dreamy filling. And what’s more, when you combine them with a scrumptious Cookie Dough Recipe as your base, you’re not just making a dessert; you’re orchestrating a symphony of flavors and textures guaranteed to impress.
Ingredients & Kitchen Tools
- All-purpose flour (2 cups): The backbone of our cookies, providing structure.
- Unsweetened cocoa powder (3/4 cup): For that rich, decadent chocolate flavor.
- Baking soda (1 teaspoon): Helps the cookies rise slightly and achieve a tender crumb.
- Salt (1/2 teaspoon): Balances sweetness and enhances flavor.
- Unsalted butter (1 cup, 2 sticks, softened): Provides richness and tenderness.
- Granulated sugar (1 cup): For sweetness and a crisp edge.
- Brown sugar (1/2 cup, packed): Adds moisture, chewiness, and a hint of caramel.
- Large eggs (2): Binds ingredients and adds richness.
- Vanilla extract (2 teaspoons): Essential for enhancing all other flavors.
- Your favorite ice cream (1.5 quarts): The star of the show! Choose a flavor that complements chocolate, like vanilla, mint chocolate chip, or even coffee.
- Optional: Chocolate chips, sprinkles, nuts: For extra texture and fun!
Kitchen Tools:
- Large mixing bowls (2): For dry and wet ingredients.
- Electric mixer (stand or hand-held): For creaming butter and sugar efficiently.
- Spatula: For scraping bowls and folding.
- Parchment paper: Prevents sticking and makes cleanup a breeze.
- Baking sheets (2): For baking the cookies.
- Wire cooling racks: Allows air circulation for even cooling.
- 9×13 inch baking pan: For shaping the ice cream.
- Plastic wrap: Crucial for preventing freezer burn and aiding in shaping.
- Sharp knife or cookie cutter: For cutting the ice cream into perfect squares.
Prep Time & Cooking Schedule
- Prep Time (cookie dough): 20 minutes
- Chill Time (cookie dough): 30 minutes (minimum)
- Bake Time: 10-12 minutes per batch
- Active Assembly Time: 15 minutes
- Freezing Time (ice cream sandwiches): 2-4 hours (to set firmly)
This recipe requires a bit of patience, especially for the chilling and freezing steps, but the active work is quite manageable. Plan to make the cookies a day in advance or allow ample time for chilling the dough and freezing the assembled sandwiches.
Step-by-Step Instructions
1. Prepare the Cookie Dough: In a medium bowl, whisk together the flour, cocoa powder, baking soda, and salt. Set aside. In a large bowl, cream together the softened butter, granulated sugar, and brown sugar with an electric mixer until light and fluffy. Beat in the eggs one at a time, then stir in the vanilla extract. Gradually add the dry ingredients to the wet ingredients, mixing until just combined. Do not overmix. This is a foundational step for our Cookie Dough Recipe, ensuring perfect texture. Cover the dough and chill in the refrigerator for at least 30 minutes. This helps prevent spreading during baking.
2. Bake the Cookies: Preheat your oven to 350°F (175°C). Line two baking sheets with parchment paper. Scoop rounded tablespoons of cookie dough onto the prepared baking sheets, leaving about 2 inches between them. Bake for 10-12 minutes, or until the edges are set but the centers are still slightly soft. Let the cookies cool on the baking sheets for 5 minutes before transferring them to a wire rack to cool completely. Ensure you have an even number of cookies for pairing!
3. Prepare the Ice Cream Slab: While the cookies cool, let your favorite ice cream soften slightly at room temperature (about 10-15 minutes), making it easier to spread. Line a 9×13 inch baking pan with plastic wrap, leaving an overhang on all sides. Spread the softened ice cream evenly into the prepared pan. The thickness should be comparable to your cookies. Smooth the top with a spatula.
4. Freeze the Ice Cream: Place the pan with the spread ice cream into the freezer for at least 1-2 hours, or until firm enough to cut.
5. Assemble the Ice Cream Sandwiches (Homemade): Once the ice cream is firm, use the plastic wrap handles to lift the entire slab out of the pan. Place it on a cutting board. Trim the edges if desired, then cut the ice cream into rectangles or squares that match the size of your cooled cookies.
6. Create Sandwiches: Take one cookie, place an ice cream square on top, and then gently press another cookie on top to form a sandwich. Repeat with the remaining cookies and ice cream.
7. Final Freeze: Wrap each assembled ice cream sandwich individually in plastic wrap or parchment paper. Place them back in the freezer for another 1-2 hours, or until thoroughly frozen, which prevents melting and helps them hold their shape.
Nutritional Benefits & Advantages
Crafting your own Ice Cream Sandwiches (Homemade) allows for complete control over ingredients, potentially reducing added sugars, artificial flavors, and preservatives often found in commercial versions. Whole-wheat flour can be substituted for some of the all-purpose flour to boost fiber content, and using good quality cocoa powder provides antioxidants. Plus, you can tailor portion sizes, making these a more mindful treat. The joy of creating them yourself also adds to the overall feel-good experience!
Tips, Variations & Cooking Advice
- Flavor Boost: Add a pinch of instant espresso powder to the cocoa dry ingredients for a deeper chocolate flavor in your cookies.
- Cookie Variations: Instead of chocolate, experiment with peanut butter, oatmeal, or even sugar cookies as your base.
- Ice Cream Fun: The possibilities are endless! Try coffee ice cream with chocolate cookies, strawberry with vanilla cookies, or even a dairy-free alternative for dietary restrictions.
- Kid-Friendly: Involve children in spreading the ice cream and pressing the cookies together. They love the hands-on fun!
- Portion Control: Use smaller cookie cutters for mini ice cream sandwiches, perfect for parties or smaller treats.
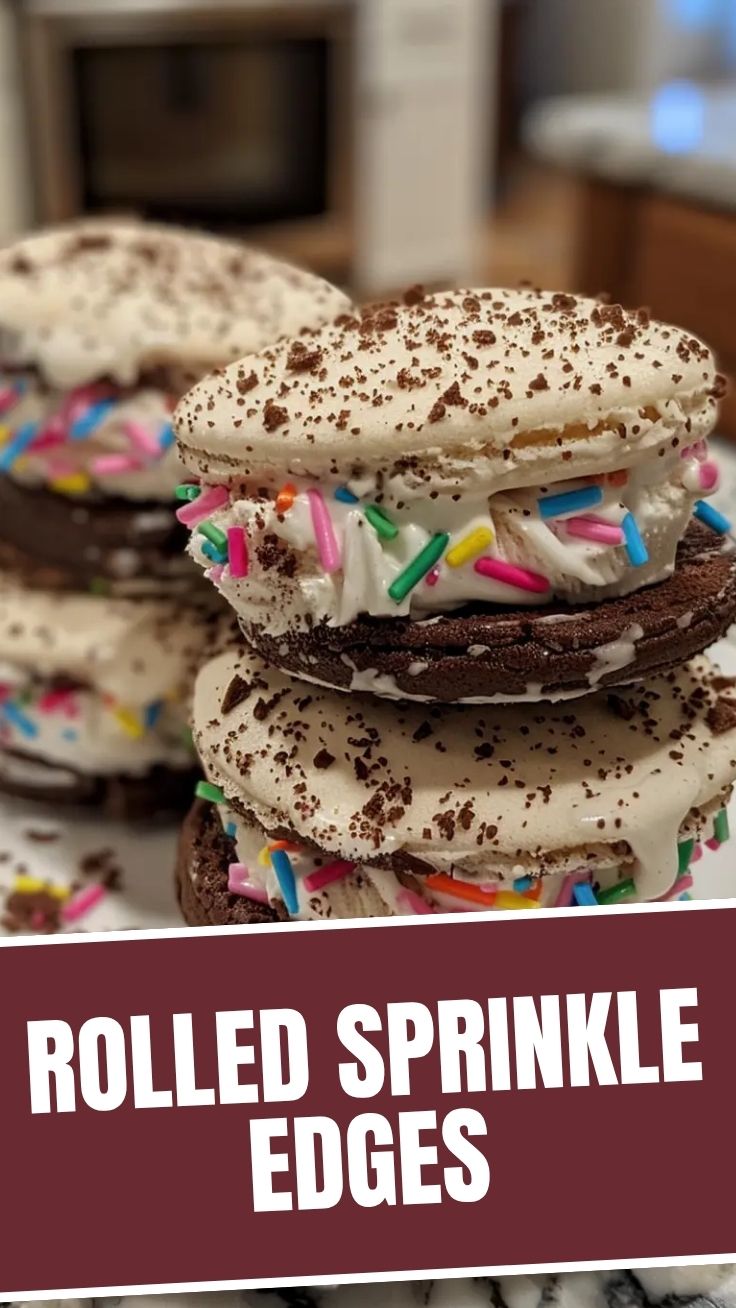
- Add-ins: Roll the edges of your finished sandwiches in sprinkles, mini chocolate chips, or crushed nuts for extra texture and visual appeal.
Common Mistakes to Avoid
- Overmixing the Dough: This can lead to tough cookies. Mix until just combined.
- Not Chilling the Dough: Warm dough spreads too much, resulting in flat, crispy cookies instead of chewy ones.
- Overbaking Cookies: Leads to dry, hard cookies. Remove them when the edges are set and centers are still slightly soft. They will continue to cook slightly on the hot pan.
- Using Too Soft Ice Cream: If the ice cream is too soft when spreading, it will be messy and difficult to cut neatly.
- Skipping the Final Freeze: Essential for solid, easy-to-handle sandwiches that don’t melt instantly.
Storage & Meal Prep Tips
Individually wrapped Ice Cream Sandwiches (Homemade) can be stored in an airtight container or a freezer-safe bag in the freezer for up to 2-3 weeks. This makes them an excellent make-ahead dessert for parties or a spontaneous treat anytime. The individual wrapping helps prevent freezer burn and makes them easy to grab and enjoy. For best texture, let them sit at room temperature for 5 minutes before serving.
Conclusion
Crafting your own Ice Cream Sandwiches (Homemade) is a rewarding culinary adventure that yields incredibly delicious results. From the rich, chewy cookies to the perfectly sculpted ice cream filling, every bite is a testament to homemade goodness. By following this guide, you’ve mastered the art of creating these nostalgic treats, incorporating a delicious Cookie Dough Recipe into your creation. Now, go forth and impress your friends and family with these delightful, customizable desserts! Don’t forget to share your creations and tell us your favorite flavor combinations in the comments below.
FAQs
Q1: Can I use store-bought cookie dough for this recipe?
A1: Yes, you can! Just ensure it’s a type that bakes well into individual cookies, not a slice-and-bake log. The quality of your cookies will directly impact the final sandwich.
Q2: How do I prevent the cookies from getting soggy?
A2: Ensuring the cookies are completely cooled before assembly is crucial. Also, a firm freeze of the assembled sandwiches helps, and storing them individually wrapped minimizes moisture exposure.
Q3: What if I don’t have a 9×13 inch pan for the ice cream?
A3: You can use any similarly sized baking dish or even a loaf pan. Just adjust the amount of ice cream to fit, ensuring a consistent thickness. You might end up with fewer, but thicker, sandwiches.
Q4: Can I make these dairy-free or gluten-free?
A4: Absolutely! Substitute gluten-free flour blend for all-purpose flour in the cookies, and use dairy-free butter and your favorite dairy-free ice cream for the filling.
Q5: How long can I store the assembled ice cream sandwiches?
A5: When properly wrapped and stored in an airtight container in the freezer, they can last for up to 2-3 weeks without significant loss of quality.