Master the Grill: Unlock the Secret to Irresistible Baby Back Ribs
Ever wondered how top pitmasters achieve those fall-off-the-bone, flavor-packed Baby Back Ribs that leave everyone craving more? Preparing truly succulent ribs at home is not only incredibly rewarding but also allows you to control every delicious detail, from the rub to the smoky finish. Forget those dry, chewy disappointments; this comprehensive guide will equip you with the knowledge and techniques to create restaurant-quality BBQ Ribs right in your backyard. Get ready to impress your friends and family with ribs so good, they’ll think you spent all day smoking them. Let’s delve into the art and science of perfect grilled ribs.
Ingredients & Kitchen Tools
Crafting the perfect rack of ribs requires a blend of quality ingredients and essential tools. Here’s what you’ll need:
- 2 racks of Baby Back Ribs (2-3 lbs each): Look for well-marbled ribs with uniform thickness.
- ½ cup Brown Sugar (packed): Adds sweetness and caramelization.
- ¼ cup Smoked Paprika: Provides smoky depth and vibrant color.
- 2 tbsp Garlic Powder: An aromatic essential.
- 2 tbsp Onion Powder: Balances the garlic flavor.
- 1 tbsp Black Pepper (freshly ground): For a subtle kick.
- 1 tbsp Kosher Salt: Enhances all flavors.
- Optional: 1 tsp Cayenne Pepper: For those who like a little heat.
- ½ cup Apple Cider Vinegar: Used for spritzing to keep ribs moist.
- 1 cup Your Favorite BBQ Ribs Sauce: Choose a high-quality sauce that complements your flavor profile.
Kitchen Tools:
- Large Baking Sheet with Rack: For seasoning and transferring the ribs.
- Sharp Knife: For trimming excess fat and membrane.
- Paper Towels: For patting ribs dry.
- Aluminum Foil (heavy-duty): Essential for the “Texas Crutch” (wrapping method).
- Meat Thermometer: For precise temperature monitoring.
- Grill (Charcoal or Gas): The star of the show.
- Tongs: For handling hot ribs.
- Basting Brush: For applying BBQ sauce.
- Heat-resistant Gloves (optional): For safely handling hot components.
- Spray Bottle: For apple cider vinegar spritzing.
Prep Time & Cooking Schedule
Planning is key for tender, flavorful ribs.
- Prep Time: 20-30 minutes (includes membrane removal and rub application).
- Marinating Time: Minimum 2 hours, ideally overnight (8-12 hours) in the refrigerator. This allows the rub to fully penetrate the meat.
- Cook Time: Approximately 3-5 hours, depending on your grill and rib thickness, using the 3-2-1 method or similar low-and-slow techniques.
- Resting Time: 15-20 minutes, allowing the juices to redistribute for ultimate tenderness.
This schedule ensures you have ample time for each stage, resulting in perfectly cooked ribs. Start your prep the day before for best results, especially if you plan on an overnight rub.
Step-by-Step Instructions
Achieving mouth-watering ribs is all about technique and patience. Follow these steps for an unforgettable grilling experience.
1. Prepare the Ribs: Start by removing the thin membrane from the bone side of each rack of Baby Back Ribs. Use a butter knife to lift a corner of the membrane, then grip it with a paper towel and pull it off. Trim any excess fat. Pat the ribs completely dry with paper towels – this helps your rub adhere better.
2. Make the Rub: In a bowl, combine the brown sugar, smoked paprika, garlic powder, onion powder, black pepper, kosher salt, and cayenne pepper (if using). Mix thoroughly.
3. Apply the Rub: Generously coat both sides of the ribs with the rub, pressing it gently to adhere. Wrap the seasoned ribs tightly in plastic wrap and refrigerate for at least 2 hours, or ideally overnight, allowing the flavors to meld deeply.
4. Preheat Your Grill: Set up your grill for indirect cooking. For charcoal, bank coals to one side. For gas, ignite burners on one side only. Aim for a consistent temperature of 250-275°F (120-135°C). Add wood chips (hickory or apple work great) if you desire a smoky flavor.
5. Smoke (or Initial Grill) Phase (2-3 hours): Place the ribs, bone-side down, on the indirect heat side of the grill. Close the lid and maintain the temperature. Spritz the ribs with apple cider vinegar every 45-60 minutes to keep them moist. This is the stage where the ribs absorb most of their smoky flavor and the internal temperature slowly rises. For truly tender BBQ Ribs, maintaining a consistent low temperature is crucial.
6. Wrap Phase (1.5-2 hours): After 2-3 hours, when the ribs have developed a nice bark and pulled back from the bones slightly, remove them from the grill. Place each rack on a large piece of heavy-duty aluminum foil. You can add a splash of apple cider vinegar, beer, or a small pat of butter to the foil before tightly sealing the ribs. Return the wrapped ribs to the grill, bone-side down, at the same temperature. This steaming process tenderizes the ribs further.
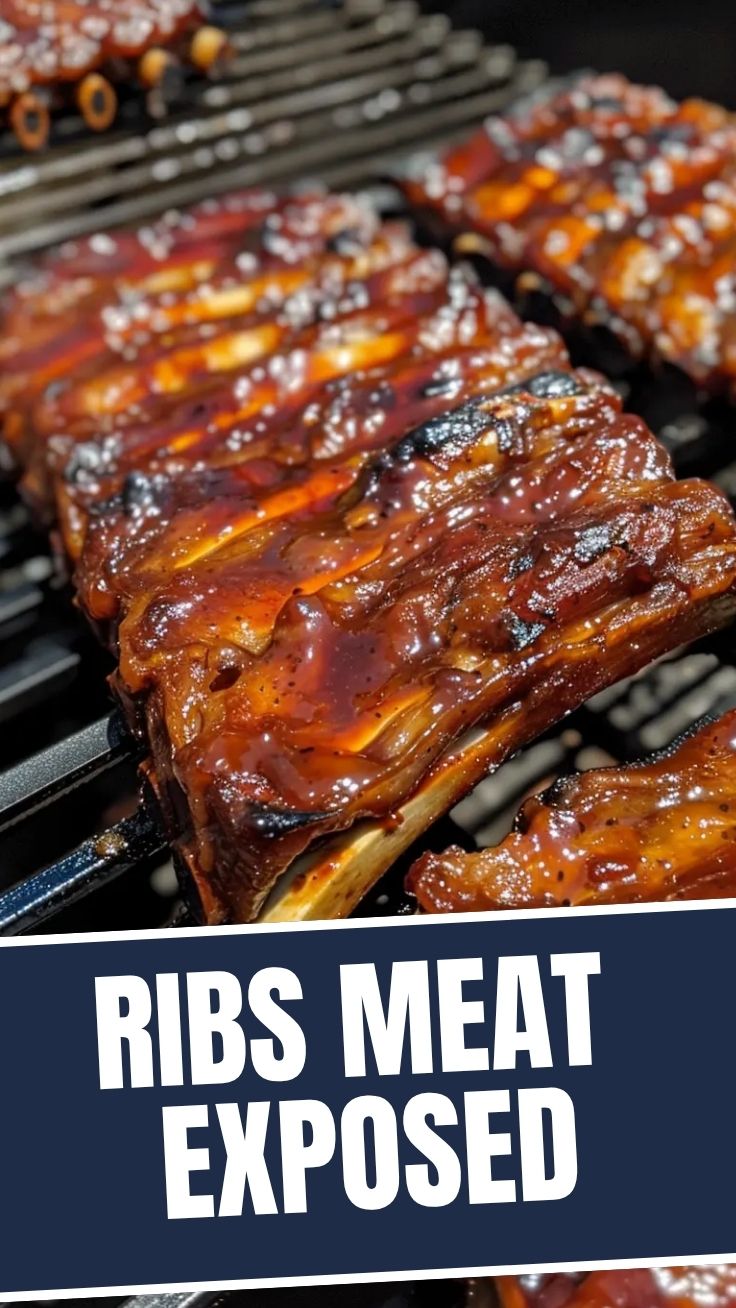
7. Sauce Phase (30-60 minutes): Once the ribs are tender (they should be very pliable and starting to bend when lifted), carefully unwrap them from the foil. Generously brush both sides with your favorite BBQ sauce. Return the unwrapped ribs to the grill for another 30-60 minutes, directly over indirect heat, or briefly over very low direct heat to caramelize the sauce. Be careful not to burn the sauce.
8. Rest and Serve: Once the sauce is tacky and caramelized, remove the ribs from the grill. Let them rest for 15-20 minutes, loosely tented with foil, before slicing and serving. This allows the juices to redistribute, ensuring maximum tenderness.
Nutritional Benefits & Advantages
Beyond their incredible flavor, homemade ribs offer several nutritional benefits when prepared thoughtfully. Pork ribs are a good source of protein, essential for muscle repair and growth, and contain important vitamins and minerals such as B vitamins (B12, niacin, riboflavin), zinc, and selenium. Grilling allows fat to drip away, potentially reducing the overall fat content compared to frying. By making your own rub, you control sodium and sugar levels, avoiding the excessive amounts often found in store-bought sauces and seasonings. Apple cider vinegar contributes to moisture without adding fat, and lean cuts of Baby Back Ribs can be a healthier choice than fattier cuts.
Tips, Variations & Cooking Advice
- Smoky Depth: For extra smoke flavor on a gas grill, use a smoker box filled with wood chips (soaked in water for 30 minutes) or place dry wood chips directly in a foil pouch with holes poked in it, placed over a burner set to low.
- Rub Variations: Experiment with different spices like chili powder, cumin, or smoked paprika for unique flavor profiles. Coffee grounds can also add a rich, deep note to your rib rub.
- Wet Ribs vs. Dry Rub: If you prefer “wet” ribs, apply a generous amount of BBQ sauce during the last 30-60 minutes of cooking. For a dry rub, simply enjoy the spiced bark straight off the grill.
- Gluten-Free/Dairy-Free: Most rubs are naturally gluten-free and dairy-free. Just ensure your chosen BBQ sauce is also free of these allergens.
- Temperature Control is King: Consistently maintaining a low temperature is the secret to tender ribs. Invest in a good grill thermometer.
- Don’t Over-Sauce: Apply sauce gradually in the final stage to build flavor without burning.
Common Mistakes to Avoid
- Not Removing the Membrane: This tough membrane prevents the rub from penetrating and results in chewy ribs. Always remove it!
- Cooking at Too High a Temperature: High heat dries out the ribs and makes them tough. Low and slow is the mantra for ribs.
- Skipping the Rest: Resting allows muscle fibers to relax and reabsorb juices, making a huge difference in tenderness.
- Over-Saucing Early: Applying BBQ sauce too early will cause it to burn and char, leading to bitter flavors.
- Impatience: Ribs are a labor of love; rushing the process will lead to subpar results. Give them the time they need.
Storage & Meal Prep Tips
Cooked ribs can be a fantastic meal prep option.
- Refrigeration: Store leftover ribs in an airtight container in the refrigerator for up to 3-4 days.
- Freezing: For longer storage, freeze ribs in an airtight freezer-safe bag or container for up to 2-3 months. Portion them out for easy reheating.
- Reheating: To reheat, wrap refrigerated ribs in foil and bake at 300°F (150°C) for 20-30 minutes, or until heated through. For frozen ribs, thaw overnight in the refrigerator first, then reheat as above. You can also briefly reheat on a grill for a smoky refresh.
Conclusion
Mastering the art of grilling Baby Back Ribs is a culinary journey that promises incredibly delicious results. From the flavorful dry rub to the low-and-slow cooking that ensures tenderness, every step contributes to a memorable dining experience. By following this comprehensive guide, you’re now equipped to create BBQ Ribs that are not just good, but truly exceptional. Don’t be afraid to experiment with different rubs and sauces, and most importantly, enjoy the process! Share your grilling triumphs with us in the comments below, or better yet, share your delicious creations on social media. Happy grilling!
FAQs
Q: How do I know when my ribs are done?
A: Ribs are done when they are tender enough to pull apart easily, but not completely falling off the bone (unless you prefer them that way). A good indicator is when the meat has pulled back from the ends of the bones by about ¼ to ½ inch. An internal temperature of 190-203°F (88-95°C) also indicates doneness.
Q: Can I bake these Baby Back Ribs instead of grilling?
A: Absolutely! Follow the same prep steps. Bake initially at 275°F (135°C) for 2-3 hours, then wrap and continue baking for 1.5-2 hours. Finish by saucing and baking for another 30-45 minutes. You’ll miss the smoky flavor but still achieve tender results.
Q: What wood chips are best for ribs?
A: Hickory and apple wood chips are classic choices for pork ribs, providing a balanced, sweet, and smoky flavor. Cherry wood also works wonderfully, offering a milder, fruity smoke.
Q: My ribs are tough – what went wrong?
A: Tough ribs are usually a sign of not cooking them long enough or at too high a temperature. Ensure you’re maintaining a low, consistent heat and allowing sufficient time for the connective tissues to break down.
Q: How can I make my rib rub spicier?
A: Increase the amount of cayenne pepper in your rub, or add a pinch of chili flakes. You can also incorporate ground chipotle powder for a smoky heat.