Achieve Culinary Perfection: Your Guide to a Flawless Brined Turkey
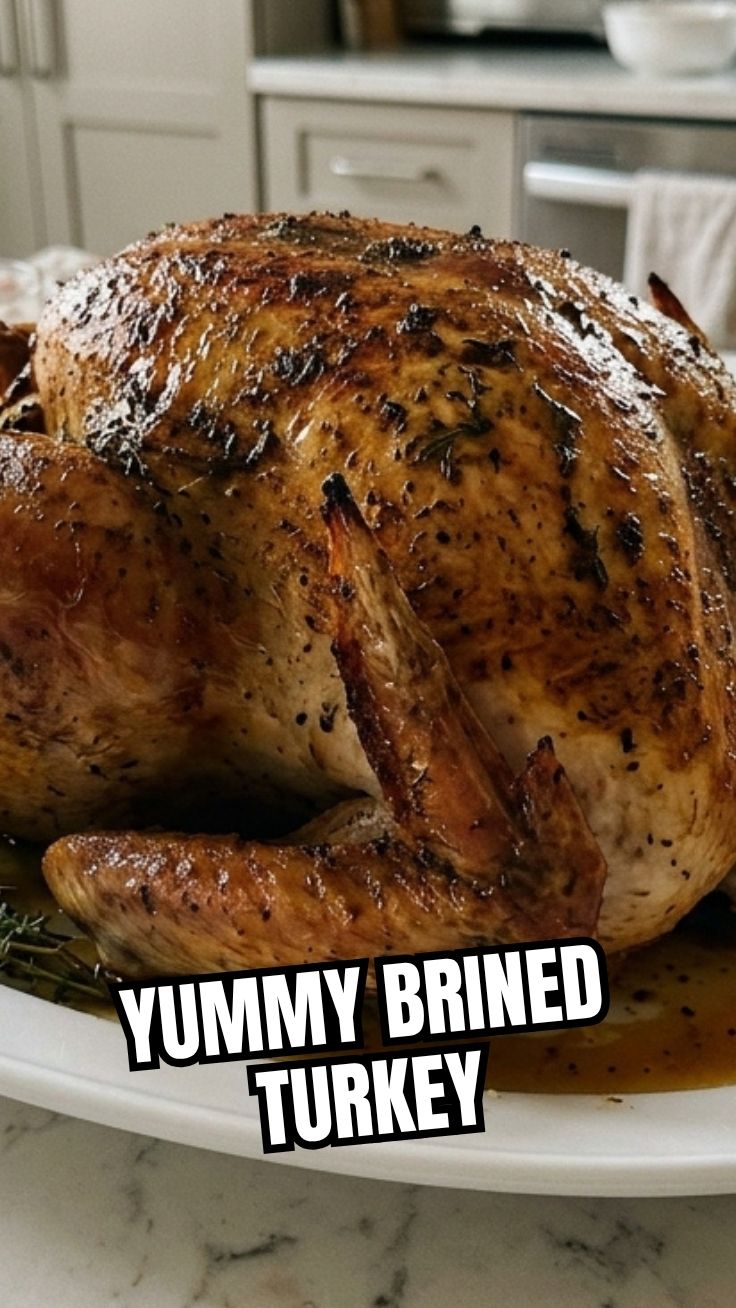
Ever wondered what transforms a good holiday meal into an unforgettable feast? The secret often lies in the details, and for poultry, that detail is undoubtedly brining. Imagine a succulent, impossibly juicy, and flavorful turkey, with skin crisped to golden perfection. This isn’t just a dream – it’s the delicious reality you can achieve right in your own kitchen! Preparing a Brined Turkey at home offers an unparalleled level of control over flavor and texture, guaranteeing a show-stopping centerpiece that will delight your family and guests. Instead of a dry, bland bird, you’ll be serving a masterpiece of culinary juiciness, thanks to the magic of Wet Brining. This comprehensive guide will walk you through every step, ensuring your festive gathering is marked by a truly spectacular and memorable meal.
Ingredients & Kitchen Tools
Gathering your mise en place is the first step to culinary success. Here’s what you’ll need:
- Whole Turkey (12-16 lbs): Fresh or fully thawed. Choose a high-quality bird for best results.
- For the Brine Solution:
* Water (2 gallons): The base for your brine.
* Kosher Salt (1 ½ cups): Essential for tenderizing and seasoning. Avoid iodized salt as it can give an off-flavor.
* Brown Sugar (1 cup): Adds a subtle sweetness and helps with browning. Can substitute with maple syrup or honey.
* Black Peppercorns (2 tbsp): Adds a mild spice.
* Whole Allspice Berries (1 tbsp): Contributes aromatic, warm notes.
* Bay Leaves (4-5): Earthy and slightly bitter, complements poultry well.
* Fresh Rosemary Sprigs (4-5): Piney and fragrant.
* Fresh Thyme Sprigs (4-5): Earthy and lemony.
* Orange (1, quartered): Adds citrus notes and brightens the flavor.
* Garlic (1 head, halved crosswise): Pungent and savory.
- For Roasting:
* Butter (½ cup, unsalted, softened): For basting and crisping the skin.
* Onions (2, quartered): For the roasting pan, adds flavor to drippings.
* Carrots (3-4, roughly chopped): For the roasting pan, adds flavor.
* Celery Stalks (3-4, roughly chopped): For the roasting pan, adds flavor.
* Chicken or Vegetable Broth (2 cups): For the roasting pan, keeps the bird moist and makes gravy.
- Essential Kitchen Tools:
* Large Brining Bag or Food-Safe Container: Must be big enough to fully submerge the turkey.
* Large Stockpot: For preparing the brine.
* Roasting Pan with Rack: Crucial for even cooking and air circulation.
Meat Thermometer: The most important* tool for perfectly cooked poultry.
* Basting Brush: For applying butter and drippings.
* Kitchen Twine: For trussing the turkey.
* Cutting Board & Sharp Knife: For prep work.
Prep Time & Cooking Schedule
- Brine Preparation: 20 minutes
- Brining Time: 12-24 hours (active time 5 minutes, passive time). This crucial period allows the turkey to absorb moisture and flavor. Plan this well in advance!
- Pre-Roast Prep: 30 minutes (removing from brine, patting dry, seasoning)
- Roast Time: Approximately 2.5-4 hours, depending on turkey size.
Rule of thumb:* 13-15 minutes per pound for an unstuffed turkey.
- Resting Time: 30-45 minutes. Absolutely essential for juicy meat! Do not skip this step.
Step-by-Step Instructions
1. Prepare the Brine (The Foundation of Flavor): In your large stockpot, combine 1 gallon of water, Kosher salt, and brown sugar. Bring to a boil, stirring until salt and sugar are dissolved. Remove from heat and add peppercorns, allspice, bay leaves, rosemary, thyme, orange, and garlic. Let this mixture cool completely. Once cool, add the remaining 1 gallon of cold water to complete your Wet Brining solution.
2. Brine the Turkey: Remove any giblets or neck from the turkey cavity. Place the turkey in the large brining bag or food-safe container. Pour the cooled brine solution over the turkey, ensuring it is fully submerged. Seal the bag or cover the container tightly. Refrigerate for 12-24 hours. A longer brine means more flavor and moisture.
3. Prepare for Roasting: Remove the turkey from the brine. Discard the brine solution. Rinse the turkey thoroughly inside and out under cold running water to remove excess salt. Pat the turkey completely dry with paper towels. This step is critical for crispy skin on your Brined Turkey.
4. Season and Truss: Stuff the cavity with quartered onions, carrots, and celery. Tuck the wing tips under the body and tie the legs together with kitchen twine. This promotes even cooking. Rub the softened butter all over the turkey-skin generously.
5. Roast: Preheat your oven to 425°F (220°C). Place the turkey on a roasting rack in a roasting pan. Pour the chicken or vegetable broth into the bottom of the pan along with additional chopped aromatics if desired. Roast for 30 minutes at 425°F.
6. Reduce Heat & Continue Roasting: Reduce the oven temperature to 325°F (160°C). Continue roasting, basting every 30-45 minutes with the pan juices or melted butter. If the skin starts to brown too quickly, tent it loosely with foil.
7. Check for Doneness: The turkey is done when a meat thermometer inserted into the thickest part of the thigh (without touching bone) reads 165°F (74°C).
8. Rest: Transfer the turkey to a large cutting board and tent it loosely with foil. Let it rest for 30-45 minutes before carving. This allows the juices to redistribute, ensuring a tender and moist bird.
Nutritional Benefits & Advantages
Brining a turkey doesn’t just add flavor and moisture; it also contributes to a healthier cooking process. The salt in the brine helps to break down muscle fibers, making the meat more tender and ensuring it absorbs moisture, which can reduce the need for excessive amounts of added fats during cooking. Turkey itself is a lean protein source, rich in essential amino acids, B vitamins (especially B6 and B12), and minerals like selenium and zinc. These nutrients support muscle growth, energy production, immune function, and thyroid health. By ensuring a consistently moist turkey, brining encourages less overcooking, which preserves more of these valuable nutrients.
Tips, Variations & Cooking Advice
- Flavor Variations: Experiment with different herbs and spices in your brine. For a smoky flavor, add a touch of liquid smoke. For a spicier kick, include sliced jalapeños or red pepper flakes.
- Ingredient Swaps: No brown sugar? Use granulated sugar or maple syrup. Don’t have fresh herbs? Dried herbs can work in a pinch (use about 1/3 the amount of fresh).
- Alternative Cooking Methods: While roasting is classic, a brined turkey can also be smoked for incredible flavor or even deep-fried (ensure it’s completely dry before frying for safety).
- Gluten-Free/Dairy-Free: This recipe is naturally gluten-free. For dairy-free, simply skip the butter or use a plant-based butter alternative.
- Gravy: Use the pan drippings from your roasted turkey to make an incredibly flavorful gravy. Deglaze the pan with some wine or stock, then thicken with a roux.
Common Mistakes to Avoid
- Not Rinsing After Brining: This is crucial. If you don’t rinse, your turkey will be excessively salty.
- Not Patting Dry: A damp turkey will steam, not crisp. Ensure the skin is thoroughly dry for that coveted golden-brown, crispy exterior.
- Overcooking: The number one sin when roasting a turkey. Invest in a good meat thermometer and pull the turkey out promptly at 165°F. Remember, it will continue to cook slightly while resting.
- Not Resting: Carving too soon allows all the internal juices to run out, leaving you with dry meat. Patience is a virtue here!
- Brining Too Long: While typically safe, extreme over-brining can lead to a mushy texture. Stick within the 12-24 hour window.
Storage & Meal Prep Tips
Portion any leftover turkey once it has completely cooled. Store in airtight containers in the refrigerator for up to 3-4 days. For longer storage, freeze cooked turkey meat in freezer-safe bags or containers for up to 2-3 months. Thaw frozen turkey in the refrigerator overnight before reheating. To reheat, gently warm in the oven with a splash of broth to prevent drying out, or microwave in smaller portions. Leftover turkey is fantastic in sandwiches, salads, stir-fries, soups, or even quesadillas!
Conclusion
Mastering a Brined Turkey is a truly rewarding culinary endeavor, guaranteeing a holiday centerpiece that’s both tender and bursting with flavor. By following these detailed steps for Wet Brining, you’ll avoid the dreaded dry bird and instead present a succulent, perfectly cooked masterpiece. Don’t be intimidated – the process is simpler than you think and the impressive results are well worth the effort. Give this recipe a try for your next special occasion, and prepare for rave reviews! Share your triumphant turkey creations with us in the comments below. Happy cooking!
FAQs
Q1: Can I use a frozen turkey directly for brining?
A1: No, your turkey must be completely thawed before brining. A partially frozen turkey will not absorb the brine evenly, leading to inconsistent flavor and texture.
Q2: What if I don’t have a brining bag?
A2: A large, clean, food-grade storage container or cooler lined with a heavy-duty garbage bag (ensure it’s food-safe) can work. Just make sure the turkey is fully submerged and the container is properly sealed.
Q3: My turkey skin isn’t getting crispy. What went wrong?
A3: The most common reasons are not patting the turkey thoroughly dry after brining, and not starting with a high oven temperature. Ensure the skin is bone-dry and consider basting with only melted butter (not pan juices) in the last hour.
Q4: Can I brine a turkey too long?
A4: While 12-24 hours is ideal, going significantly beyond 24 hours can start to break down the proteins too much, leading to a mushy or spongy texture, especially if the brine is very concentrated.