Unlock the Secret to Restaurant-Quality Sesame Chicken: Your Ultimate Guide
Ever wished you could recreate that irresistible, sticky-sweet, and savory flavor of your favorite Chinese Takeout dish right in your own kitchen? Well, prepare to have your culinary dreams come true! This blog post is your ultimate guide to mastering homemade Sesame Chicken. Forget soggy, bland imitations – we’re diving deep into the techniques and ingredients that make this dish a true showstopper. Not only will you save money and enjoy a healthier, customizable meal, but you’ll also impress everyone with your newfound culinary prowess. Get ready to transform your weeknight dinners!
Ingredients & Kitchen Tools
Crafting the perfect Sesame Chicken requires a few key items. Here’s what you’ll need:
- For the Chicken:
* 1 ½ lbs boneless, skinless chicken thighs or breasts: Thighs offer more flavor and tend to stay juicier; breasts are lean but can dry out if overcooked. Cut into 1-inch pieces.
* ¼ cup cornstarch: Our secret for that crispy coating.
* 1 large egg: Helps the cornstarch adhere to the chicken.
* Salt and freshly ground black pepper: To taste, for seasoning.
* Vegetable oil or peanut oil: For frying. Peanut oil offers a distinct, authentic flavor.
- For the Sesame Sauce:
* ½ cup low-sodium soy sauce: The foundation of our savory sauce.
* ¼ cup rice vinegar: Adds a tangy brightness.
* 3 tablespoons honey or brown sugar: For sweetness and a beautiful glaze. Adjust to your sweetness preference.
* 2 tablespoons toasted sesame oil: Crucial for that signature nutty aroma.
* 1 tablespoon fresh ginger, grated: Pungent and aromatic.
* 2 cloves garlic, minced: Essential for depth of flavor.
* 1 tablespoon cornstarch (mixed with 2 tablespoons cold water): Our thickening agent for a glossy, clingy sauce.
- For Garnish (Optional):
* Toasted sesame seeds: For visual appeal and extra sesame crunch.
* Sliced green onions (scallions): Adds freshness and a pop of color.
- Kitchen Tools:
* Large mixing bowls (2): For marinating chicken and mixing sauce.
* Whisk: To combine sauce ingredients smoothly.
* Large skillet or wok: Ideal for frying chicken and simmering the sauce. A non-stick pan is helpful.
* Tongs: For handling chicken while frying.
* Slotted spoon or spider: To remove fried chicken from oil.
* Paper towels: For draining excess oil from fried chicken.
* Measuring cups and spoons: For precise ingredient amounts.
Prep Time & Cooking Schedule
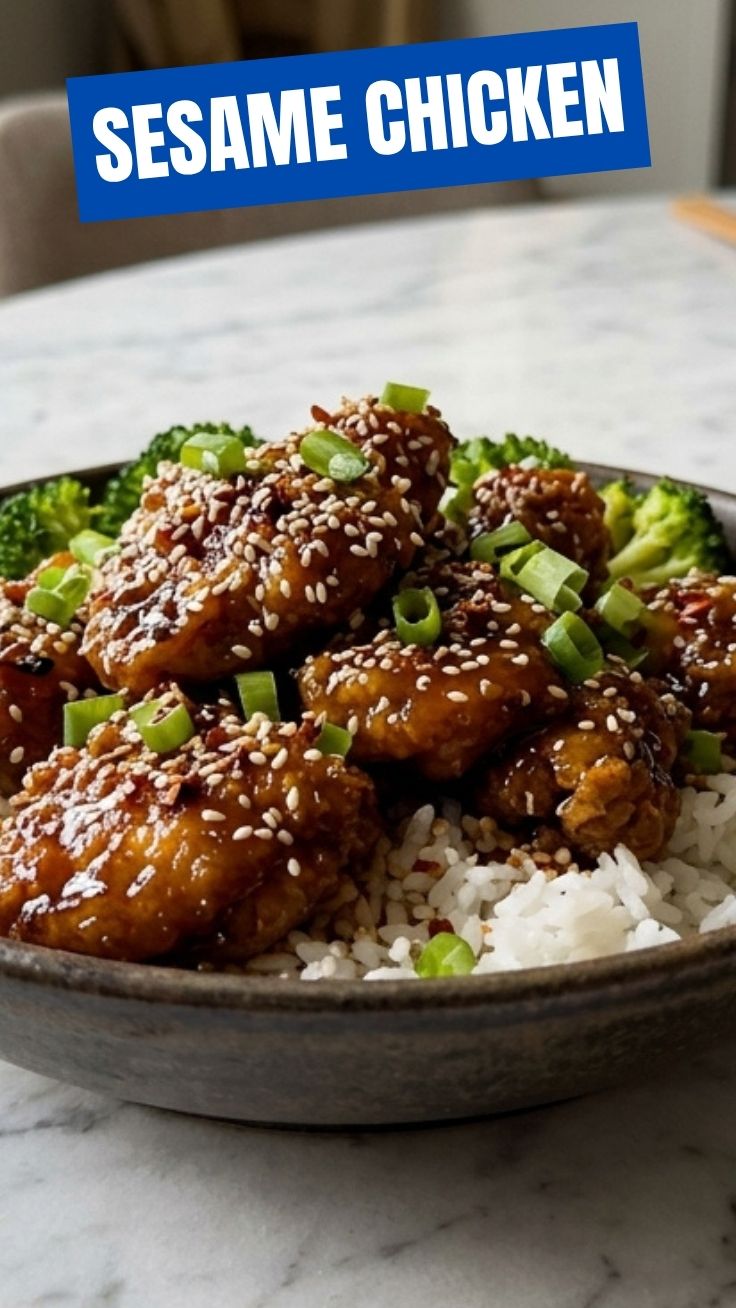
This recipe is surprisingly quick, making it perfect for a weeknight dinner.
- Prep Time: 15 minutes (Includes chopping chicken, grating ginger, and mincing garlic).
- Marinating Time: 15-30 minutes (Optional, but highly recommended for flavor. If pressed for time, even 10 minutes helps).
- Cook Time: 15-20 minutes (Frying the chicken and simmering the sauce).
- Total Time: Approximately 45-65 minutes.
Plan to start your rice or noodles about 20 minutes before you begin cooking the chicken, so everything is ready to serve hot and fresh simultaneously. The short cook time allows for a flexible dinner schedule, perfect for busy evenings.
Step-by-Step Instructions
1. Prepare the Chicken: In a medium bowl, whisk the egg. In another bowl, combine cornstarch, salt, and pepper. Dredge chicken pieces first in the egg, then toss well in the cornstarch mixture until fully coated. For the crispiest results for your homemade Sesame Chicken, ensure each piece is evenly coated.
2. Make the Sesame Sauce: In a separate medium bowl, whisk together the soy sauce, rice vinegar, honey/brown sugar, toasted sesame oil, grated ginger, and minced garlic. Set aside. Also, prepare your cornstarch slurry (1 tbsp cornstarch mixed with 2 tbsp cold water). This is key to achieving that luscious, glossy finish often found in high-quality Chinese Takeout dishes.
3. Fry the Chicken: Heat about 1 inch of vegetable or peanut oil in a large skillet or wok over medium-high heat (350-375°F / 175-190°C). Fry the chicken in batches, being careful not to overcrowd the pan, which can lower the oil temperature and lead to soggy chicken. Cook for 3-4 minutes per side, or until golden brown and cooked through. Remove with a slotted spoon and place on a paper-towel-lined plate to drain.
4. Simmer the Sauce: Carefully drain most of the oil from the pan, leaving about 1 tablespoon. Reduce heat to medium. Pour the prepared sesame sauce mixture into the pan. Bring to a gentle simmer, then slowly whisk in the cornstarch slurry. Stir continuously for 1-2 minutes until the sauce thickens and becomes glossy.
5. Combine & Serve: Add the fried chicken back into the pan with the thickened sauce. Toss gently to coat every piece evenly.
6. Garnish & Enjoy: Serve immediately over steamed rice or noodles, garnished with toasted sesame seeds and sliced green onions.
Nutritional Benefits & Advantages
Homemade Sesame Chicken offers several nutritional advantages over its restaurant counterpart. By preparing it yourself, you have control over the quality of ingredients, like choosing lower-sodium soy sauce and fresh chicken. Chicken itself is an excellent source of lean protein, essential for muscle repair and growth. Ginger and garlic offer powerful antioxidant and anti-inflammatory benefits. While the sauce does contain sugar, using honey or adjusting the amount allows for a healthier alternative to overly sweet commercial versions. Furthermore, fresh ingredients ensure you’re avoiding unwanted additives and preservatives found in many processed foods.
Tips, Variations & Cooking Advice
- Extra Crispy Chicken: For an even crunchier crust, consider a double-fry method. Fry the chicken once until lightly golden, remove, cool slightly, then fry again briefly at a higher temperature (375-400°F / 190-200°C) until deep golden.
- Vegetarian Option: Substitute chicken with extra-firm tofu or tempeh, pressed and cubed, then follow the same breading and frying steps.
- Spice it Up: Add a pinch of red pepper flakes to the sauce for a subtle kick, or a teaspoon of sriracha for more heat.
- Gluten-Free: Use tamari instead of soy sauce and ensure your cornstarch is gluten-free.
- Broccoli Boost: Steam or lightly stir-fry some broccoli florets and toss them with the chicken and sauce for added vegetables.
- Thicker Sauce: If your sauce isn’t thickening enough, whisk in another tiny bit of cornstarch slurry (½ tsp cornstarch to 1 tbsp water) and simmer for another minute.
Common Mistakes to Avoid
- Overcrowding the Pan: This is the number one culprit for soggy chicken. Fry in batches to maintain oil temperature and achieve crispy results.
- Overcooking the Chicken: Chicken breasts, especially, can dry out quickly. Use a meat thermometer to ensure they reach 165°F (74°C).
- Skipping the Slurry: The cornstarch slurry is crucial for sauce thickness and gloss. Don’t add dry cornstarch directly to hot liquid, as it will clump.
- Too High Heat for Sauce: Simmer the sauce gently; boiling it too vigorously can reduce its volume too quickly and make it overly salty.
- Uneven Coating: Ensure chicken pieces are fully coated in the egg and cornstarch mixture for consistent crispiness.
Storage & Meal Prep Tips
Leftover Sesame Chicken can be stored in an airtight container in the refrigerator for up to 3-4 days. While the chicken will lose some of its crispiness, the flavor remains delightful. For best reheating, use a microwave or gently warm in a skillet over low heat until heated through. To maintain some texture, reheat in a preheated oven or air fryer at 350°F (175°C) for 10-15 minutes. This dish is also an excellent candidate for meal prep; portion it out with rice or noodles for quick lunches throughout the week.
Conclusion
Congratulations! You’ve just unlocked the secrets to creating exquisite, restaurant-quality Sesame Chicken right in your own home. Moving beyond the usual Chinese Takeout, this recipe empowers you to enjoy fresh, flavorful, and customizable meals that truly satisfy. We encourage you to try this recipe, experiment with the variations, and revel in the joy of truly delicious, homemade cuisine. Share your culinary triumphs with us in the comments below!
FAQs
Q1: Can I bake or air fry the chicken instead of deep frying?
A1: Yes! For a healthier option, you can bake the coated chicken at 400°F (200°C) for 20-25 minutes, flipping halfway, or air fry at 375°F (190°C) for 12-15 minutes, shaking the basket occasionally. The texture won’t be identical to fried, but it will still be delicious.
Q2: What if my sauce is too thin or too thick?
A2: If too thin, mix another small cornstarch slurry (½ tsp cornstarch + 1 tbsp water) and whisk into the simmering sauce. If too thick, add a tablespoon of chicken broth or water at a time until the desired consistency is reached.
Q3: Can I prepare the sauce in advance?
A3: Absolutely! You can whisk together all the sauce ingredients (except the cornstarch slurry) up to 2-3 days in advance and store it in the refrigerator. Add the slurry just before simmering.
Q4: What’s the best way to get toasted sesame seeds?
A4: You can buy them pre-toasted, or toast raw sesame seeds yourself in a dry skillet over medium-low heat for 3-5 minutes, stirring frequently, until fragrant and lightly golden. Watch them carefully as they burn quickly!