Ditch the Delivery: Unleash Your Inner Chef with Homemade Sesame Chicken!
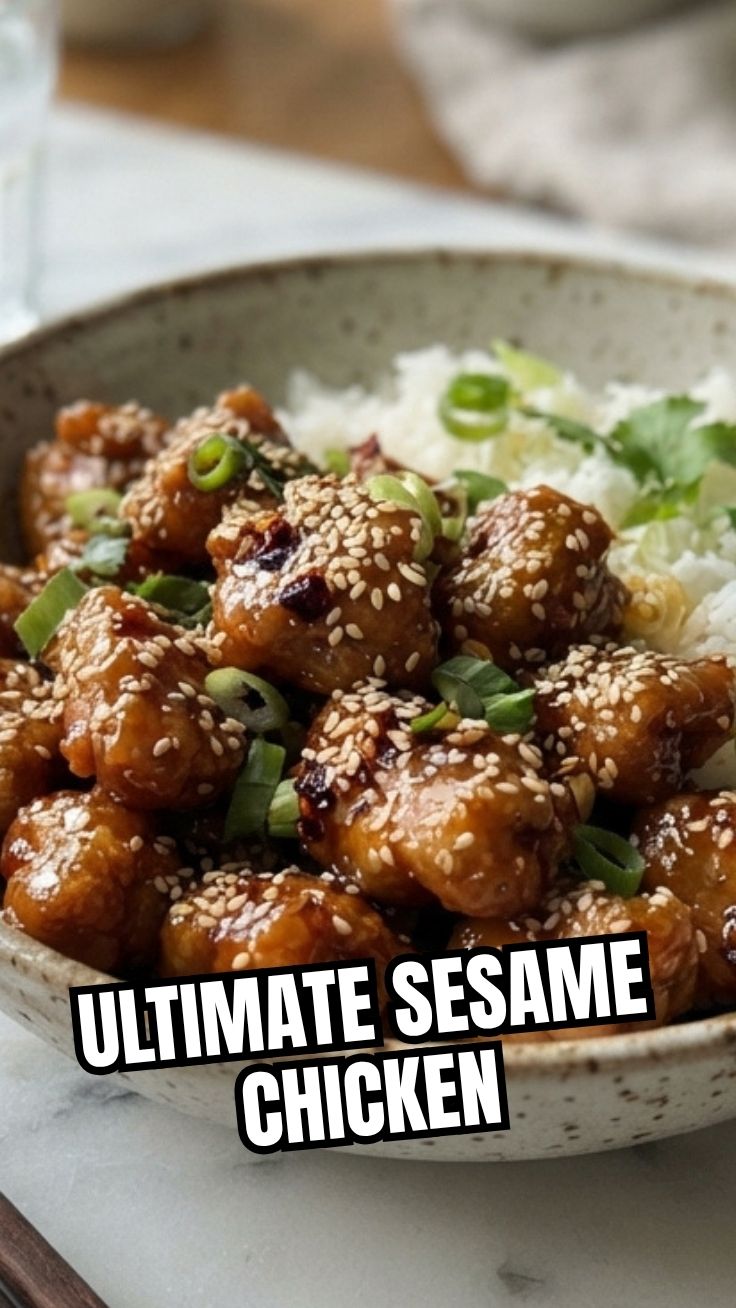
Tired of the same old Chinese Takeout? Do you dream of that perfect balance of crispy chicken, sticky, sweet-and-savory sauce, and a hint of nutty sesame, all crafted in your own kitchen? Well, dream no more! Preparing homemade Sesame Chicken is not only incredibly satisfying but also allows you to control the quality of ingredients, adjust flavors to your preference, and avoid those mysterious additives often found in restaurant dishes. Get ready to elevate your weeknight meals and impress your family and friends with this fantastic recipe!
Ingredients & Kitchen Tools
- For the Chicken:
* 1.5 lbs Boneless, Skinless Chicken Thighs or Breasts: Thighs offer more flavor and tenderness; breasts are leaner. Cut into 1-inch pieces.
* 1/2 cup Cornstarch: Essential for that signature crispy coating.
* 1 Egg (large): Helps bind the cornstarch to the chicken.
* Salt & Black Pepper: To season the chicken before coating.
* 2 cups Vegetable Oil (or other neutral oil): For frying the chicken.
- For the Sauce:
* 1/2 cup Soy Sauce (low sodium preferred): The umami base of the sauce.
* 1/2 cup Chicken Broth: Adds depth and thins the sauce slightly.
* 1/4 cup Rice Vinegar: Balances the sweetness with a touch of tang.
* 1/4 cup Honey or Brown Sugar: For sweetness; adjust to taste.
* 2 tbsp Sesame Oil: Crucial for the distinct sesame flavor.
* 1 tbsp Fresh Ginger, grated: Adds a pungent, warm note.
* 2 cloves Garlic, minced: Aromatic foundation.
* 1 tbsp Cornstarch (mixed with 2 tbsp cold water): Creates a slurry to thicken the sauce.
- For Garnish (Optional):
* Toasted Sesame Seeds: Adds texture and visual appeal.
* Sliced Green Onions: Fresh, mild onion flavor.
- Kitchen Tools:
* Large Mixing Bowls: For coating chicken and mixing sauce.
* Heavy-Bottomed Pot or Dutch Oven: Best for even frying.
* Whisk: For combining sauce ingredients.
* Slotted Spoon or Spider Strainer: For removing fried chicken.
* Paper Towel-Lined Plate: To drain excess oil from chicken.
* Large Skillet or Wok: For combining chicken with sauce.
Prep Time & Cooking Schedule
- Prep Time: 20 minutes (includes chopping chicken, mincing aromatics, and mixing sauce).
- Cook Time: 25-30 minutes (frying chicken in batches, cooking sauce, combining).
- Total Time: Approximately 45-50 minutes.
This recipe is perfect for a busy weeknight. You can prep the chicken and sauce components in advance – cut the chicken, mix the dry coating, and whisk together the sauce ingredients – to save even more time. Frying the chicken and assembling the dish just before serving ensures the crispiest results!
Step-by-Step Instructions
1. Prepare the Chicken: Pat the chicken pieces dry with paper towels. In a large bowl, season the chicken with salt and pepper. In a separate bowl, whisk the egg. Add the cornstarch to a third bowl. Dip each piece of chicken first in the egg, then dredge thoroughly in the cornstarch, ensuring an even coating. This coating is key to achieving that restaurant-quality crispness, making your homemade Sesame Chicken truly stand out from standard Chinese Takeout options.
2. Fry the Chicken: Heat the vegetable oil in a heavy-bottomed pot or Dutch oven over medium-high heat to 350°F (175°C). Fry the chicken in batches for 4-6 minutes per batch, until golden brown and cooked through. Do not overcrowd the pot, as this will lower the oil temperature and result in soggy chicken. Remove fried chicken with a slotted spoon and place on a paper towel-lined plate to drain excess oil.
3. Make the Sauce: In a medium bowl, whisk together the soy sauce, chicken broth, rice vinegar, honey/brown sugar, sesame oil, grated ginger, and minced garlic.
4. Thicken the Sauce: In a large skillet or wok, pour the prepared sauce mixture. Bring to a simmer over medium heat. Whisk in the cornstarch slurry (1 tbsp cornstarch mixed with 2 tbsp cold water) and stir continuously until the sauce thickens to your desired consistency, about 1-2 minutes.
5. Combine & Serve: Add the fried chicken to the skillet with the thickened sauce. Toss gently to coat all the chicken evenly. Garnish with toasted sesame seeds and sliced green onions. Serve immediately over steamed rice or noodles.
Nutritional Benefits & Advantages
Homemade Sesame Chicken offers several advantages over its fast-food counterparts. By using lean chicken, you’re getting a good source of protein. We’re also using fresh ginger and garlic, which are packed with antioxidants and anti-inflammatory properties. Furthermore, controlling the amount of sugar and sodium in your homemade version allows for a healthier meal, avoiding excessive fats and artificial ingredients often found in commercial preparations.
Tips, Variations & Cooking Advice
- Spice It Up: Add a pinch of red pepper flakes to the sauce for a fiery kick.
- Vegetarian Option: Substitute chicken with extra-firm tofu (pressed and cubed) or tempeh for a delicious plant-based version.
- Gluten-Free: Use tamari instead of soy sauce and ensure your cornstarch is certified gluten-free.
- Air Fryer Method: For a lighter option, lightly coat the breaded chicken with cooking spray and air fry at 375°F (190°C) for 15-20 minutes, flipping halfway, until golden and crispy.
- Crispier Coating: For extra crispiness, try double-frying the chicken. Fry once until lightly golden, remove, let rest for a few minutes, then fry again briefly until deeply golden and extra crunchy.
Common Mistakes to Avoid
- Overcrowding the Pan: This is the most common mistake when frying. It drops the oil temperature, leading to soggy, oily chicken instead of crisp, golden pieces. Fry in batches!
- Skipping the Cornstarch Slurry: The slurry is essential for thickening the sauce. Without it, your sauce will be watery and won’t coat the chicken properly.
- Overcooking the Chicken: While you want it cooked through, overcooking can make the chicken dry. Keep an eye on the internal temperature (165°F / 74°C).
- Uneven Chicken Pieces: Cut chicken into uniform sizes for even cooking.
Storage & Meal Prep Tips
Store leftover Sesame Chicken in an airtight container in the refrigerator for up to 3-4 days. While the chicken won’t be as crispy as freshly made, the flavors will still be excellent. For best reheating results, spread the chicken on a baking sheet and reheat in an oven or toaster oven at 350°F (175°C) for 10-15 minutes until heated through. Microwaving is an option but may result in softer chicken. This dish does not freeze well due to the fried coating.
Conclusion
Creating your own delicious Sesame Chicken at home is a rewarding culinary experience that easily outshines typical Chinese Takeout. With a perfectly crispy coating and a balanced, flavorful sauce, this recipe is sure to become a family favorite. Give it a try tonight and discover the joy of homemade goodness! Don’t forget to share your culinary creations with us!
FAQs
1. Can I use chicken breast instead of thighs? Yes, absolutely! Chicken breast works well; just be mindful that it can dry out more easily, so adjust cooking times accordingly.
2. How can I make the sauce spicier? Add a pinch of red pepper flakes to the sauce while it’s simmering, or a dash of sriracha at the end.
3. What can I use if I don’t have rice vinegar? Apple cider vinegar or white vinegar can be used as a substitute, though rice vinegar offers a slightly milder, sweeter tang.
4. My sauce isn’t thickening. What went wrong? Ensure your cornstarch slurry is properly mixed with cold water before adding it to the simmering sauce. If it’s still too thin, mix another small slurry and whisk it in gradually.
5. Can I bake the chicken instead of frying? While frying gives the best crispy texture, you can bake the coated chicken at 400°F (200°C) for 20-25 minutes, flipping halfway, until golden and cooked through. It won’t be as crispy but will still be delicious.