The Ultimate Guide to Irresistible Peanut Butter Cookies: Your New Go-To Recipe!
Ever wondered how to achieve that perfect balance of chewy, crispy, and melt-in-your-mouth goodness in a homemade cookie? Look no further! Today, we’re diving deep into the art of crafting the most delectable Peanut Butter Cookies from scratch. In a world of fleeting trends, the classic appeal of a truly great peanut butter cookie remains unwavering. Preparing this beloved treat at home isn’t just about saving a few bucks; it’s about infusing your kitchen with comforting aromas, creating cherished memories, and having complete control over the quality and freshness of every ingredient. Get ready to master a peanut butter cookie recipe that will quickly become your family’s most requested dessert. This guide promises to walk you through every step, ensuring your baking adventure is both rewarding and delicious.
Ingredients & Kitchen Tools
To embark on this delightful baking journey, gather the following:
- 1 cup (2 sticks) unsalted butter, softened: Provides richness and a tender crumb. Unsalted allows you to control the salt content.
- 1 cup granulated sugar: For sweetness and crisp edges.
- 1 cup packed light brown sugar: Adds moisture, chewiness, and a lovely molasses flavor.
- 1 cup creamy peanut butter: The star of the show! Use a good quality, commercial brand for best results. Avoid natural styles that separate, as they can alter texture.
- 2 large eggs: Binds ingredients, adds moisture, and contributes to structure.
- 1 teaspoon vanilla extract: Enhances all the other flavors. Pure vanilla is always best.
- 2 ½ cups all-purpose flour: Provides structure. Sifting is optional but ensures a lighter texture.
- 1 teaspoon baking soda: Helps the cookies rise and spread slightly.
- ½ teaspoon salt: Balances sweetness and enhances flavor. Use a fine-grain salt.
- Optional: ½ cup granulated sugar (for rolling): For that classic sparkling, crunchy exterior.
Kitchen Tools:
- Large mixing bowl: For combining wet and dry ingredients.
- Electric mixer (stand or hand-held): Essential for creaming butter and sugars efficiently.
- Measuring cups and spoons: Accuracy is key in baking!
- Rubber spatula or wooden spoon: For scraping bowls and incorporating dry ingredients.
- Baking sheets: Preferably light-colored for even baking.
- Parchment paper or silicone baking mats: Prevents sticking and makes cleanup a breeze.
- Wire cooling rack: Allows cookies to cool evenly and prevents sogginess.
Prep Time & Cooking Schedule
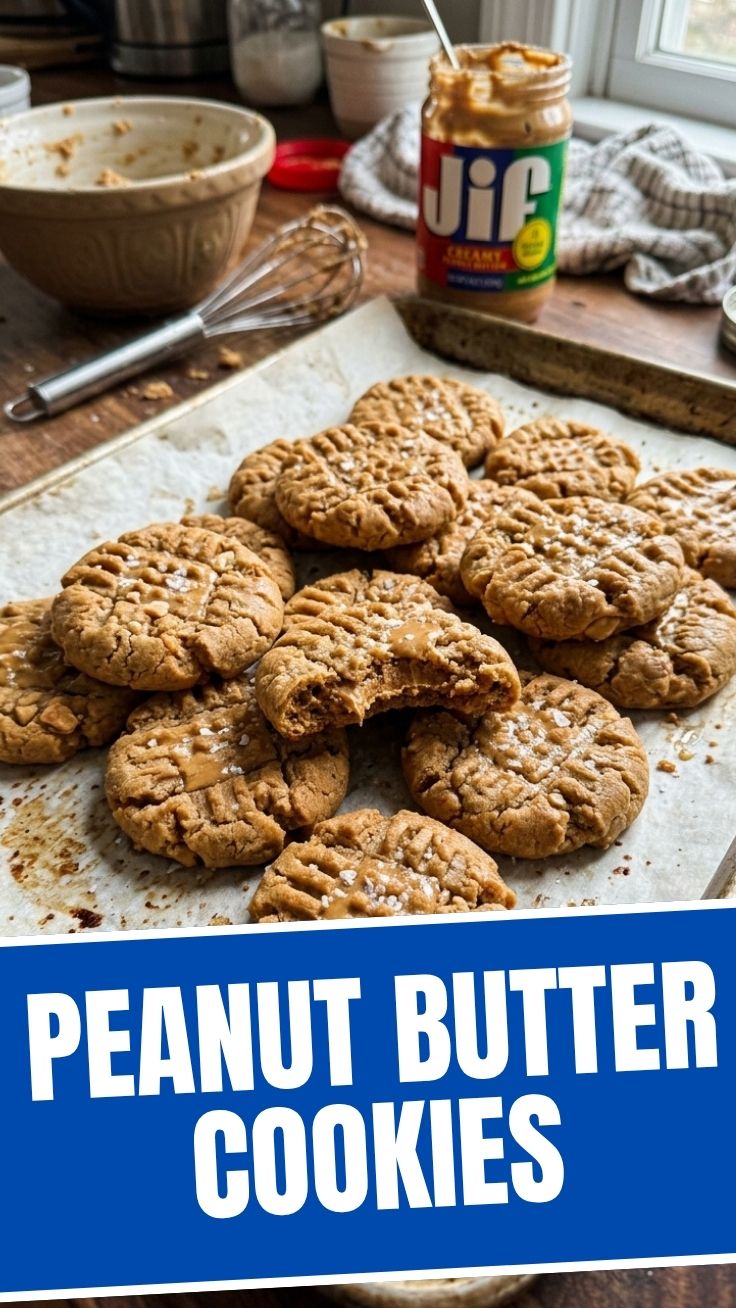
Planning is crucial for perfect cookies! This recipe is straightforward but does benefit from a little chilling time.
- Prep Time: 15 minutes (active working time)
- Chill Time: 30 minutes (minimum, but up to 24 hours for deeper flavor and less spread)
- Cook Time: 10-12 minutes per batch
- Resting Time: 5 minutes after baking on the sheet, then transferred to a wire rack to cool completely.
Allowing your dough to chill briefly helps solidify the butter, which prevents the cookies from spreading too much and results in a thicker, chewier cookie. This also gives the flour time to fully hydrate, leading to a more tender crumb.
Step-by-Step Instructions
Ready to bake some magic? Follow these steps for the perfect Peanut Butter Cookies:
1. Cream Butter & Sugars: In your large mixing bowl, using an electric mixer on medium speed, cream together the softened butter, granulated sugar, and brown sugar until light and fluffy (about 2-3 minutes). This incorporates air, which contributes to the cookies’ texture.
2. Add Wet Ingredients: Beat in the peanut butter until well combined. Then, add the eggs one at a time, mixing well after each addition. Stir in the vanilla extract. Scrape down the sides of the bowl to ensure everything is fully incorporated.
3. Combine Dry Ingredients: In a separate medium bowl, whisk together the flour, baking soda, and salt.
4. Gradually Add Dry to Wet: With the mixer on low, slowly add the dry ingredients to the wet ingredients, mixing just until combined. Be careful not to overmix, as this can lead to tough cookies.
5. Chill the Dough: Cover the bowl with plastic wrap and refrigerate the dough for at least 30 minutes. This step is crucial for the perfect peanut butter cookie recipe, helping to prevent excessive spreading during baking.
6. Preheat & Prepare: Preheat your oven to 375°F (190°C). Line baking sheets with parchment paper. If you’re rolling your cookies in sugar, place the extra granulated sugar in a shallow dish.
7. Scoop & Roll: Scoop rounded tablespoons of dough. Roll each into a ball. If desired, roll the dough balls in the extra granulated sugar for a sparkling, crunchy exterior.
8. Form Crisscross Pattern: Place the dough balls about 2 inches apart on the prepared baking sheets. Using the tines of a fork, gently press down on each cookie in a crisscross pattern. This iconic design helps them bake evenly.
9. Bake: Bake for 10-12 minutes, or until the edges are lightly golden but the centers still look slightly soft. Do not overbake!
10. Cool: Let the cookies cool on the baking sheet for 5 minutes before transferring them to a wire rack to cool completely. This allows them to firm up without breaking.
Nutritional Benefits & Advantages
Peanut butter, the star ingredient, offers more than just delicious flavor. It’s a good source of protein, healthy fats (monounsaturated and polyunsaturated), and dietary fiber, which can contribute to satiety and digestive health. While cookies are a treat, these provide a small energy boost and contribute valuable nutrients like Vitamin E, magnesium, and potassium. Making them at home also means you can control sugar levels and avoid artificial additives often found in store-bought versions.
Tips, Variations & Cooking Advice
- Chewy vs. Crispy: For chewier cookies, reduce baking time by 1-2 minutes. For crispier edges, extend baking time slightly.
- Ingredient Swaps: Explore different nut butters like almond or cashew butter for unique flavor profiles. Just be aware that their consistency might slightly alter the final texture.
- Add-ins: Stir in chocolate chips, chopped nuts (peanuts, pecans), or even a dash of cinnamon or nutmeg for extra flair.
- Gluten-Free: Substitute the all-purpose flour with a 1:1 gluten-free baking flour blend containing xanthan gum.
- Dairy-Free: Use a dairy-free butter substitute (like vegan butter sticks) for a dairy-free treat.
Common Mistakes to Avoid
- Overmixing the Dough: Overmixing once flour is added develops gluten, leading to tough, dry cookies. Mix just until combined.
- Not Chilling the Dough: Skipping the chill time results in cookies that spread too much, becoming thin and crispy instead of thick and chewy.
- Overbaking: Peanut butter cookies continue to cook slightly on the hot baking sheet. Pull them when the edges are set and the centers still look a little soft.
- Using Natural Peanut Butter: While healthy, natural peanut butter (the kind that separates) has a different consistency that can make dough more difficult to handle and result in greasier, crumbly cookies. Stick to processed, creamy peanut butter for consistency.
Storage & Meal Prep Tips
Once completely cooled, store your Peanut Butter Cookies in an airtight container at room temperature for up to 5-7 days. For longer storage, you can freeze baked cookies for up to 3 months. Place them in a single layer on a baking sheet to freeze solid, then transfer to a freezer-safe bag or container, separating layers with parchment paper. Thaw at room temperature when ready to enjoy. For meal prepping, you can also freeze the raw dough balls. Simply place scooped dough balls on a parchment-lined baking sheet, freeze until solid, then transfer to a freezer bag. Bake from frozen, adding an extra 2-4 minutes to the baking time.
Conclusion
There you have it – the definitive guide to baking extraordinary Peanut Butter Cookies! By following these detailed instructions and incorporating our expert tips, you’re not just making a dessert; you’re creating a moment of pure culinary joy. This peanut butter cookie recipe is more than just ingredients and steps; it’s an invitation to fill your home with warmth and delight. We encourage you to try this recipe, experiment with the variations, and share your delicious creations with loved ones. Happy baking!
FAQs
Q1: Can I use crunchy peanut butter instead of creamy?
A1: Yes, you can! Crunchy peanut butter will add extra texture and nuttiness to your cookies. The dough consistency might be slightly different, but the overall result will still be delicious.
Q2: My cookies spread too much. What went wrong?
A2: Common culprits include using butter that was too warm, not chilling the dough long enough, or using a baking soda that isn’t fresh. Ensure ingredients are at the correct temperature and don’t skip the refrigeration step.
Q3: How do I get that perfect crisscross pattern without the dough sticking to the fork?
A3: Dip your fork in a little granulated sugar between presses. This prevents sticking and also adds a touch more sweetness and sparkle.
Q4: Can I make the dough ahead of time?
A4: Absolutely! The dough can be stored in the refrigerator for up to 3 days. This actually enhances the flavor development. Just let it sit out for 10-15 minutes before rolling if it’s too firm.
Q5: What’s the secret to a perfectly chewy cookie?
A5: The use of brown sugar, avoiding overmixing, and not overbaking are key. Aim for edges that are golden brown and centers that are still slightly soft when you remove them from the oven.