Master the Art of Classic Cheesecake at Home: Your Ultimate Guide
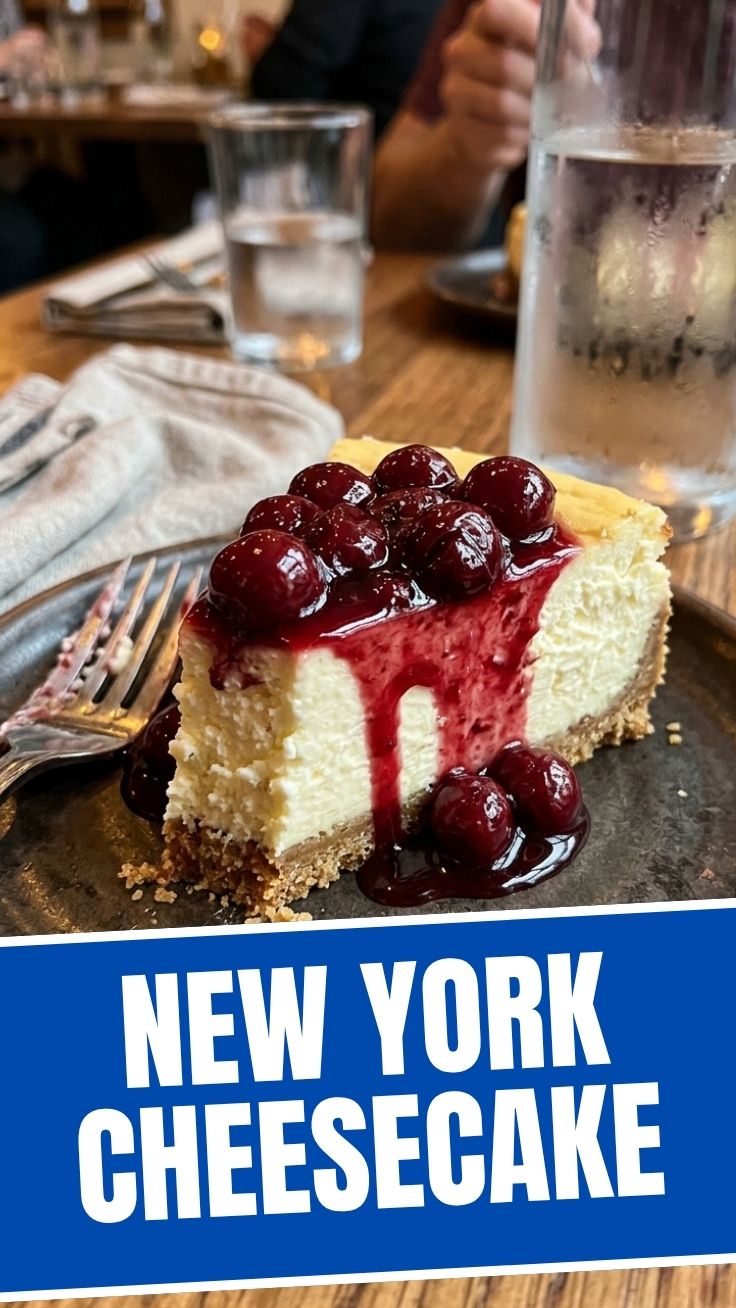
Ever wondered if you could recreate that velvety, rich, and utterly irresistible cheesecake experience right in your own kitchen? The answer is a resounding YES! Preparing this classic dessert at home is not just about saving money; it’s about the pure satisfaction of creating a culinary masterpiece, tailored exactly to your taste. Forget pre-made mixes; today, we’re diving deep into crafting an extraordinary New York Cheesecake that will impress even the most discerning palates. This comprehensive guide will equip you with all the knowledge and techniques needed to achieve a perfectly smooth, crack-free, and sumptuously rich dessert, rivaling any high-end bakery creation, even those inspired by a Philadelphia Cheesecake.
Ingredients & Kitchen Tools
Crafting the perfect cheesecake relies on quality ingredients and the right tools.
- For the Crust:
* 1 ½ cups (about 180g) Graham Cracker Crumbs: Crushed finely for a uniform base. You can use a food processor or a Ziploc bag and a rolling pin.
* ¼ cup (50g) Granulated Sugar: Adds a touch of sweetness to the crust.
* 6 tablespoons (85g) Unsalted Butter, melted: Binds the crumbs together, ensuring a firm, flavorful base.
* Optional Substitutions: Digestive biscuits or even chocolate cookies can be used for a different flavor profile.
- For the Filling:
* 4 (8-ounce) blocks (904g) Full-Fat Cream Cheese, softened: Crucial for the creamy texture. “Softened” means leaving it at room temperature for at least an hour to prevent lumps.
* 1 ½ cups (300g) Granulated Sugar: Sweetens the rich cream cheese.
* 1 tablespoon All-Purpose Flour: A secret ingredient that helps prevent cracks by stabilizing the filling.
* 1 teaspoon Pure Vanilla Extract: Enhances the overall flavor. Don’t skimp on quality!
* ¼ teaspoon Salt: Balances the sweetness and depth of flavor.
* 2 large Eggs, at room temperature: Incorporate seamlessly into the mixture for a smooth consistency.
* ½ cup (120g) Sour Cream, at room temperature: Adds a delightful tang and extra creaminess.
* Optional Substitutions: A good quality Greek yogurt can be a lighter alternative to sour cream, though the texture might be slightly different.
- Essential Kitchen Tools:
* 9-inch Springform Pan: Indispensable for easy release of the delicate cheesecake. Wrap the bottom with aluminum foil to prevent water bath leakage.
* Large Roasting Pan: For the all-important water bath.
* Electric Mixer (Stand or Handheld): For achieving a smooth, lump-free filling.
* Rubber Spatula: For scraping down the sides of the bowl and folding ingredients gently.
* Measuring Cups and Spoons: For precise ingredient measurement.
* Parchment Paper: For lining the bottom of the springform pan (optional, but makes removal easier).
Prep Time & Cooking Schedule
Planning is key for a flawless cheesecake!
- Prep Time: 25 minutes (includes making the crust and filling)
- Bake Time: 60-75 minutes
- Cooling Time (Room Temperature): 1-2 hours
- Chill Time (Refrigerator): At least 6 hours, ideally overnight. This allows the cheesecake to set completely and develop its full flavor and texture.
Remember to bring your cream cheese, eggs, and sour cream to room temperature well in advance. This prevents lumps and ensures a smooth, homogeneous batter.
Step-by-Step Instructions
Achieving that iconic, creamy New York Cheesecake texture requires patience and precision. Follow these steps carefully:
1. Prepare the Crust: Preheat your oven to 350°F (175°C). In a medium bowl, combine Graham cracker crumbs, granulated sugar, and melted butter. Press firmly into the bottom of a 9-inch springform pan. Bake for 10 minutes until lightly golden. Remove from oven and let cool. Reduce oven temperature to 325°F (160°C).
2. Prepare the Water Bath: Wrap the outside of your springform pan tightly with several layers of heavy-duty aluminum foil to prevent water from seeping in. Place the foil-wrapped pan inside a larger roasting pan.
3. Make the Filling: In a large bowl, using an electric mixer on medium speed, beat the softened cream cheese until smooth and creamy (about 2-3 minutes). Don’t overmix!
4. Add Dry Ingredients: Gradually add the granulated sugar and all-purpose flour to the cream cheese mixture, beating until just combined. Scrape down the sides of the bowl.
5. Incorporate Flavorings: Beat in the vanilla extract and salt until well blended.
6. Add Eggs: Add the eggs one at a time, beating on low speed until just incorporated after each addition. Be careful not to incorporate too much air, as this can lead to cracks.
7. Fold in Sour Cream: Gently fold in the sour cream using a rubber spatula until just combined. The aim is a velvety smooth, lump-free batter, reminiscent of the best Philadelphia Cheesecake.
8. Pour and Bake: Pour the cheesecake filling over the cooled crust in the springform pan. Carefully pour hot water into the roasting pan, around the springform pan, until it reaches about halfway up the sides of the springform pan.
9. Bake: Bake for 60-75 minutes, or until the edges are set but the center still slightly jiggles when gently nudged.
10. Cool Gradually: Turn off the oven, crack the door open slightly, and let the cheesecake cool in the water bath for 1 hour. This gradual cooling process is crucial for preventing cracks.
11. Chill: Remove the cheesecake from the water bath and the roasting pan. Carefully remove the foil. Let cool completely on a wire rack at room temperature for another 1-2 hours. Once completely cool, cover loosely with plastic wrap and refrigerate for at least 6 hours, or preferably overnight, before serving.
Nutritional Benefits & Advantages
While often seen as an indulgence, a homemade cheesecake, especially made with quality ingredients, offers some surprising benefits. Full-fat cream cheese provides a good source of fat-soluble vitamins (A, D, E, K) and calcium. When made at home, you have full control over the sugar content, allowing for adjustments to suit dietary preferences. Opting for organic ingredients can further enhance the nutritional profile. The protein and healthy fats contribute to satiety, making a small slice a satisfying treat.
Tips Variations & Cooking Advice
- Flavor Variations: Swirl in fruit purees (raspberry, blueberry), chocolate ganache, or caramel sauce before baking. Add lemon zest or orange zest to the filling for a bright citrus note.
- Crust Alternatives: Use crushed shortbread cookies, ginger snaps, or even gluten-free cookies for a delicious twist.
- Dairy-Free: Substitute dairy cream cheese with plant-based cream cheese alternatives and sour cream with dairy-free yogurt. Ensure all other ingredients (like butter for the crust) are also dairy-free.
- Preventing Cracks:
* Don’t overmix the batter, especially after adding eggs.
* Use a water bath.
* Cool the cheesecake gradually in the oven after baking.
* Avoid sudden temperature changes.
- Topping Ideas: Fresh berries, chocolate shavings, whipped cream, or a simple fruit compote elevate the presentation and flavor.
Common Mistakes to Avoid
- Overmixing: This introduces too much air, which expands during baking and then contracts, causing cracks. Mix until just combined.
- Cold Ingredients: Using cold cream cheese or eggs will result in a lumpy batter. Ensure they are at room temperature.
- Skipping the Water Bath: This is crucial for even heat distribution and maintaining moisture, preventing a dry, cracked surface.
- Opening the Oven Door Too Often: This causes temperature fluctuations, which are a major cause of cracks.
- Not Chilling Long Enough: The cheesecake needs ample time to set and firm up. Patience is key!
Storage & Meal Prep Tips
Your magnificent cheesecake can be stored, ensuring you enjoy its delightful taste for days:
- Refrigeration: Store leftover cheesecake tightly covered with plastic wrap in the refrigerator for up to 5-7 days.
- Freezing: For longer storage, slice the cheesecake into individual portions. Place each slice on parchment paper, then wrap tightly in plastic wrap and then in aluminum foil. Freeze for up to 1-2 months. Thaw individual slices in the refrigerator overnight before serving.
- Reheating: Cheesecake is best served chilled, so reheating is generally not recommended as it alters the texture.
Conclusion
There you have it – your comprehensive guide to mastering the classic New York Cheesecake. With careful attention to detail and a little patience, you’ll be baking a creamy, crack-free dessert that rivals any professional creation. Remember, the journey from mixing bowl to perfectly chilled slice is a rewarding one, and the end result – a truly sublime treat – is well worth the effort. So go ahead, whip up this recipe, and savor the pure joy of a homemade cheesecake, a timeless dessert that even the most celebrated Philadelphia Cheesecake purists would admire. Share your baking triumphs in the comments below! We’d love to see your delicious creations.
FAQs
1. Why did my cheesecake crack?
Cracks are typically caused by overmixing the batter (incorporating too much air), baking at too high a temperature, or cooling too quickly. Follow the water bath and gradual cooling steps carefully.
2. Can I make this recipe gluten-free?
Absolutely! Simply substitute the Graham cracker crumbs with gluten-free digestive biscuits or a gluten-free cookie alternative for the crust.
3. How do I know when the cheesecake is done baking?
The edges should be set, but the center will still have a slight jiggle when you gently nudge the pan. It will continue to set as it cools and chills.
4. What if I don’t have a springform pan?
While a springform pan is ideal, you can use a regular 9-inch round cake pan lined with parchment paper, leaving an overhang on the sides to help lift the cheesecake out once cooled. However, a springform pan makes removal significantly easier.
5. Can I use low-fat cream cheese?
It’s strongly recommended to use full-fat cream cheese for the best texture and flavor. Low-fat versions can result in a less creamy, sometimes watery cheesecake.