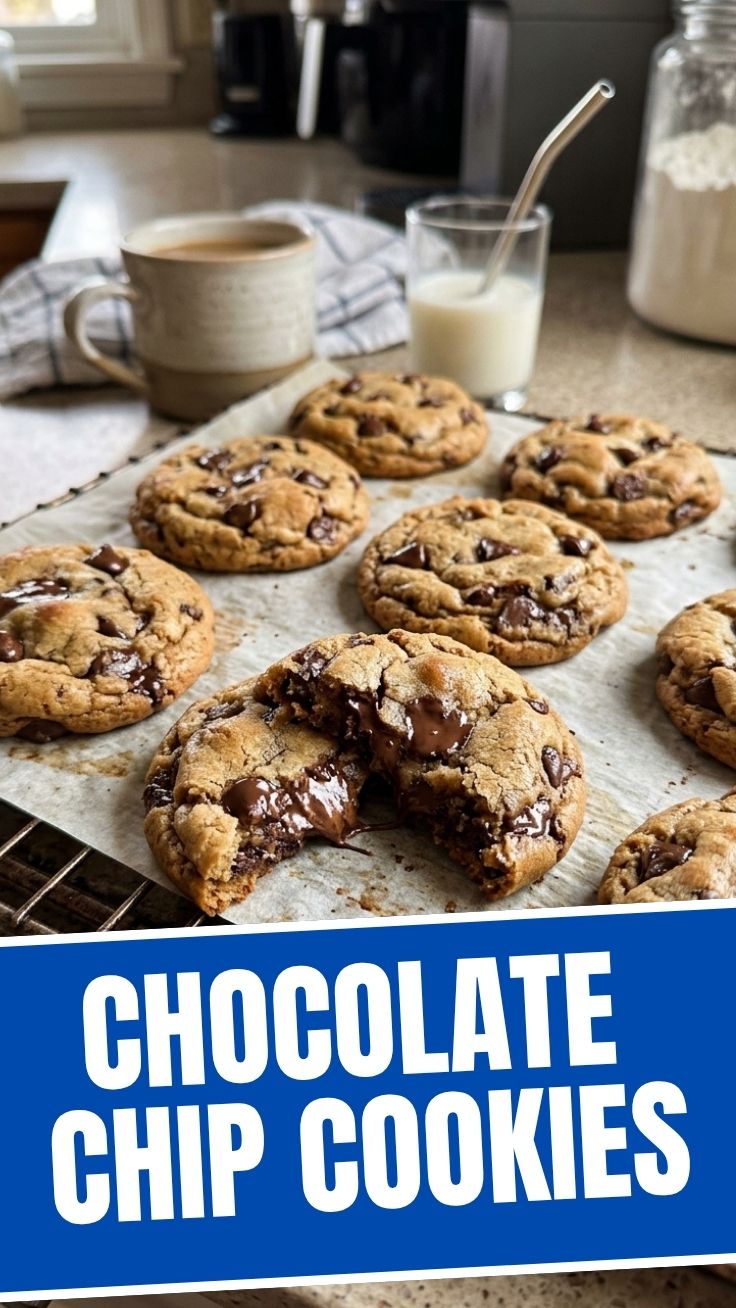
Ever Dreamed of Baking the Perfect Batch of Chocolate Chip Cookies? Your Journey Starts Here!
Imagine a world where the aroma of warm vanilla and melting chocolate fills your kitchen, a world where every bite brings unadulterated joy. For many, that world revolves around the quintessential Chocolate Chip Cookie Recipe. There’s something undeniably magical about these golden-edged, chewy-centered delights, and while store-bought versions can be convenient, nothing compares to the satisfaction and flavor of baking them yourself. Beyond the sheer deliciousness, preparing these beloved treats at home offers complete control over ingredients, allowing you to tailor them to your taste and dietary preferences. Get ready to unlock the secrets to baking truly extraordinary cookies.
Ingredients & Kitchen Tools
Gathering your mise en place is the first step to baking success. Here’s what you’ll need:
- All-Purpose Flour (2 ¼ cups): The structural backbone of our cookies.
- Baking Soda (1 teaspoon): Provides lift and contributes to a tender texture.
- Salt (1 teaspoon): Balances sweetness and enhances flavor.
- Unsalted Butter (1 cup / 2 sticks, softened): Adds richness and contributes to chewiness; unsalted allows you to control the salt content.
- Granulated Sugar (¾ cup): For sweetness and crispy edges.
- Packed Light Brown Sugar (¾ cup): Adds moisture, chewiness, and a subtle caramel flavor.
- Large Eggs (2, room temperature): Binds ingredients and adds richness.
- Vanilla Extract (2 teaspoons): The essential flavor enhancer for classic cookies.
- Semi-Sweet Chocolate Chips (2 cups): The star of the show! Feel free to use milk, dark, or a mix.
- Optional: Flaky Sea Salt (for sprinkling): A touch of gourmet sophistication that balances sweetness.
Kitchen Tools:
- Large Mixing Bowls (2): For dry and wet ingredients.
- Electric Mixer (stand or hand-held): For creaming butter and sugar; essential for aeration.
- Rubber Spatula: For scraping bowls and folding ingredients.
- Whisk: For combining dry ingredients thoroughly.
- Measuring Cups & Spoons: For accurate ingredient portions.
- Baking Sheets (2): Lined with parchment paper or silicone mats for non-stick baking.
- Parchment Paper or Silicone Baking Mats: Prevents sticking and ensures even baking.
- Cookie Scoop (1.5-2 tablespoons): For uniformly sized cookies.
- Wire Cooling Rack: For cooling cookies evenly and preventing sogginess.
Prep Time & Cooking Schedule

- Prep Time: 15-20 minutes (includes gathering ingredients and mixing)
- Chilling Time: At least 30 minutes, or up to 24-48 hours (highly recommended for enhanced flavor and texture!)
- Cook Time: 9-12 minutes per batch
- Yields: Approximately 24-30 cookies
The chilling time is crucial here. While you can bake these immediately, allowing the dough to chill solidifies the butter, preventing excessive spreading, and gives the flavors more time to meld, resulting in a more complex and satisfying cookie. Plan accordingly for the best results!
Step-by-Step Instructions
1. Prep Dry Ingredients: In a medium bowl, whisk together the all-purpose flour, baking soda, and salt. Set aside. This ensures all leavening agents are evenly distributed.
2. Cream Wet Ingredients: In a large bowl, using an electric mixer, cream together the softened unsalted butter, granulated sugar, and packed light brown sugar until light and fluffy (about 2-3 minutes). This aeration step incorporates air, making the cookies tender.
3. Add Eggs and Vanilla: Beat in the large eggs one at a time, mixing well after each addition. Stir in the vanilla extract until just combined.
4. Combine Wet and Dry: Gradually add the dry ingredient mixture to the wet mixture, mixing on low speed until just combined. Be careful not to overmix, as this can lead to tough cookies. Less is more here!
5. Fold in Chocolate Chips: Stir in the semi-sweet chocolate chips with a rubber spatula until evenly distributed throughout the dough.
6. Chill the Dough: Cover the bowl with plastic wrap and refrigerate the dough for at least 30 minutes. For an even richer flavor and chewier texture, chill for 24-48 hours. This step is a game-changer for an amazing Chocolate Chip Cookies.
7. Preheat Oven & Prep Baking Sheets: Once ready to bake, preheat your oven to 375°F (190°C). Line baking sheets with parchment paper or silicone baking mats.
8. Scoop Cookies: Using a cookie scoop (or a spoon), drop rounded tablespoons of dough onto the prepared baking sheets, spacing them about 2 inches apart. If desired, sprinkle a pinch of flaky sea salt on top of each dough ball.
9. Bake: Bake for 9-12 minutes, or until the edges are golden brown and the centers are still slightly soft. For the perfect gooey texture, slightly underbake. Turn the baking sheet halfway through for even baking. This attention to detail elevates your Chocolate Chip Cookie Recipe.
10. Cool: Let the cookies cool on the baking sheets for 5 minutes before transferring them to a wire rack to cool completely. This allows them to set and prevents breakage.
Nutritional Benefits & Advantages
While we’re indulging, it’s worth noting some components. Darker chocolate chips, for instance, offer antioxidants. Eggs contribute protein and essential vitamins. Baking at home means you control the sugar content and can opt for higher-quality butter or even use whole wheat flour for added fiber, subtly boosting the nutritional profile without sacrificing flavor.
Tips, Variations & Cooking Advice
- Brown Butter: For a rich, nutty flavor, brown your butter before creaming it. Allow it to cool slightly before use.
- Chocolate Variety: Beyond semi-sweet, try milk chocolate, dark chocolate, white chocolate, or even chopped chocolate bars for larger melty puddles.
- Add-ins: Experiment with nuts (walnuts, pecans), dried fruit (cranberries, cherries), or a dash of cinnamon or espresso powder for complexity.
- Gluten-Free: Substitute the all-purpose flour with a 1:1 gluten-free baking blend that contains xanthan gum.
- Larger Cookies: Increase baking time by a few minutes for larger cookies, keeping an eye on the edges.
Common Mistakes to Avoid
- Overmixing the Dough: Leads to excess gluten development, resulting in tough, cake-like cookies. Mix until just combined.
- Not Chilling the Dough: Causes cookies to spread too much, becoming thin and crispy instead of thick and chewy.
- Baking on a Hot Baking Sheet: Always allow baking sheets to cool between batches to prevent premature spreading.
- Incorrect Oven Temperature: An oven that’s too hot can burn the edges, while one that’s too cool can lead to flat, pale cookies. Use an oven thermometer if unsure.
- Overbaking: Cookies will continue to cook slightly as they cool. Remove them when the edges are set and the centers still look a little soft.
Storage & Meal Prep Tips
Store baked cookies in an airtight container at room temperature for up to 3-5 days. For longer storage, freeze cooled cookies in a single layer on a baking sheet, then transfer to a freezer-safe bag or container for up to 3 months. Thaw at room temperature or reheat briefly in the microwave or oven for that fresh-baked feel.
You can also prepare the dough in advance and freeze it. Scoop individual dough balls onto a parchment-lined baking sheet and freeze until solid, then transfer to a freezer-safe bag. Bake from frozen, adding an extra 2-4 minutes to the baking time.
Conclusion
There’s an undeniable charm and heartwarming satisfaction in mastering the classic Chocolate Chip Cookies. This guide provides all the tools and techniques you need to create a batch that will impress and delight. By following these steps and embracing the nuances of baking, you’ll consistently achieve thick, chewy, and perfectly golden results. Don’t be afraid to make this Chocolate Chip Cookie Recipe your own; experiment with variations and discover your perfect cookie. We encourage you to try this recipe, share your creations, and spread the joy of homemade goodness!
FAQs
Q1: Why are my cookies spreading too much?
A: This usually happens if your butter was too soft (or melted), the dough wasn’t chilled enough, or your oven temperature is too low. Ensure butter is softened, not melted, and always chill the dough.
Q2: Can I adjust the type of sugar?
A: Yes, but be mindful of the impact. Increasing brown sugar adds chewiness and moisture, while more white sugar results in a crisper cookie. A 1:1 ratio of granulated to brown sugar is ideal for a classic balance.
Q3: How do I ensure my cookies are chewy and not cakey?
A: Don’t overmix the dough once flour is added, use slightly less baking soda, and slightly underbake. Chilling the dough also significantly contributes to a chewier texture.
Q4: Can I make this recipe dairy-free?
A: Absolutely! Substitute the butter with a high-quality plant-based butter alternative and ensure your chocolate chips are dairy-free. Bake as directed.
Q5: What’s the best way to get uniformly sized cookies?
A: A cookie scoop is your best friend! It ensures consistent size, which leads to even baking.