Crunch into Health: Your Guide to Perfect Crispy Chickpeas (Roasted)
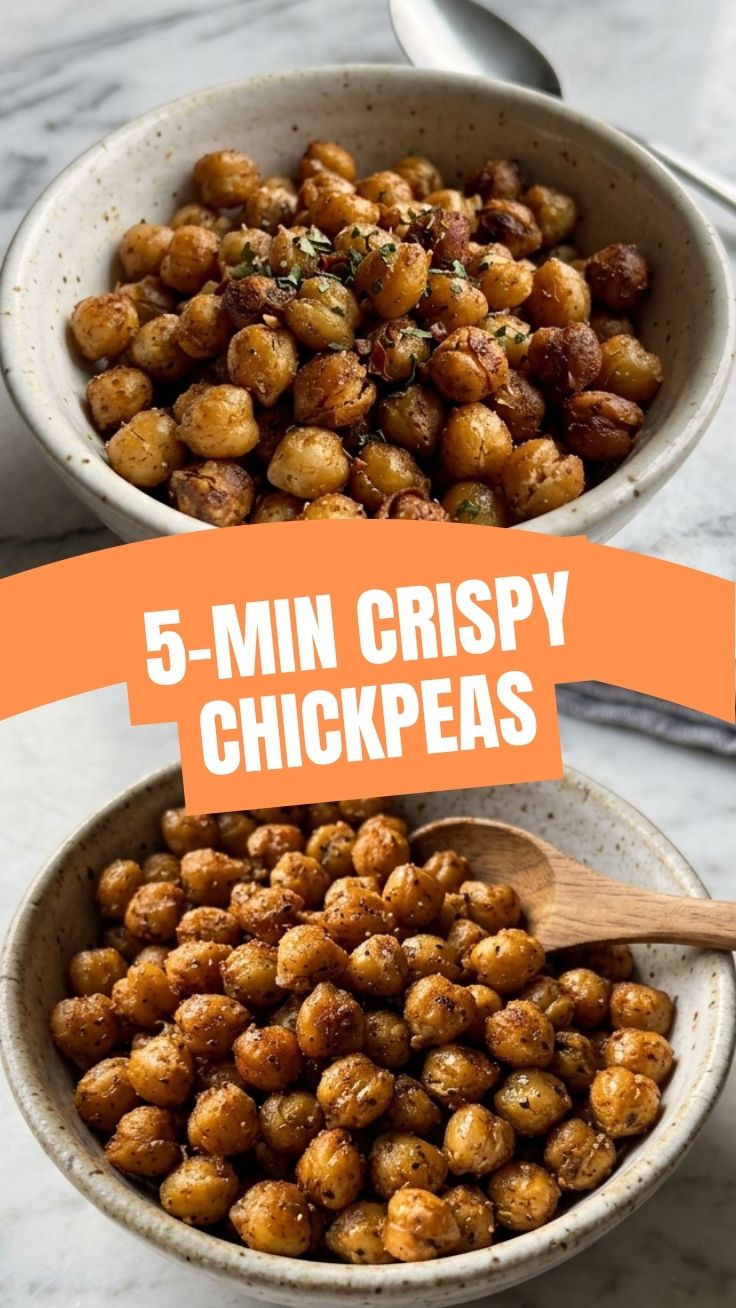
Ever find yourself reaching for an unhealthy snack, craving that satisfying crunch but wanting something genuinely good for you? What if I told you there’s a simple, delicious, and incredibly versatile recipe that delivers on all fronts? Enter the humble chickpea, transformed into an irresistible powerhouse of flavor and texture. Preparing these Crispy Chickpeas (Roasted) at home not only saves you money but also gives you complete control over the ingredients, ensuring a wholesome and truly delicious outcome. This recipe is a game-changer for anyone looking to incorporate more plant-based protein and fiber into their diet, making it one of the easiest and most flavorful Healthy Snacks you can whip up in your own kitchen. Let’s dive into how you can achieve perfectly golden, crunchy chickpeas every single time.
Ingredients & Kitchen Tools
To embark on your crispy chickpea journey, gather these essentials:
1 (15-ounce) can chickpeas (garbanzo beans): Rinsed thoroughly and patted completely dry. Drying them fully is crucial for crispiness.*
- 1-2 tablespoons olive oil: Or avocado oil for a neutral flavor and higher smoke point.
- 1/2 teaspoon sea salt: Or to taste. Essential for enhancing flavor.
- 1/4 teaspoon black pepper: Freshly ground preferred. Adds a subtle kick.
- Optional Spices:
* Smoked paprika: For a deep, smoky flavor.
* Garlic powder: Adds an aromatic, savory note.
* Cumin: For an earthy, warm spice.
* Chili powder or cayenne pepper: For a touch of heat.
* Nutritional yeast: For a cheesy, umami flavor.
- Baking sheet: A standard-sized sheet pan.
- Parchment paper: Optional but highly recommended for non-stick baking and easy cleanup.
- Colander: For rinsing the chickpeas.
- Clean kitchen towel or paper towels: For thoroughly drying the chickpeas.
- Large bowl: For tossing chickpeas with oil and spices.
Prep Time & Cooking Schedule
- Prep time: 10 minutes (includes rinsing and drying)
- Cook time: 20-30 minutes
- Resting time: 5 minutes (for extra crispiness)
This recipe is quick enough for a spontaneous snack attack but also perfect for meal prepping. You can get a batch into the oven in under 15 minutes, making it an ideal choice when you need a nutritious crunch without a long wait. Plan to start these about 30-40 minutes before you want to enjoy them.
Step-by-Step Instructions
1. Preheat Oven & Prep: Preheat your oven to 400°F (200°C). Line a baking sheet with parchment paper for easier cleanup, if desired.
2. Rinse & Dry Chickpeas: Drain the canned chickpeas in a colander and rinse them thoroughly under cold running water. Spread them out on a clean kitchen towel or several layers of paper towels. Gently pat them until they are as dry as possible. This step is critical! The drier the chickpeas, the crispier they will become. You can even gently rub them to help remove any loose skins; while optional, removing skins can contribute to an even crispier texture.
3. Seasoning: Transfer the dried chickpeas to a large bowl. Drizzle with olive oil and toss to coat evenly. Add the sea salt, black pepper, and any optional spices you choose. Toss again until all the chickpeas are well coated.
4. Spread & Roast: Spread the seasoned chickpeas in a single layer on the prepared baking sheet. Ensure they are not overcrowded, as this will steam them instead of roasting them to a perfect crisp.
5. Roast to Perfection: Bake for 20-30 minutes, stirring halfway through, until the chickpeas are golden brown and crunchy. The actual time may vary depending on your oven and how dry the chickpeas were initially. Keep an eye on them towards the end to prevent burning.
6. Cool & Serve: Once golden and crisp, remove the Crispy Chickpeas (Roasted) from the oven. Let them cool on the baking sheet for 5-10 minutes. They will continue to crisp up as they cool. Enjoy them as a standalone Healthy Snacks, a salad topping, or a soup garnish.
Nutritional Benefits & Advantages
Chickpeas are nutritional powerhouses! They are an excellent source of plant-based protein, making them a fantastic option for vegetarians, vegans, and anyone looking to reduce their meat intake. They’re also loaded with dietary fiber, which aids digestion, promotes satiety, and helps regulate blood sugar levels. Furthermore, chickpeas provide essential minerals like iron, folate, and magnesium. Roasting them rather than frying significantly reduces unhealthy fats while preserving their nutrient content, making them a smart and satisfying choice for sustained energy.
Tips, Variations & Cooking Advice
- Spice It Up: Experiment with different spice blends – curry powder, za’atar, chili lime, everything bagel seasoning, or even a sweet cinnamon-sugar variety!
- Air Fryer Method: For an even quicker crisp, air fry at 375°F (190°C) for 15-20 minutes, shaking the basket periodically, until golden and crispy.
Texture Control: For extra-crispy chickpeas, make sure to blot them very* dry. You can even let them air dry on a baking sheet for 30 minutes before roasting if you have time.
- Garbanzo Flour Dust: Some chefs dust their chickpeas with a tiny amount of garbanzo bean flour (chickpea flour) before roasting to enhance crispiness. Use sparingly!
Common Mistakes to Avoid
- Not Drying Thoroughly: This is the number one culprit for soft, chewy chickpeas instead of crispy ones. Spend the extra time patting them dry.
- Overcrowding the Pan: Spreading the chickpeas in a single layer is crucial. If they’re piled up, they’ll steam rather than roast, resulting in a soggy texture.
- Undercooking: Don’t pull them out too early! They need to be truly golden and firm to the touch to achieve peak crispiness.
- Adding Oil Too Soon: Ensure chickpeas are completely dry before adding oil and spices; otherwise, the oil won’t adhere properly.
Storage & Meal Prep Tips
Store leftover Crispy Chickpeas (Roasted) in an airtight container at room temperature for up to 3-4 days. While they tend to lose some of their crispness over time, they’re still delicious. To revive their crunch, simply spread them on a baking sheet and reheat in a 300°F (150°C) oven for 5-10 minutes, or in an air fryer for 3-5 minutes, until warm and re-crisped. They are not recommended for freezing once roasted, as this significantly degrades their texture. These are fantastic for meal prep as a ready-to-go snack for the week.
Conclusion
There you have it – your ultimate guide to crafting perfectly crunchy, flavor-packed Crispy Chickpeas (Roasted). This simple recipe provides an abundance of nutrition, making it an unbeatable choice for delightful Healthy Snacks or a versatile addition to countless meals. Don’t let the simplicity fool you; the transformation from canned bean to crispy sensation is truly magical. Give this recipe a try and share your favorite spice blends in the comments below – we’d love to hear how you make them your own!
FAQs
Q1: Why aren’t my chickpeas getting crispy?
A1: The most common reason is insufficient drying. Ensure they are completely patted dry before roasting, and avoid overcrowding the baking sheet so they can roast evenly.
Q2: Can I use dried chickpeas instead of canned?
A2: Yes, but you’ll need to soak and cook them first. Once cooked, follow the same drying and roasting steps as with canned chickpeas.
Q3: How long do roasted chickpeas stay crispy?
A3: They are best enjoyed the same day. While they can be stored, they tend to soften over time. Reheating them in the oven can help restore some crispness.
Q4: Can I make these sweet?
A4: Absolutely! Skip the savory spices and toss with a blend of cinnamon, a pinch of nutmeg, and a little maple syrup or brown sugar before roasting for a delicious sweet treat.
Q5: Are these suitable for a keto diet?
A5: Chickpeas are relatively high in carbohydrates, so they are generally not considered keto-friendly. However, they are excellent for plant-based, high-fiber, and whole-foods diets.