Master the Art of Decadent Chocolate Cake with Homemade Frosting
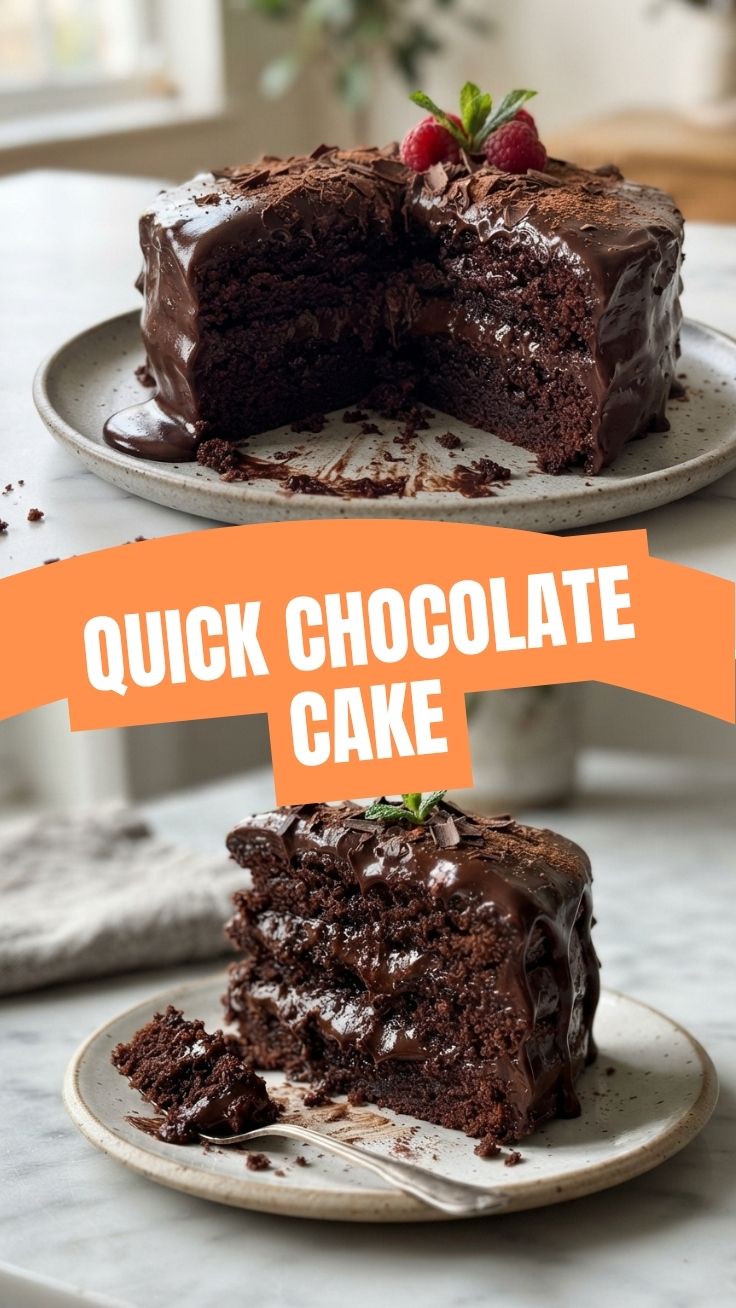
Ever found yourself craving a slice of pure comfort, a dessert so rich and satisfying it feels like a warm hug? While store-bought treats can be convenient, there’s an unparalleled joy and sense of accomplishment in crafting a truly exceptional Chocolate Cake from scratch, complete with homemade Frosting. Beyond the incredible flavour and tantalizing aroma that fills your kitchen, preparing this classic at home allows you to control every ingredient, ensuring a superior taste and a healthier, more wholesome experience. Get ready to impress your taste buds and loved ones with this step-by-step guide to baking the perfect chocolate confection.
Ingredients & Kitchen Tools
Here’s everything you’ll need to create this impressive dessert:
- All-Purpose Flour (2 cups): The structural backbone of our cake. You can use gluten-free all-purpose flour as a substitution.
- Granulated Sugar (2 cups): For sweetness and moisture retention.
- Unsweetened Cocoa Powder (¾ cup): The star of our Chocolate Cake, providing deep chocolate flavor.
- Baking Soda (2 teaspoons): A leavening agent that helps the cake rise.
- Baking Powder (1 teaspoon): Another leavening boost for a light, airy crumb.
- Salt (1 teaspoon): Balances sweetness and enhances chocolate flavor.
- Eggs (2 large): Binds ingredients and adds richness.
- Milk (1 cup): Adds moisture and tenderness. Any dairy or non-dairy milk works.
- Vegetable Oil (½ cup): Contributes to a moist texture. Melted butter or canola oil are good alternatives.
- Vanilla Extract (2 teaspoons): Enhances all other flavors.
- Boiling Water (1 cup): Bloom the cocoa, intensifying the chocolate flavor and contributing to a tender crumb.
- Unsalted Butter (1 cup, softened): For the luscious Frosting. Make sure it’s at room temperature for easy creaming.
- Powdered Sugar (4-5 cups): The base for our smooth and sweet frosting. Sift it for best results.
- Heavy Cream or Milk (¼ cup): Adjusts frosting consistency.
- Oven: Essential for baking.
- Two 9-inch Round Cake Pans: For even baking.
- Mixing Bowls (large and medium): For combining wet and dry ingredients.
- Electric Mixer (stand or hand-held): For creaming butter and sugar, and whipping frosting.
- Whisk: To combine dry ingredients.
- Rubber Spatula: For scraping bowls and folding ingredients.
- Measuring Cups and Spoons: For accurate ingredient portions.
- Parchment Paper: To line cake pans for easy release.
Prep Time & Cooking Schedule
- Prep Time: 25 minutes
- Bake Time: 30-35 minutes
- Cooling Time: 1 hour (for cake layers before frosting)
- Total Time: Approximately 2 hours
To ensure a smooth baking experience, budget about 30 minutes for active preparation. The baking itself is relatively quick, but remember to factor in ample cooling time for the cake layers. Attempting to frost warm cakes is a recipe for disaster, as the frosting will melt and slide off.
Step-by-Step Instructions
1. Preheat & Prep Pans: Preheat your oven to 350°F (175°C). Grease and flour two 9-inch round cake pans, then line the bottoms with parchment paper. This ensures your cake layers release easily.
2. Combine Dry Ingredients: In a large mixing bowl, whisk together the flour, granulated sugar, unsweetened cocoa powder, baking soda, baking powder, and salt. Whisking ensures an even distribution of leavening agents.
3. Combine Wet Ingredients: In a separate medium bowl, whisk together the eggs, milk, vegetable oil, and vanilla extract until well combined.
4. Combine & Add Boiling Water: Pour the wet ingredients into the dry ingredients. Mix on low speed with an electric mixer until just combined. The batter will be thick. Carefully add the boiling water to the batter, mixing on low speed until smooth. This surprisingly thin batter is the secret to a super moist Chocolate Cake.
5. Bake: Divide the batter evenly between the prepared cake pans. Bake for 30-35 minutes, or until a wooden skewer inserted into the center comes out clean.
6. Cool: Let the cakes cool in the pans for 10-15 minutes before inverting them onto a wire rack to cool completely. This prevents the cakes from crumbling.
7. Prepare the Frosting: While the cakes cool, beat the softened butter in a large bowl with an electric mixer until light and fluffy (about 2-3 minutes). Gradually add the powdered sugar, one cup at a time, beating well after each addition. Add the vanilla extract and slowly drizzle in the heavy cream or milk, beating until smooth and creamy. If the frosting is too thick, add more liquid, a teaspoon at a time. Too thin? Add more powdered sugar.
8. Assemble & Frost: Once the cake layers are completely cool, place one layer on a serving plate or cake stand. Spread a generous amount of frosting evenly over the top. Carefully place the second cake layer on top, then frost the top and sides of the entire cake.
Nutritional Benefits & Advantages
Beyond its undeniable deliciousness, this homemade Chocolate Cake offers a few advantages. You control the quality of ingredients, opting for organic or ethically sourced cocoa, for instance. Cocoa powder itself, while part of a treat, contains antioxidants. Making your own from scratch means avoiding artificial flavors, preservatives, and excessive hydrogenated oils commonly found in store-bought versions. Plus, the satisfaction of creating something so delectable is its own reward!
Tips, Variations & Cooking Advice
- Coffee Boost: For an even richer chocolate flavor, replace half of the boiling water with hot brewed coffee. The coffee enhances the chocolate without making the cake taste like coffee.
- Buttermilk Substitute: If you don’t have milk, use buttermilk for an extra tangy and moist cake. Simply add 1 tablespoon of lemon juice or white vinegar to a cup of milk and let it sit for 5 minutes before using.
- Flavorful Frosting: Experiment with your Frosting! Add a pinch of espresso powder for depth, a swirl of peanut butter, or a touch of mint extract for a different twist.
- Dairy-Free: Substitute milk with a plant-based milk (almond, oat, soy) and use dairy-free butter for the frosting.
- Gluten-Free: Use a 1:1 gluten-free all-purpose flour blend.
Common Mistakes to Avoid
- Overmixing the Batter: This develops the gluten, leading to a tough, dry cake. Mix until just combined.
- Not Cooling Cakes Completely: As mentioned, warm cakes will melt your beautiful frosting. Patience is key!
- Under-baking: A wobbly center or sticky skewer means your cake needs more time.
- Over-baking: A very dry skewer coming out too clean, or a cake that pulls significantly away from the pan edges, indicates over-baking, which results in a dry cake.
Storage & Meal Prep Tips
Leftover Chocolate Cake should be stored in an airtight container at room temperature for up to 3 days, or in the refrigerator for up to 5 days. If refrigerating, let slices come to room temperature before serving for the best texture and flavor. Unfrosted cake layers can be wrapped tightly in plastic wrap and aluminum foil, then frozen for up to 2 months. Thaw frozen layers in the refrigerator overnight before frosting.
Conclusion
Creating a homemade Chocolate Cake with a velvety smooth Frosting is an incredibly rewarding experience that yields a truly spectacular dessert. This recipe ensures a moist, chocolatey crumb every time, making it a perfect centerpiece for celebrations or a delightful indulgence. Don’t be shy about trying your hand at this classic; your taste buds will thank you! We encourage you to bake this cake, share your results, and explore other delicious recipes on our blog.
FAQs
Q: Can I use dark cocoa powder instead of unsweetened?
A: Absolutely! Dark cocoa powder (Dutched cocoa) will give you an even more intense, darker chocolate Chocolate Cake.
Q: My frosting is too runny/too stiff. How can I fix it?
A: If it’s too runny, gradually add more powdered sugar until it reaches the desired consistency. If it’s too stiff, add milk or cream one teaspoon at a time until it’s spreadable.
Q: Do I really need boiling water?
A: Yes, the boiling water is crucial! It “blooms” the cocoa powder, enhancing its flavor, and creates a uniquely moist and tender cake texture.
Q: Can I make this a sheet cake?
A: Yes, you can bake this recipe in a 9×13 inch baking pan. The baking time might need to be adjusted slightly, typically around 35-40 minutes. Always check for doneness with a skewer.
Q: How can I make my cake layers perfectly level?
A: You can use a serrated knife to carefully trim the domed tops off your cooled cake layers. This step makes stacking and frosting much easier and gives a professional finish.