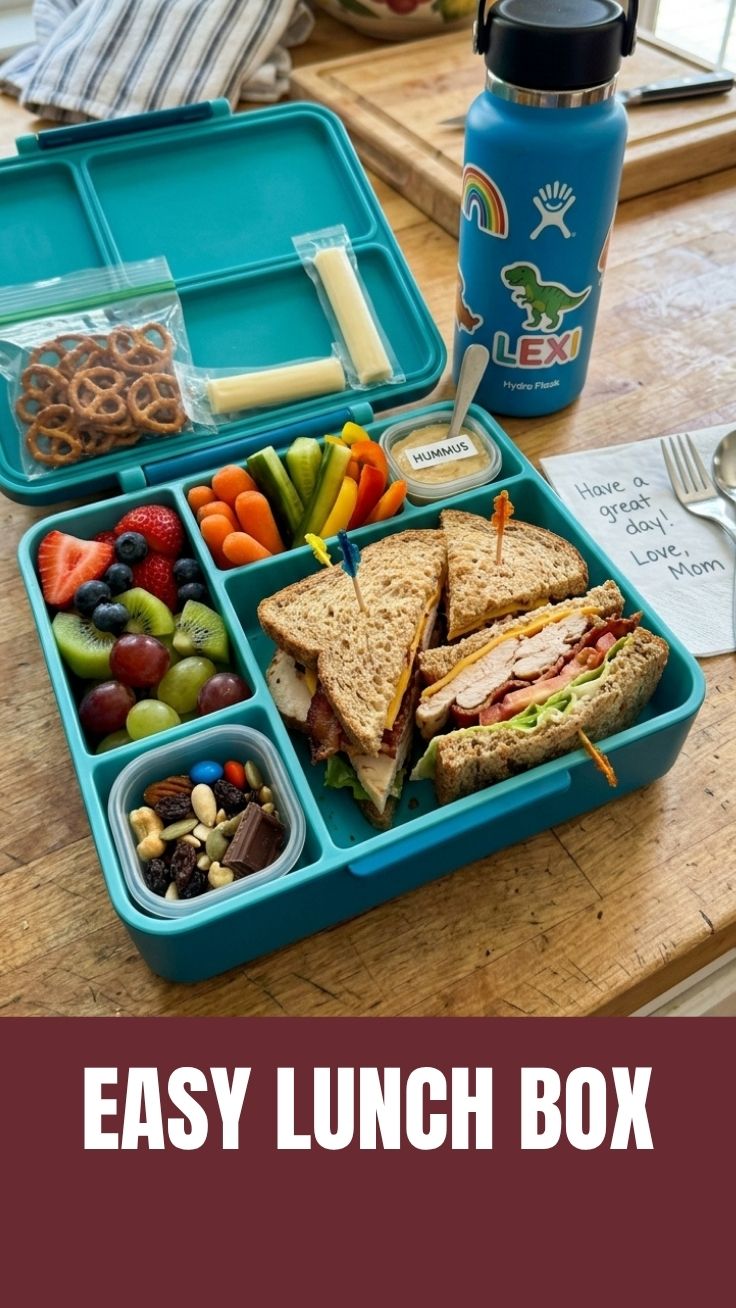
Master the Art of School Lunches: Your Ultimate Guide to Irresistible & Nutritious Meals!
Are you tired of sending your kids to school with the same old, uninspired lunches? Do you dream of lunchboxes that return home empty, signaling a delicious and satisfying meal? Preparing homemade lunches not only ensures fresh, wholesome ingredients but also allows you to tailor meals to your child’s preferences and dietary needs. Today, we’re diving deep into creating incredible Back to School Lunch Box Ideas that will have your kids excited for lunchtime. Forget the pre-packaged snacks and sugary treats; we’re focusing on vibrant, flavorful, and genuinely nourishing options that are easy to recreate at home. These aren’t just any meals; these are genuinely Healthy lunch box recipes designed to fuel young minds and bodies.
Ingredients & Kitchen Tools
Crafting the perfect lunch requires a blend of fresh ingredients and efficient tools. Here’s what you’ll need, along with some helpful clarifications and substitutions:
Whole Wheat Tortillas (6-inch or 8-inch): Foundation for wraps. Substitution: Gluten-free tortillas or large lettuce leaves for a low-carb option.*
Cooked Chicken Breast (shredded or diced, 1 cup): Lean protein for sustained energy. Pre-cooked rotisserie chicken works wonders for time-saving.*
Cream Cheese (softened, 2 tbsp): Binds ingredients and adds creaminess. Substitution: Hummus or mashed avocado for a dairy-free alternative.*
Mayonnaise (1 tbsp): Adds moisture and flavor. Substitution: Greek yogurt for a lighter, tangier option.*
Cheddar Cheese (shredded, 1/2 cup): A kid-favorite, adds calcium and flavor. Substitution: Monterey Jack, mozzarella, or a dairy-free cheese alternative.*
Carrots (grated, 1/4 cup): Adds a touch of sweetness and essential vitamins. Substitution: Finely diced bell peppers for added crunch.*
Spinach (finely chopped, 1/4 cup): Sneaky greens for nutrient boost. Substitution: Arugula or baby kale.*
Apple (1 medium, sliced): For a sweet and crunchy side. Substitution: Pear or grapes.*
Small Container of Yogurt (plain or fruit-flavored): Probiotics for gut health. Substitution: Apple sauce or a fruit cup.*
- Small handful of Berries (strawberries, blueberries, raspberries): Antioxidant-rich and naturally sweet.
- Lunchbox: Preferably bento-style to keep items separated.
- Small Mixing Bowl: For combining fillings.
- Spatula or Spoon: For mixing.
- Sharp Knife & Cutting Board: For prep.
Prep Time & Cooking Schedule

This recipe is a true weeknight warrior, designed for minimal fuss!
- Prep Time: 15 minutes
- Cook Time: 0 minutes (assuming pre-cooked chicken)
- Assembly Time: 5 minutes per lunchbox
Prepare the chicken filling the night before, store it in an airtight container, and assemble the lunchboxes in the morning while sipping your coffee. This strategy ensures fresh, appealing meals without the morning rush.
Step-by-Step Instructions
Let’s get those lunchboxes packed with goodness! Follow these simple steps for delicious Back to School Lunch Box Ideas.
1. Prepare the Filling: In a small mixing bowl, combine the shredded or diced cooked chicken, softened cream cheese, mayonnaise, shredded cheddar cheese, grated carrots, and finely chopped spinach. Mix thoroughly until all ingredients are well incorporated and the mixture is creamy. Taste and adjust seasoning if needed (a pinch of salt and pepper can enhance flavors).
2. Assemble the Wraps: Lay a whole wheat tortilla flat on a clean surface. Spread about 2-3 tablespoons of the chicken mixture evenly over the tortilla, leaving a small border around the edges.
3. Roll the Wraps: Carefully roll the tortilla tightly from one end to the other. You can fold in the sides slightly before rolling to create a neater, more secure wrap.
4. Slice and Pack: Once rolled, slice the wrap into 1-inch thick pinwheels. This makes them easy for little hands to manage and adds visual appeal.
5. Pack the Lunchbox: Arrange the pinwheels in the main compartment of your bento box. In separate compartments, add the sliced apple, spoonful of berries, and the small container of yogurt. For truly Healthy lunch box recipes, focus on a good balance of protein, healthy fats, complex carbohydrates, and plenty of fruits and vegetables.
Nutritional Benefits & Advantages
These wraps are a powerhouse of nutrition! The whole wheat tortillas provide complex carbohydrates for sustained energy. Chicken offers lean protein essential for growth and muscle development. The addition of spinach and carrots packs in vital vitamins, minerals, and fiber, promoting healthy digestion and boosting immunity. Cheese contributes calcium for strong bones, while fruits and yogurt add natural sugars for quick energy, antioxidants, and beneficial probiotics.
Tips, Variations & Cooking Advice
- Flavor Boost: Add a dash of dry ranch seasoning or a squeeze of lemon juice to the chicken mixture for extra pop.
- Veggie Power-Up: Finely chop bell peppers, cucumbers, or even shredded zucchini into the filling mixture.
- Protein Swap: Substitute chicken with canned tuna, shredded turkey, or even drained and mashed chickpeas for a vegetarian option.
- Gluten-Free: Use gluten-free tortillas or serve the chicken mixture in lettuce cups.
- Dairy-Free: Opt for dairy-free cream cheese, cheese alternatives, and a plant-based yogurt.
- Spice It Up (for older kids): A tiny pinch of chili powder or a drop of hot sauce in the filling can add an exciting kick.
- Interactive Lunch: Pack the filling separately and let kids assemble their own mini-wraps at school.
Common Mistakes to Avoid
- Overfilling the Wraps: This can make them difficult to roll and messy to eat. Stick to 2-3 tablespoons of filling.
- Not Rolling Tightly Enough: Loose wraps tend to fall apart. Ensure your roll is firm and compact.
- Skipping the Veggies: Even small amounts of finely chopped vegetables significantly boost nutritional value and texture. Don’t underestimate “sneaky” additions!
- Forgetting to Keep it Cold: Always pack with an ice pack, especially if the lunchbox contains dairy or meat, to prevent spoilage and maintain food safety.
Storage & Meal Prep Tips
The beauty of these wraps lies in their meal prep potential!
- Filling: The chicken filling can be prepared up to 3 days in advance and stored in an airtight container in the refrigerator.
- Assembled Wraps: While best fresh, assembled wraps can be stored in an airtight container in the refrigerator for up to 1 day. Place a piece of parchment paper between layers to prevent sticking.
- Freezing: This specific recipe is not ideal for freezing once assembled, as the tortillas and fresh vegetables may become soggy upon thawing.
- Reheating: These wraps are designed to be enjoyed cold or at room temperature, making them perfect for school lunches.
Conclusion
Creating exciting and nutritious Back to School Lunch Box Ideas doesn’t have to be a daunting task. With a little planning and creativity, you can provide your children with delicious meals that they’ll actually want to eat, fueling their day with energy and focus. We encourage you to try this versatile recipe, experiment with the variations, and discover just how easy it is to pack genuinely Healthy lunch box recipes. Share your fantastic creations in the comments below – we’d love to see your personal touches!
FAQs
Q1: Can I make these wraps vegetarian?
A1: Absolutely! Replace the cooked chicken with drained and mashed chickpeas, a hearty bean spread, or even smoked tofu for a delicious vegetarian alternative.
Q2: How far in advance can I prepare the entire lunchbox?
A2: For best freshness, assemble the wraps and pack the lunchbox the night before or the morning of. The chicken filling, however, can be prepared 2-3 days in advance.
Q3: My child doesn’t like spinach. What can I use instead?
A3: Finely chop other mild vegetables like grated zucchini (squeezed dry), very finely diced bell peppers, or even a small amount of finely shredded cabbage. The key is to chop them so small they blend seamlessly into the creamy filling.
Q4: How can I keep the sliced apples from turning brown?
A4: Toss sliced apples with a tiny amount of lemon juice or a fruit protector spray. You can also buy individual apple slices that are already treated to prevent browning.