The Ultimate Homemade Apple Pie: A Step-by-Step Guide to Perfection
Tired of store-bought pies that lack that heartwarming, homemade touch? Imagine a dessert that fills your home with the intoxicating aroma of cinnamon, baked apples, and a perfectly flaky crust. Learning to bake your own Apple Pie from scratch isn’t just about making a delicious treat; it’s about crafting an experience, a memory, and a culinary masterpiece. This guide will walk you through every step, ensuring your apple pie—from its tender, spiced filling to its golden Apple Pie Crust—is nothing short of spectacular. We’ll delve into the secrets of creating a pie that’s both traditional and utterly irresistible, proving that the best desserts are always made with love and a little know-how right in your own kitchen.
Ingredients & Kitchen Tools
Crafting the perfect apple pie requires a thoughtful selection of ingredients and the right tools. Here’s what you’ll need:
For the Filling:
- 6-8 medium baking apples: (e.g., Granny Smith, Honeycrisp, Fuji, Gala) A mix provides balanced flavor and texture. Granny Smith offers tartness, while sweeter varieties add complexity.
- 1/2 cup granulated sugar: For sweetness, adjust to apple tartness.
- 1/4 cup packed light brown sugar: Adds a deeper, caramel-like sweetness.
- 1/4 cup all-purpose flour or 2 tbsp cornstarch: Thickener for the filling, prevents a watery pie.
- 1 tsp ground cinnamon: Classic warm spice for apple pie.
- 1/4 tsp ground nutmeg: Complements cinnamon; use freshly grated for best flavor.
- 1/4 tsp salt: Enhances all other flavors.
- 1 tbsp lemon juice: Brightens the apples and prevents browning.
- 2 tbsp unsalted butter: Cut into small pieces, dotted over the filling for richness.
For the Apple Pie Crust (or use store-bought for convenience):
- 2 ½ cups all-purpose flour: The base for a tender, flaky crust.
- 1 tsp salt: Essential for flavor balance in the crust.
- 1 cup (2 sticks) unsalted butter: Very cold, cut into 1/2-inch cubes. Crucial for flakiness.
- 1/2 cup ice water: Adjust as needed; the colder, the better for a tender crust.
Kitchen Tools:
- 9-inch pie plate: Standard size for a delicious pie.
- Large mixing bowls: For apples and for mixing dry ingredients.
- Rolling pin: Essential for rolling out the pie crust.
- Pastry blender or food processor: For cutting butter into flour (though hands work too).
- Measuring cups and spoons: For precise ingredient amounts.
- Paring knife and vegetable peeler: For preparing apples.
- Wire rack: For cooling the pie evenly.
Prep Time & Cooking Schedule
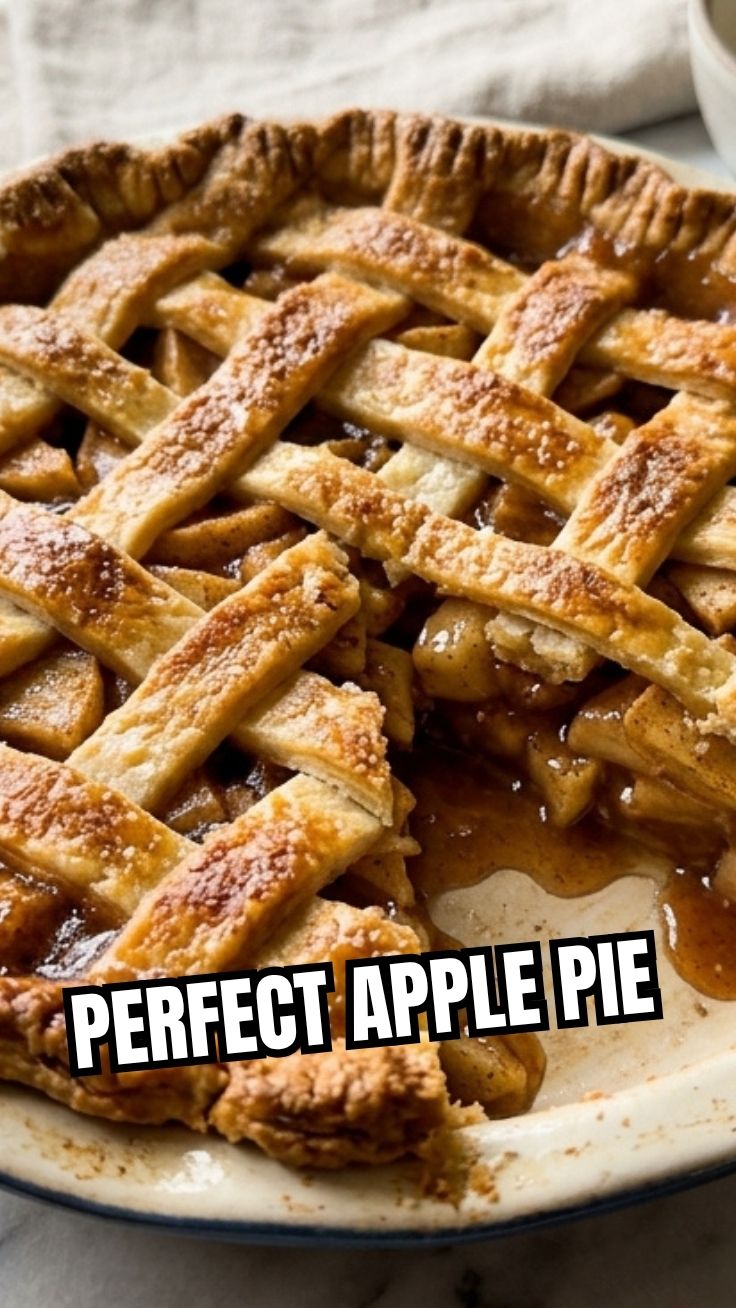
Making a fantastic Apple Pie is a fulfilling process that benefits from proper planning.
- Prep Time: 45-60 minutes (includes making the crust and preparing the filling).
- Chill Time (Crust): 30 minutes to 2 hours (or overnight). This is vital for a flaky crust.
- Cook Time: 50-60 minutes.
- Resting Time: At least 2-3 hours (Crucial for the filling to set and flavors to meld).
This pie is perfect for holidays or weekend baking projects. Start your crust early in the day, or even the day before, to break up the preparation.
Step-by-Step Instructions
1. Prepare the Apple Pie Crust: In a large bowl, whisk together flour and salt. Cut in the very cold butter using a pastry blender or your fingertips until the mixture resembles coarse meal with some pea-sized butter chunks. Gradually add ice water, one tablespoon at a time, mixing until just combined. Be careful not to overmix. Divide the dough in half, flatten into discs, wrap in plastic, and refrigerate for at least 30 minutes. The cold dough is easier to handle and ensures a flakier crust.
2. Prepare the Apples: Peel, core, and slice your apples into 1/4-inch thick uniform pieces. Place them in a large bowl. Add lemon juice and toss gently to coat.
3. Mix the Filling: In a separate small bowl, whisk together granulated sugar, brown sugar, flour (or cornstarch), cinnamon, nutmeg, and salt. Pour this dry mixture over the sliced apples and toss until all apple slices are evenly coated.
4. Assemble the Pie: On a lightly floured surface, roll out one disc of chilled dough into a 12-inch circle. Carefully transfer it to your 9-inch pie plate. Trim the edges, leaving about an inch of overhang.
5. Fill the Pie: Spoon the apple mixture into the crust-lined pie plate, mounding it slightly in the center. Dot the top of the apples with the small pieces of butter.
6. Top the Pie: Roll out the second disc of dough. You can either place it directly over the filling, cut vents, or create a lattice top. Carefully place the top crust over the apples. Trim the edges and crimp them together with the bottom crust using your fingers or a fork to seal.
7. Bake the Apple Pie: Preheat your oven to 425°F (220°C). If desired, brush the top crust with an egg wash (one egg yolk mixed with 1 tbsp water) and sprinkle with a tablespoon of sugar for a golden, sparkly finish. Place the pie on a baking sheet (to catch any drips) and bake for 15 minutes. Reduce the oven temperature to 375°F (190°C) and continue baking for another 35-45 minutes, or until the crust is golden brown and the filling is bubbling thickly. If the crust browns too quickly, cover the edges loosely with foil.
8. Cooling: Transfer the baked pie to a wire rack and cool completely for at least 2-3 hours before slicing and serving. This allows the filling to set properly.
Nutritional Benefits & Advantages
Apples, the star of this pie, are rich in dietary fiber, including pectin, which aids digestion and helps regulate blood sugar. They also provide essential vitamins like Vitamin C and antioxidants that support overall health. While pie is a treat, the inclusion of fruit means you’re getting some goodness! Making it at home also allows you to control the sugar content and use fresh, high-quality ingredients, avoiding artificial additives often found in commercially prepared versions.
Tips, Variations & Cooking Advice
- Flavor Boost: Add a pinch of ground ginger or cardamom to the apple filling for an extra layer of warmth.
- Crust Variations: For a richer crust, you can substitute a portion of the all-purpose flour with whole wheat pastry flour. For a nutty flavor, try adding finely chopped pecans to the crust dough.
- Gluten-Free Option: Use a gluten-free all-purpose flour blend (one specifically designed for baking, often containing xanthan gum) for the crust. Ensure your thickener for the apples is also gluten-free if using cornstarch.
- Dairy-Free: Substitute unsalted butter with a high-quality, plant-based butter alternative for both the crust and dotting the filling.
- Serving Suggestions: Serve warm with a scoop of vanilla bean ice cream, a dollop of whipped cream, or a drizzle of caramel sauce for an extra indulgent experience.
Common Mistakes to Avoid
Overworking the Dough: This develops gluten, leading to a tough, rather than flaky, crust. Mix until just* combined.
- Warm Butter: If your butter isn’t very cold for the crust, it will melt into the flour too quickly, resulting in a less flaky texture.
- Not Chilling the Dough: Skipping the chilling step makes the dough difficult to roll and can lead to shrinkage during baking.
- Not Cooling Long Enough: Cutting into a pie too soon will result in a runny, unset filling, as the pectin in the apples needs time to gel as the pie cools.
- Overfilling: Don’t mound the apples excessively high; this can cause the top crust to burst or the filling to bubble over aggressively.
Storage & Meal Prep Tips
Leftover Apple Pie should be stored at room temperature, loosely covered, for up to two days. For longer storage, refrigerate for up to 4-5 days. To reheat, warm individual slices in a microwave for 30-60 seconds, or in a preheated oven at 350°F (175°C) for 10-15 minutes until warmed through and the crust crisps slightly. You can also freeze a whole, unbaked pie (wrapped tightly in plastic wrap and then foil) for up to 3 months. Bake from frozen, adding an extra 20-30 minutes to the baking time.
Conclusion
Baking your own Apple Pie is a rewarding journey that culminates in a truly spectacular dessert. From mastering the flaky Apple Pie Crust to balancing the sweet and tart flavors of the filling, every step contributes to a pie that tastes like pure comfort. This comprehensive guide has equipped you with all the knowledge and tips you need to achieve apple pie perfection. So, roll up your sleeves, embrace the process, and prepare to delight your taste buds and those of your loved ones with this timeless classic. Happy baking!
FAQs
Q1: What are the best apples for apple pie?
A1: A mix of apples is ideal. Granny Smith provides tartness and holds its shape well, while Honeycrisp, Fuji, or Gala add sweetness and a softer texture. Using 2-3 different varieties creates a more complex flavor.
Q2: How can I prevent a soggy bottom crust?
A2: Ensure your oven is hot enough, avoid overfilling with apples, and consider a light “blind bake” of the bottom crust for 10-15 minutes before adding the filling, especially if your apples are very juicy. Adding a layer of breadcrumbs or crushed cereal on the bottom before the filling can also absorb excess moisture.
Q3: Can I make the pie crust ahead of time?
A3: Absolutely! Pie crust dough can be made up to 2-3 days in advance and stored in the refrigerator, or frozen for up to 3 months. Thaw frozen dough in the refrigerator overnight before using.
Q4: My pie crust is browning too quickly. What should I do?
A4: If the edges of your pie crust are browning too fast, loosely cover them with aluminum foil or use a pie crust shield.
Q5: How do I know when the apple pie filling is cooked?
A5: The filling is cooked when it’s visibly bubbling thickly through the vents in the top crust. You can also insert a thin, sharp knife into a vent; if it goes in easily, the apples are tender.