The Ultimate Guide to Crafting the Perfect Homemade Banana Bread
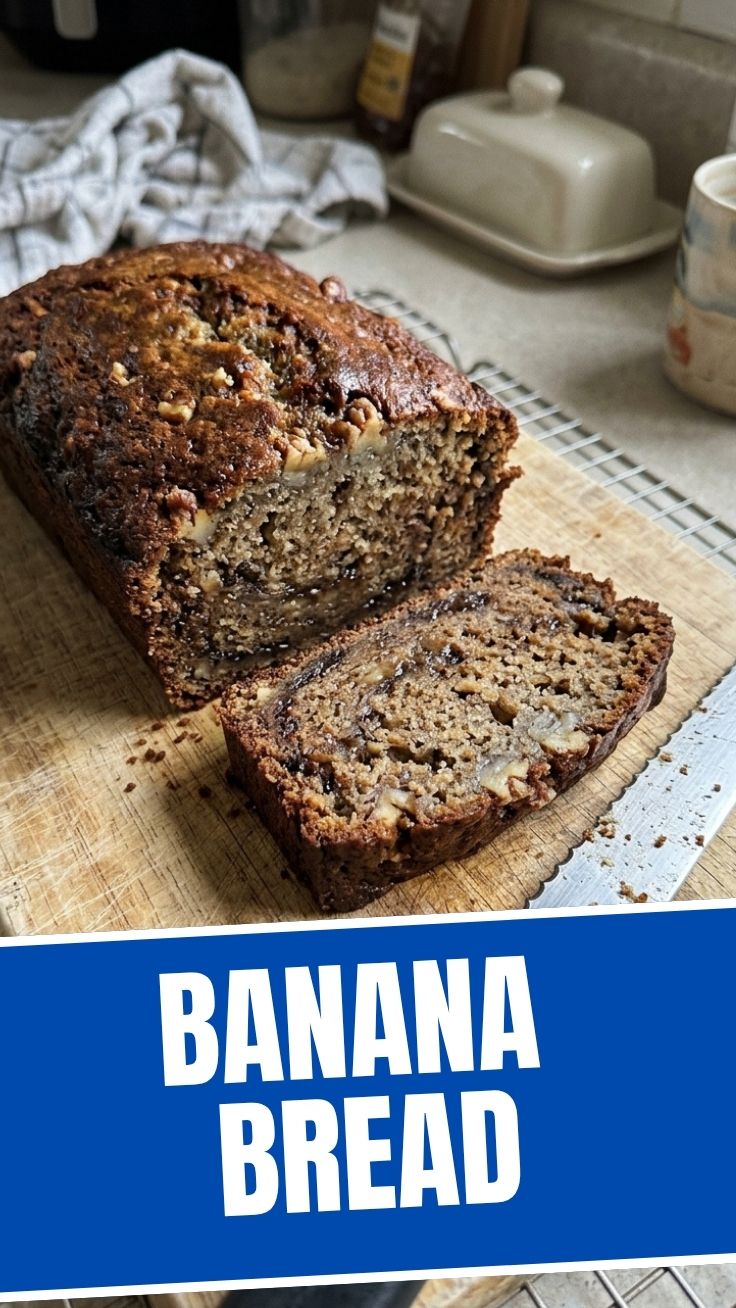
Are you seeking a comforting aroma to fill your kitchen, a delightful treat that whispers of home, and a recipe that’s as rewarding to make as it is to eat? There’s something undeniably magical about freshly baked Banana Bread. Beyond the incredible taste, preparing this classic at home offers a priceless sense of accomplishment and allows you to control every ingredient, ensuring a wholesome and delicious loaf. Forget store-bought imitations; mastering homemade Banana treats is a culinary journey worth taking, transforming ripe fruit into a warm, inviting masterpiece.
Ingredients & Kitchen Tools
To embark on your banana bread adventure, gather these essentials:
- Ripe Bananas (3-4 medium): The star of our show! Look for speckled, almost black bananas for maximum sweetness and moisture. These are crucial for a truly flavorful Banana Bread.
- All-Purpose Flour (1 ½ cups): Provides the structure. Sifting is optional but recommended for a lighter texture.
- Granulated Sugar (¾ cup): Sweetens and tenderizes. Adjust to your sweetness preference.
- Large Egg (1): Binds the ingredients and adds richness.
- Unsalted Butter (½ cup, melted): Adds moisture and flavor. Using unsalted allows you to control the salt content.
- Baking Soda (1 teaspoon): The leavening agent that helps the bread rise. Ensure it’s fresh for best results.
- Salt (½ teaspoon): Balances sweetness and enhances other flavors.
- Vanilla Extract (1 teaspoon): A flavor enhancer that complements the Banana beautifully.
- Optional Add-ins: Chopped nuts (walnuts, pecans), chocolate chips, or a sprinkle of cinnamon for extra flair.
Kitchen Tools:
- Loaf Pan (8.5 x 4.5 inches or 9 x 5 inches): The vessel for your delicious creation. Grease and flour it well.
- Large Mixing Bowl: For combining wet and dry ingredients.
- Fork or Potato Masher: For mashing the bananas.
- Whisk: For dry ingredients.
- Rubber Spatula: For folding and scraping.
- Measuring Cups and Spoons: For accurate ingredient proportions.
Prep Time & Cooking Schedule
- Prep Time: 15 minutes
- Cook Time: 55-65 minutes
- Resting Time: 15-20 minutes (before slicing)
This recipe is perfect for a lazy Sunday morning or a quick weekday bake. The prep time is minimal, allowing you to quickly get your loaf into the oven. The resting time ensures the Banana Bread sets properly, making it easier to slice and preventing it from crumbling.
Step-by-Step Instructions
1. Preheat & Prepare: Preheat your oven to 350°F (175°C). Grease and flour your loaf pan, or line it with parchment paper for easy removal.
2. Mash the Bananas: In a large bowl, mash the ripe Banana using a fork or potato masher. Don’t worry about a few lumps; they add character.
3. Combine Wet Ingredients: Add the melted butter, granulated sugar, beaten egg, and vanilla extract to the mashed bananas. Stir until well combined.
4. Combine Dry Ingredients: In a separate medium bowl, whisk together the all-purpose flour, baking soda, and salt. This ensures even distribution of the leavening agent.
5. Combine Wet and Dry: Gradually add the dry ingredients to the wet ingredients, stirring just until combined. Be careful not to overmix; overmixing can lead to a tough Banana Bread. If using, fold in any optional add-ins like nuts or chocolate chips now.
6. Bake: Pour the batter into your prepared loaf pan. Bake for 55-65 minutes, or until a wooden skewer inserted into the center comes out clean. If the top starts to brown too quickly, you can tent it loosely with aluminum foil.
7. Cool: Once baked, remove the loaf from the oven and let it cool in the pan for 10 minutes before transferring it to a wire rack to cool completely. This crucial step prevents sticking and allows the internal structure to stabilize.
Nutritional Benefits & Advantages
Beyond its delightful taste, banana bread offers surprising nutritional value, especially when made at home. Bananas are a fantastic source of potassium, essential for heart health and blood pressure regulation. They also provide dietary fiber, aiding digestion and promoting satiety. By making it yourself, you control sugar and fat content, making it a healthier alternative to many store-bought baked goods. Adding oats or whole wheat flour can further boost its fiber content and nutritional profile.
Tips, Variations & Cooking Advice
- Spice it Up: Add ½ teaspoon of cinnamon, nutmeg, or a pinch of allspice for a warming flavor profile.
- Nutty Goodness: A ¾ cup of chopped walnuts or pecans adds a delightful crunch and extra flavor.
- Chocolate Indulgence: ¾ cup of chocolate chips (dark, milk, or white) creates a decadent treat.
- Gluten-Free Option: Substitute all-purpose flour with a 1:1 gluten-free baking blend.
- Dairy-Free: Use a plant-based butter substitute and a dairy-free milk if any liquid is added (though this recipe typically doesn’t require milk).
- Mini Loaves/Muffins: Adjust baking time accordingly. Mini loaves may take 30-35 minutes, while muffins typically bake in 20-25 minutes.
Common Mistakes to Avoid
- Using Under-Ripe Bananas: This is the most critical mistake. Under-ripe bananas won’t provide enough sweetness or moisture, resulting in a drier, less flavorful loaf.
- Overmixing the Batter: This develops the gluten too much, leading to a tough and chewy banana bread. Mix just until the dry ingredients are incorporated.
- Underbaking: If the center is still wet, it will sink and be gummy. Always check with a skewer.
- Opening the Oven Door Too Often: This causes temperature fluctuations, which can prevent the bread from rising properly.
Storage & Meal Prep Tips
Homemade banana bread stores beautifully.
- Countertop: Store at room temperature, tightly wrapped in plastic wrap or in an airtight container, for up to 3-4 days. This helps maintain its moisture.
- Refrigerator: For extended freshness, store in the refrigerator for up to a week.
- Freezer: Wrap individual slices or the whole loaf tightly in plastic wrap, then aluminum foil. Freeze for up to 3 months. Thaw at room temperature or gently reheat in the microwave or oven.
This makes it an excellent candidate for meal prepping; bake a big batch and enjoy it throughout the week or freeze for later!
Conclusion
There’s an unparalleled joy in pulling a warm, aromatic loaf of Banana Bread from your oven. This guide provides all the tools and knowledge you need to consistently bake a moist, flavorful, and perfectly spiced treat. From selecting the ripest Banana to mastering the baking process, you’re now equipped to create a homemade masterpiece. We encourage you to try this recipe, experiment with your favorite variations, and share your delicious results. Happy baking!
FAQs
Q1: Can I use frozen bananas?
A1: Yes! Thaw them completely and drain any excess liquid before mashing. They will be very soft and perfect for baking.
Q2: My banana bread top is cracking. Is this normal?
A2: A slight crack down the middle is perfectly normal and a sign of a good rise. If it cracks excessively, your oven might be too hot or you might have overmixed the batter.
Q3: How can I make my banana bread extra moist?
A3: Ensure you’re using very ripe bananas. You can also add a tablespoon or two of sour cream or plain yogurt to the batter for added moisture and tenderness.
Q4: Can I reduce the sugar?
A4: Yes, you can reduce the sugar by ¼ to ⅓ cup, especially if your bananas are very ripe. Be aware that the texture might be slightly different.
Q5: How do I prevent the bottom of my banana bread from getting soggy?
A5: Make sure your loaf pan is properly greased and floured. Also, allow the bread to cool completely on a wire rack to allow air circulation.