Unlock the Secret to Restaurant-Quality Chicken Parmesan at Home
Ever wondered how to replicate that perfectly crispy yet tender, gloriously cheesy, and utterly satisfying Chicken Parmesan you crave from your favorite Italian restaurant? What if I told you that mastering this iconic dish in your own kitchen isn’t just achievable, but surprisingly rewarding? Beyond the simple joy of a delicious meal, preparing homemade Chicken Parmesan allows you to control the quality of your ingredients, tailor it to your dietary needs, and impress your loved ones with a culinary masterpiece. Forget bland store-bought options; today, we’re diving deep into crafting an authentic and flavorful version that will elevate your dinner table. Get ready to explore the nuances of this classic dish, from selecting the finest components to executing flawless techniques, ensuring your homemade rendition stands out. We’ll also touch upon versatile Chicken Parmesan Recipes to further inspire your culinary journey.
Ingredients & Kitchen Tools
Crafting the perfect Chicken Parmesan requires a thoughtful selection of ingredients and the right culinary arsenal.
Boneless, Skinless Chicken Breasts (4, about 6-8 oz each): Opt for fresh, high-quality chicken. Substitution: Chicken thighs for a richer, juicier result.*
- All-Purpose Flour (1/2 cup): For dredging, to create a foundational coating.
- Large Eggs (2): Beaten, act as a binder for the breadcrumbs.
Panko Breadcrumbs (1.5 cups): Essential for a superior crispy crust. Substitution: Regular breadcrumbs, though Panko provides better texture.*
Grated Parmesan Cheese (1/2 cup, plus more for topping): Freshly grated is always best for flavor. Clarification: Not the powdered kind in a canister.*
- Dried Italian Seasoning (1 tsp): A blend of herbs to infuse flavor into the coating.
- Garlic Powder (1/2 tsp): Adds aromatic depth.
- Salt and Black Pepper (to taste): Seasoning throughout each step is crucial.
Marinara Sauce (2 cups): High-quality jarred or homemade. Clarification: A good marinara is key, as it forms the base of the dish.*
Fresh Mozzarella Cheese (8 oz), sliced or shredded: Melts beautifully and provides that signature gooey stretch. Substitution: Low-moisture mozzarella for less water release.*
- Olive Oil (1/4 cup, or as needed): For pan-frying the chicken.
- Fresh Basil (for garnish): Adds a pop of color and fresh flavor.
Kitchen Tools:
- Shallow Dishes (3): For flour, egg wash, and breadcrumbs.
- Meat Mallet or Rolling Pin: To pound chicken breasts even.
- Large Skillet or Cast Iron Pan: For pan-frying.
- Baking Dish (9×13 inch): For baking the assembled dish.
- Tongs: For handling chicken.
- Wire Rack: For resting fried chicken (optional, but recommended for crispiness).
- Instant-Read Thermometer: To ensure chicken is cooked through (165°F / 74°C).
Prep Time & Cooking Schedule
- Prep Time: 25 minutes
- Cook Time: 30-35 minutes (Pan-frying: 10-15 mins; Baking: 20 mins)
- Resting Time: 5 minutes (after baking)
This recipe is perfectly designed for a delicious weeknight dinner or a weekend gathering. The frying and baking steps can be partially prepped ahead of time. You can bread the chicken a few hours in advance and keep it refrigerated, or even fry it a day prior and refrigerate, then reheat in the oven during the baking step.
Step-by-Step Instructions
1. Prepare the Chicken: Place a chicken breast between two sheets of plastic wrap. Using a meat mallet or rolling pin, pound it to an even 1/2-inch thickness. Repeat with the remaining chicken breasts. Even thickness ensures uniform cooking.
2. Set Up Breading Stations: In three shallow dishes, set up your dredging stations.
* Dish 1: Flour, salt, and pepper.
* Dish 2: Beaten eggs.
* Dish 3: Panko breadcrumbs, 1/2 cup grated Parmesan, Italian seasoning, garlic powder, salt, and pepper. Mix well.
3. Bread the Chicken: Dredge each chicken breast first in the flour, shaking off excess. Then dip in the egg wash, allowing excess to drip off. Finally, press firmly into the Panko mixture, ensuring it’s completely coated. This meticulous breading is crucial for a perfectly crispy Chicken Parmesan.
4. Pan-Fry the Chicken: Heat olive oil in a large skillet over medium-high heat until shimmering. Carefully place 2 chicken breasts in the hot oil (do not overcrowd the pan). Fry for 3-4 minutes per side, or until golden brown and cooked through (internal temperature of 165°F / 74°C). Remove to a wire rack to drain any excess oil. Repeat with remaining chicken.
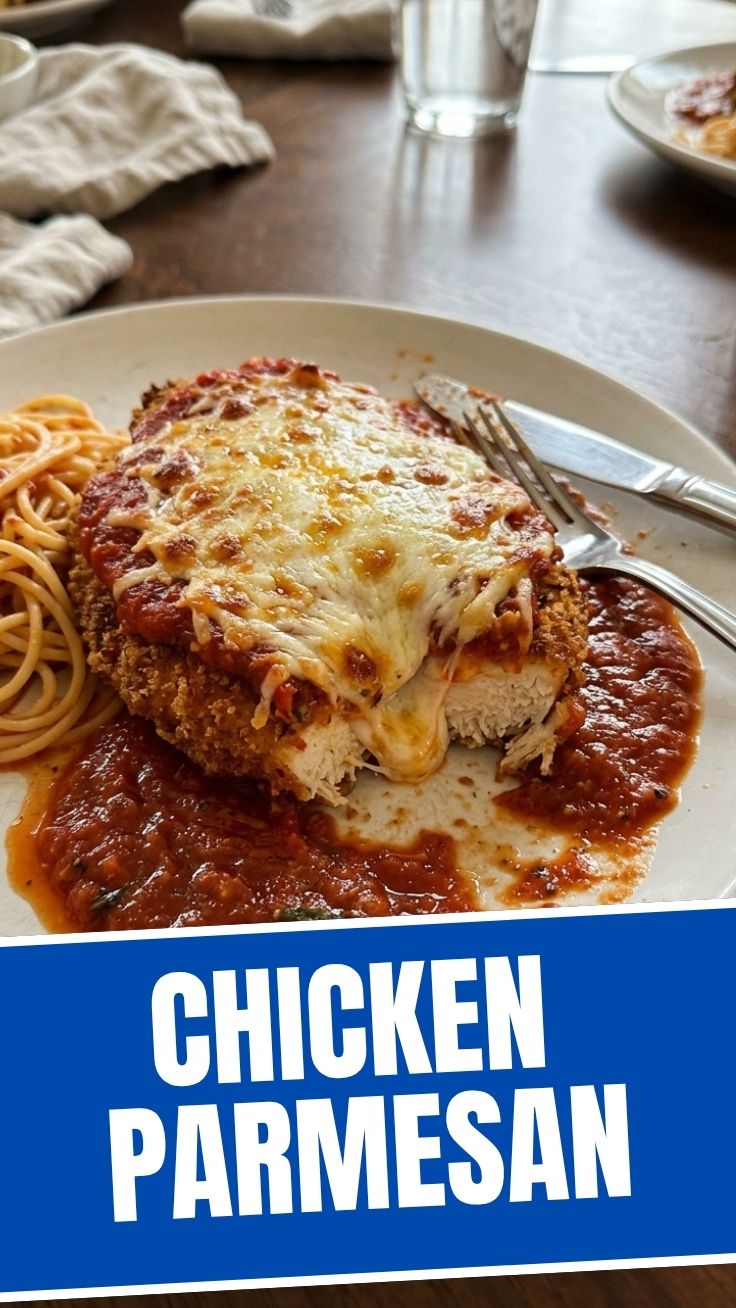
5. Assemble and Bake: Preheat oven to 400°F (200°C). Spread a thin layer of marinara sauce on the bottom of your baking dish. Arrange the pan-fried chicken breasts over the sauce. Top each piece generously with more marinara sauce, ensuring full coverage, then layer with slices or shredded fresh mozzarella. Sprinkle additional grated Parmesan cheese over the top. This assembly creates the classic layers many popular Chicken Parmesan Recipes utilize.
6. Bake: Bake for 15-20 minutes, or until the cheese is melted, bubbly, and lightly golden brown.
7. Serve: Let the dish rest for 5 minutes before serving. Garnish with fresh basil. Serve with pasta, a side salad, or crusty bread.
Nutritional Benefits & Advantages
This homemade Chicken Parmesan offers more than just incredible flavor. Lean chicken breast provides a significant source of protein, essential for muscle repair and satiety. The use of fresh mozzarella offers calcium for bone health, while the tomato-based marinara sauce brings antioxidants like lycopene, which has been linked to heart health benefits. By pan-frying rather than deep-frying, you can control the amount of oil used, making it a healthier alternative to many restaurant versions.
Tips, Variations & Cooking Advice
- Spicy Kick: Add a pinch of red pepper flakes to your breadcrumb mixture or marinara sauce for a subtle heat.
- Herbal Boost: Incorporate fresh chopped parsley or oregano into the breadcrumb mixture for more aromatic depth.
- Gluten-Free Version: Use gluten-free flour and gluten-free breadcrumbs. Ensure your marinara is also gluten-free.
- Dairy-Free Option: While challenging for a dish built on cheese, you can explore plant-based mozzarella and Parmesan alternatives.
- Baked (Lower Fat) Version: Instead of pan-frying, bake the breaded chicken directly in the oven at 425°F (220°C) for 18-22 minutes, flipping halfway, until golden and cooked through. Then proceed with the assembly and final bake.
- Make it a Casserole: Cube the cooked chicken and layer it with pasta and extra marinara for a comforting Chicken Parmesan Recipes bake.
Common Mistakes to Avoid
- Overcrowding the Pan: Frying too many chicken pieces at once lowers the oil temperature, leading to soggy, oily chicken instead of a crispy crust. Fry in batches.
- Undercooked Chicken: Always use an instant-read thermometer to ensure the chicken reaches 165°F (74°C) to prevent foodborne illness.
- Too Much Sauce: While tempting, excessive marinara can make the breading soggy. Use a moderate amount to coat the chicken without drowning it.
- Using Pre-Shredded Cheese: Pre-shredded cheeses often contain anti-caking agents that can affect how they melt. Freshly grated or sliced mozzarella melts much more smoothly.
- Skipping the Pounding: Pounding the chicken ensures it cooks evenly and doesn’t dry out.
Storage & Meal Prep Tips
Leftover Chicken Parmesan can be stored in an airtight container in the refrigerator for up to 3-4 days. To reheat, place individual portions in the oven at 350°F (175°C) for 15-20 minutes, or until heated through, to help maintain some crispiness. Microwaving is faster but will result in a softer breading. This dish also freezes well; wrap individual portions tightly in plastic wrap and then in foil, and store for up to 2-3 months. Thaw in the refrigerator overnight before reheating in the oven.
Conclusion
There you have it – the definitive guide to crafting an extraordinary Chicken Parmesan that rivals any restaurant’s offering. By following these steps, you’re not just making a meal; you’re creating an experience. The crispy exterior, the juicy chicken, and the melty, flavorful cheese all come together in a symphony of taste that celebrates the heart of Italian-American cuisine. Don’t be afraid to experiment with different Chicken Parmesan Recipes and make this classic dish truly your own. Give this recipe a try, share your culinary triumphs in the comments below, and prepare to be amazed by the deliciousness you can create right in your own kitchen!
FAQs
Q1: Can I use different types of breadcrumbs?
A1: While Panko is recommended for superior crispiness, you can certainly use regular fine breadcrumbs, or even a mix for varied texture. For a gluten-free option, use gluten-free breadcrumbs.
Q2: My chicken often turns out soggy. How can I prevent this?
A2: Ensure your oil is hot enough before frying, don’t overcrowd the pan, and place the fried chicken on a wire rack to drain excess oil. Also, avoid using too much marinara when assembling.
Q3: Can I make this dish ahead of time?
A3: Yes! You can bread and pan-fry the chicken ahead of time and refrigerate it. Then, simply assemble and bake when ready to serve. For best results, avoid fully assembling with sauce and cheese until just before baking to prevent sogginess.
Q4: What’s the best way to serve Chicken Parmesan?
A4: Traditionally, it’s served with pasta (like spaghetti or penne), a simple green salad, or crusty garlic bread. The subtle flavors of a side salad perfectly complement the richness of the dish.
Q5: How can I adjust the seasoning for a richer flavor profile?
A5: Boost the flavor by adding onion powder, dried oregano, or a pinch of red pepper flakes to your breadcrumb mixture. You can also infuse your olive oil with garlic cloves before frying for an extra aromatic kick.