The Quintessential American Dessert: Mastering the Art of Apple Pie (Classic)
Is there any dessert more comforting, more evocative of home, or more deeply ingrained in Americana than a perfectly baked apple pie? The aroma alone — a symphony of cinnamon, sweet apples, and buttery crust — is enough to transport you to cherished memories. While store-bought versions offer convenience, there’s an unparalleled satisfaction in creating your own, especially when it comes to a true Apple Pie (Classic). It’s a culinary journey that rewards you not just with a delicious treat, but with the pride of crafting something truly special, a skill that brings joy for generations. Today, we’re diving deep into making a scrumptious Apple Pie (Classic), a timeless dessert that will impress everyone at your table. This comprehensive guide will walk you through every step, ensuring your homemade creation rivals even the best Grandma’s apple pie recipe.
Ingredients & Kitchen Tools
- Apples (6-8 medium, about 3 lbs): A mix of tart (Granny Smith, Braeburn) and sweet (Honeycrisp, Fuji) varieties offers the best flavor and texture balance. Granny Smith holds its shape beautifully.
- All-Purpose Flour (1/2 cup for filling, 2 ½ cups for crust): Thickens the filling and forms the base of our flaky crust.
- Granulated Sugar (3/4 to 1 cup, adjust to apple sweetness): Sweetens the filling. Less if your apples are naturally sweet.
- Brown Sugar (1/4 cup, packed): Adds molasses notes and depth to the filling.
- Cinnamon (1 ½ teaspoons): The classic apple pie spice, essential for warmth and aroma.
- Nutmeg (1/2 teaspoon, freshly grated if possible): Enhances the warming spices.
- Salt (1/4 teaspoon for filling, 1 teaspoon for crust): Balances sweetness and brings out flavors.
- Lemon Juice (1 tablespoon): Brightens the apple flavor and prevents browning.
- Unsalted Butter (1/2 cup / 1 stick, cold and cubed for crust, 2 tablespoons for filling): Creates flakiness in the crust and enriches the filling.
- Ice Water (1/2 to 3/4 cup for crust): Essential for a tender, flaky pie dough. Keep it very cold!
- Egg (1 large, for egg wash, optional): Gives the crust a golden, glossy finish.
- Turbinado Sugar (1 tablespoon, for sprinkling, optional): Adds sparkle and a slight crunch to the top crust.
- 9-inch Pie Dish: Standard size for pies.
- Large Mixing Bowls: For tossing apples and mixing dough.
- Pastry Blender or Food Processor: For cutting butter into flour for the crust.
- Rolling Pin: To roll out the pie dough.
- Parchment Paper or Silicone Mat: Prevents sticking when rolling dough.
- Sharp Knife or Apple Slicer/Corer: For preparing apples.
- Measuring Cups and Spoons: For accurate ingredient portions.
- Whisk: For combining dry ingredients.
Prep Time & Cooking Schedule
- Crust Prep Time: 20 minutes (plus 30-60 minutes chilling)
- Apple Filling Prep Time: 15 minutes
- Assembly Time: 20-30 minutes
- Bake Time: 50-60 minutes
- Resting Time: 2-4 hours (crucial for filling to set and flavors to meld)
Total active time: Approximately 1 hour 15 minutes. Total time (including chilling and resting): Approximately 4-6 hours. Plan ahead! The chilling of the dough is non-negotiable for a flaky crust, and allowing the pie to cool completely ensures a perfectly set filling and no soupy slices.
Step-by-Step Instructions
1. Prepare the Pie Crust: In a large bowl, whisk together 2 ½ cups flour, 1 teaspoon salt, and 1 tablespoon granulated sugar. Add the cold, cubed butter. Using a pastry blender or your fingertips (or a food processor pulsing), cut the butter into the flour until the mixture resembles coarse meal with some pea-sized pieces of butter remaining. Gradually add ice water, 1 tablespoon at a time, mixing until the dough just comes together. Be careful not to overmix! Divide the dough in half, flatten into discs, wrap in plastic, and refrigerate for at least 30 minutes, or up to 2 days. This chilling step is vital for a tender, flaky crust.
2. Prepare the Apple Filling: Peel, core, and slice your apples into roughly 1/4-inch thick pieces. In a large bowl, toss the apple slices with 1 tablespoon lemon juice. In a separate small bowl, whisk together the 1/2 cup flour, 3/4 to 1 cup granulated sugar, 1/4 cup brown sugar, 1 ½ teaspoons cinnamon, 1/2 teaspoon nutmeg, and 1/4 teaspoon salt. Add the dry mixture to the apples and toss gently until the apples are evenly coated. Set aside.
3. Assemble the Pie: Preheat your oven to 425°F (220°C). On a lightly floured surface, roll one dough disc into a 12-inch circle. Carefully transfer it to your 9-inch pie dish, pressing it gently into the bottom and up the sides. Trim any excess dough, leaving about a 1/2-inch overhang.
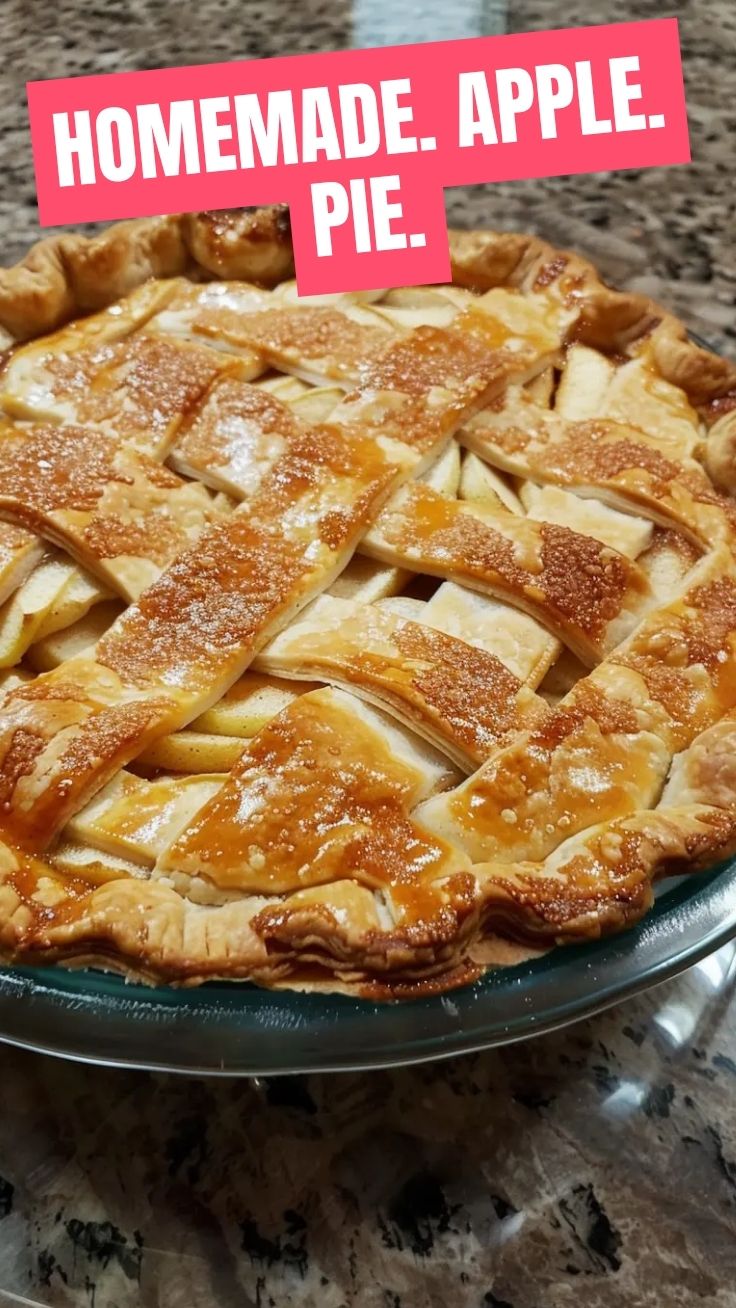
4. Fill and Top: Pour the apple filling into the pie crust, mounding it slightly in the center. Dot the top of the apples with the 2 tablespoons of butter, cut into small pieces. Roll out the second dough disc for the top crust (a lattice top is beautiful if you’re feeling adventurous!). Place the top crust over the apples. Trim the edges and crimp or flute them to seal the pie. If desired, cut a few slits in the top crust (if not latticed) to allow steam to escape. For a golden sheen, brush the top with an egg wash (1 egg beaten with 1 tablespoon water) and sprinkle with turbinado sugar.
5. Bake the Pie: Place the pie on a baking sheet to catch any drips. Bake for 15 minutes at 425°F (220°C). Reduce the oven temperature to 375°F (190°C) and continue baking for another 35-45 minutes, or until the crust is golden brown and the filling is bubbling. If the crust browns too quickly, loosely tent the pie with aluminum foil.
6. Cool Completely: This is perhaps the most crucial step for a beautiful slice. Let your homemade Apple Pie (Classic) cool on a wire rack for at least 2-4 hours before slicing. This allows the filling to set properly, preventing a soupy mess. Patience here is a virtue that perfects your slice of Grandma’s apple pie recipe.
Nutritional Benefits & Advantages
While often seen as an indulgence, a homemade apple pie can offer several nutritional advantages. Apples are rich in dietary fiber, which aids digestion and promotes satiety. They also provide vitamin C and various antioxidants. Using whole, fresh ingredients allows you to control sugar content, potentially reducing it for a healthier version. The spices, cinnamon and nutmeg, are known for their anti-inflammatory properties and ability to help regulate blood sugar. When prepared thoughtfully, this classic dessert becomes not just a treat, but a source of beneficial nutrients.
Tips, Variations & Cooking Advice
- Apple Choice is Key: Don’t be afraid to experiment with different apple varieties! A blend usually yields the best results, balancing sweetness and tartness.
- Spice It Up: Beyond cinnamon and nutmeg, consider adding a pinch of cloves, ginger, or cardamom for a more complex flavor profile.
- Crust Variations: For a richer crust, you can substitute a portion of the all-purpose flour with whole wheat pastry flour. For a lighter crust, some recipes use shortening in combination with butter.
- Gluten-Free Option: Use a high-quality gluten-free all-purpose flour blend (one designed for baking) for the crust. Ensure your chosen blend contains xanthan gum or add ½ teaspoon per cup of flour.
- Dairy-Free Option: Use an unsalted, plant-based butter alternative that’s suitable for baking in both the crust and the filling.
- Thicker Filling: If you prefer an even thicker filling, increase the flour in the apple mixture by 1-2 tablespoons, or add 1 teaspoon of cornstarch.
- Pie Protector: Invest in a pie crust shield (or create one from foil) to prevent the edges from browning too quickly during baking.
Common Mistakes to Avoid
- Overworking the Dough: This leads to a tough, rather than flaky, crust. Mix until just combined and handle minimally.
- Warm Butter in Crust: The key to a flaky crust is cold butter. If the butter melts into the flour too much, you’ll end up with a dense, cookie-like crust.
- Not Chilling the Dough: Skipping refrigeration means the butter will melt too quickly in the oven, hindering flakiness.
- Not Slicing Apples Uniformly: Unevenly sized apple slices will cook at different rates, leading to some crunchy and some mushy pieces.
- Cutting into a Hot Pie: As tempting as it is, cutting into a hot pie before the filling has set will result in a runny, soupy mess. Patience is crucial!
- Under-baking: An under-baked pie will have a pale, doughy bottom crust and a runny filling. Ensure the bottom is golden and the filling is bubbling.
Storage & Meal Prep Tips
Your freshly baked Apple Pie (Classic) can be stored at room temperature, loosely covered, for up to 2 days. If you live in a warm climate or for longer storage, refrigerate for up to 4-5 days. For reheating, cover individual slices loosely with foil and warm in a preheated oven at 300°F (150°C) for 15-20 minutes, or until warmed through. This helps to re-crisp the crust.
For meal prep, you can make the pie crust dough ahead of time and store it in the refrigerator for up to 2 days, or freeze for up to 3 months. The apple filling can be prepared a day in advance and stored in the refrigerator, but it’s best assembled with the crust just before baking. Baked pies can also be frozen for up to 3 months; wrap tightly in plastic wrap and then foil. Thaw overnight in the refrigerator and reheat as described above.
Conclusion
Creating a homemade Apple Pie (Classic) is more than just baking; it’s an act of love, a connection to culinary heritage, and a guarantee of pure, unadulterated pleasure. With fresh, vibrant apples nestled in a perfectly flaky crust, spiced just right, you’re not just making a dessert – you’re crafting an experience. We hope this guide empowers you to bake your most delightful Grandma’s apple pie recipe yet. Don’t hesitate to share your creations and any personal twists you discovered in the comments below! Happy baking!
FAQs
Q: Can I use pre-made pie crust for this recipe?
A: Yes, you can. Two store-bought 9-inch pie crusts will work. However, the scratch-made crust in this recipe offers a superior flavor and texture that is truly worth the extra effort.
Q: What if my pie crust edges are browning too fast?
A: If you notice the edges are browning more quickly than the rest of the pie, simply cover them loosely with aluminum foil or a pie crust shield for the remainder of the baking time.
Q: How do I know when the apples are cooked through?
A: The best way to check is to carefully insert a thin, sharp knife through a vent in the top crust into the apple filling. If the knife slides in easily with minimal resistance, the apples are tender. The filling should also be visibly bubbling.
Q: Can I reduce the amount of sugar in the filling?
A: Absolutely! The amount of sugar can be adjusted based on the sweetness of your apples and your personal preference. Start with the lower end of the recommended range (3/4 cup granulated sugar) and taste a raw apple slice to gauge its natural sweetness.
Q: My pie filling is still runny after cooling. What went wrong?
A: A runny filling is usually due to two reasons: not enough thickener (flour/cornstarch) or, more commonly, not allowing the pie to cool and set long enough. The starches in the flour need time to gelatinize and firm up, which only happens as the pie cools. Resist the urge to cut it too soon!