Master the Art of Homemade Red Velvet Cake: Your Guide to a Velvety Dream
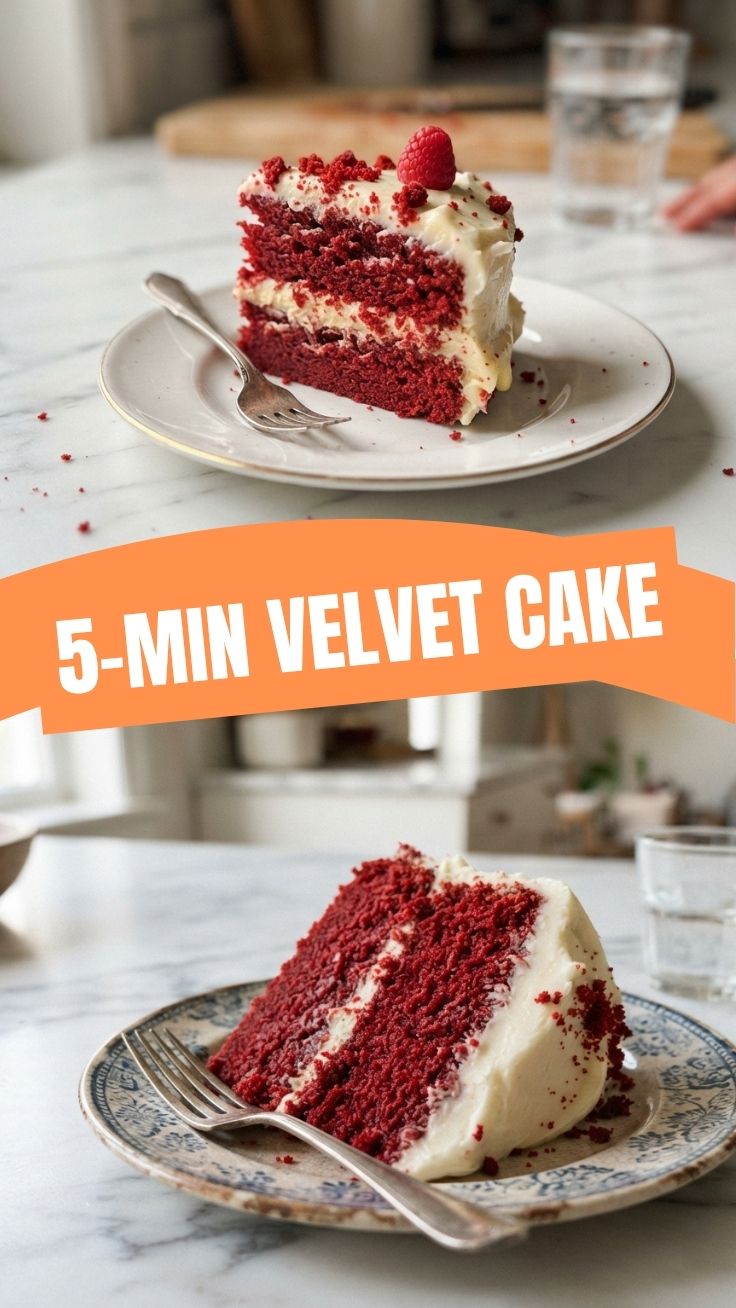
Have you ever wondered what makes a truly exceptional Red Velvet Cake? Beyond its striking crimson hue, it’s the perfect balance of tender crumb, subtle cocoa, and that irresistible tangy topping. While store-bought versions are convenient, there’s an undeniable magic in creating this classic dessert from scratch. Not only do you get to control the quality of ingredients, but the process itself is a delightful culinary journey. Picture sinking your fork into a slice, each bite a symphony of flavors crowned with a luscious cream cheese frosting. This comprehensive guide will equip you with everything you need to bake a show-stopping Red Velvet Cake that will impress everyone.
Ingredients & Kitchen Tools
Crafting the perfect Red Velvet Cake requires a specific set of high-quality ingredients and the right tools. Here’s what you’ll need:
Wet Ingredients:
- 2 cups buttermilk: Essential for the cake’s tender texture and slight tang. You can make a substitute by adding 2 tablespoons of white vinegar or lemon juice to 2 cups of regular milk and letting it sit for 5 minutes.
- ½ cup unsalted butter, softened: Crucial for richness and moisture. Ensure it’s at room temperature for smooth creaming.
- 2 large eggs, at room temperature: Binds the ingredients and adds richness.
- 1 tablespoon vanilla extract: Enhances the overall flavor profile.
- 2 tablespoons red food coloring: Achieves the iconic vibrant red hue. Gel food coloring provides a more intense color with less liquid.
Dry Ingredients:
- 2 ½ cups all-purpose flour: The base of our cake’s structure.
- 1 ½ cups granulated sugar: Sweetens and tenderizes the cake.
- 1 teaspoon baking soda: Our primary leavening agent.
- 1 teaspoon salt: Balances sweetness and enhances other flavors.
- 2 tablespoons unsweetened cocoa powder: Provides the subtle chocolatey notes characteristic of Red Velvet.
For the Cream Cheese Frosting:
- 16 oz cream cheese, softened: The star of the frosting, providing its signature tang and creaminess. Ensure it’s full-fat for the best texture.
- ½ cup unsalted butter, softened: Adds richness and helps stabilize the frosting.
- 4 cups powdered sugar, sifted: Sweetens the frosting and creates a smooth consistency. Sifting prevents lumps.
- 1 teaspoon vanilla extract: Enhances the frosting’s flavor.
Kitchen Tools:
- Two 9-inch round cake pans: Standard size for layer cakes.
- Parchment paper: Prevents sticking and ensures easy release.
- Electric mixer (stand or hand-held): For efficiently creaming butter and sugar and mixing the batter.
- Large mixing bowls: For combining wet and dry ingredients.
- Whisk: For dry ingredients.
- Rubber spatula: For scraping down bowls and folding.
- Measuring cups and spoons: For accurate ingredient measurement.
- Wire rack: For cooling the cakes completely.
- Offset spatula or butter knife: For spreading frosting.
Prep Time & Cooking Schedule
Planning ahead is key to a perfectly baked cake. Here’s a breakdown of the time needed:
- Prep Time: 30 minutes. This includes gathering ingredients, softening butter and cream cheese, measuring, and preparing your cake pans.
- Cook Time: 25-30 minutes per layer. Baking time may vary slightly depending on your oven.
- Cooling Time: 1-2 hours (minimum). It’s crucial for the cake layers to cool completely before frosting to prevent the frosting from melting and sliding. You can even bake the layers the day before and wrap them tightly for overnight storage at room temperature.
- Resting Time (frosted cake): 30 minutes in the refrigerator before serving. This allows the frosting to firm up slightly and the flavors to meld.
Step-by-Step Instructions
Baking a beautiful Red Velvet Cake is a rewarding experience. Follow these steps for success:
1. Preheat and Prep: Preheat your oven to 350°F (175°C). Grease and flour two 9-inch round cake pans, then line the bottoms with parchment paper. This ensures easy removal.
2. Combine Dry Ingredients: In a large bowl, whisk together the all-purpose flour, granulated sugar, baking soda, salt, and cocoa powder. Make sure there are no lumps.
3. Cream Wet Ingredients: In a separate large bowl, using an electric mixer, cream together the softened unsalted butter and granulated sugar until light and fluffy. This can take 3-5 minutes. Beat in the eggs one at a time, then add the vanilla extract and red food coloring. Mix until well combined and vibrant.
4. Alternate Wet and Dry: Gradually add the dry ingredients to the wet ingredients, alternating with the buttermilk, beginning and ending with the dry ingredients. Mix on low speed until just combined, being careful not to overmix, as this can lead to a tough cake. Scrape down the sides of the bowl as needed. The final batter will be thick and rich.
5. Bake: Divide the batter evenly between the prepared cake pans. Bake for 25-30 minutes, or until a wooden skewer inserted into the center comes out clean.
6. Cool: Let the cakes cool in their pans on a wire rack for 10-15 minutes before inverting them onto the wire rack to cool completely.
7. Prepare the cream cheese frosting: While the cakes cool, beat the softened cream cheese and butter together with an electric mixer until smooth and creamy. Gradually add the sifted powdered sugar, ½ cup at a time, mixing until fully incorporated after each addition. Stir in the vanilla extract. Beat on high speed for 1-2 minutes until light and fluffy.
8. Assemble and Frost: Once the cake layers are completely cool, place one layer on your serving plate or cake stand. Spread a generous layer of cream cheese frosting over the top. Place the second cake layer on top and frost the top and sides of the cake.
9. Chill and Serve: Refrigerate the frosted cake for at least 30 minutes to allow the frosting to set. Slice and serve!
Nutritional Benefits & Advantages
While a treat, Red Velvet Cake does offer some interesting components. Buttermilk contributes probiotics, which can support gut health. Cocoa powder is rich in antioxidants, specifically flavonoids, which are linked to various health benefits, including heart health. The eggs provide protein and essential vitamins. Making it at home allows you to choose organic ingredients, reduce artificial additives, and even experiment with whole wheat flour for added fiber, though this will alter the texture of a traditional Red Velvet.
Tips, Variations & Cooking Advice
- For a deeper cocoa flavor: Use Dutch-processed cocoa powder as it’s less acidic and provides a richer, darker chocolate note.
- Buttermilk Substitute: If you don’t have buttermilk, add 1 tablespoon of white vinegar or lemon juice to 1 cup of regular milk and let it sit for 5-10 minutes.
- Moist Cake: Don’t overbake! A slightly underbaked cake is better than an overbaked, dry one. Use a toothpick or skewer to check for doneness.
- Flavor Variations: Add a hint of almond extract to the batter for a unique twist. You can also incorporate chocolate chips into the batter for an extra chocolate boost.
- Gluten-Free: Substitute all-purpose flour with a 1:1 gluten-free baking blend that contains xanthan gum.
- Dairy-Free: Use dairy-free buttermilk (made with non-dairy milk and vinegar), vegan butter, and a vegan cream cheese alternative for the frosting.
Common Mistakes to Avoid
- Overmixing the Batter: This develops gluten, leading to a tough and dry cake. Mix until just combined.
- Not Using Room Temperature Ingredients: Cold butter and eggs don’t cream properly, affecting the cake’s texture and rise.
- Over-baking: Leads to a dry, crumbly cake. Keep an eye on the oven and use the skewer test.
- Frosting Warm Cakes: The frosting will melt and slide right off. Ensure your cake layers are completely cool.
- Not Sifting Powdered Sugar: Results in lumpy frosting. Sifting ensures a smooth, creamy consistency.
Storage & Meal Prep Tips
Leftover Red Velvet Cake, while rare, can be stored properly to maintain its deliciousness.
- Refrigeration: Store frosted cake in an airtight container in the refrigerator for up to 3-4 days. The frosting contains dairy, so refrigeration is essential.
- Freezing Cake Layers: Unfrosted cake layers can be wrapped tightly in plastic wrap, then foil, and frozen for up to 2-3 months. Thaw in the refrigerator overnight before frosting.
- Freezing Frosted Cake: While possible, the texture of the frosting can change slightly. Wrap individual slices tightly in plastic wrap and then foil. Thaw in the refrigerator.
- Reheating: Red Velvet Cake is best served at room temperature. Take it out of the refrigerator 30-60 minutes before serving.
Conclusion
Baking a homemade Red Velvet Cake from scratch is a rewarding experience that yields a dessert far superior to any store-bought alternative. With its decadent layers and tangy cream cheese frosting, it’s a timeless classic perfect for any occasion. By following these detailed instructions and tips, you’re well on your way to creating a culinary masterpiece that will surely become a favorite. Don’t be afraid to experiment with the variations, and most importantly, enjoy the process of bringing this vibrant and flavorful treat to life!
FAQs
1. Can I use liquid food coloring instead of gel?
Yes, but you might need to use more liquid food coloring to achieve the desired intense red color. Gel food coloring provides a more concentrated pigment.
2. My cake turned out dense. What went wrong?
Most likely, you overmixed the batter, which develops too much gluten, leading to a dense and tough cake. Mix only until the ingredients are just combined.
3. How can I make my cake layers level for easier frosting?
You can use specialized baking strips that wrap around the cake pans to help them bake more evenly. Alternatively, once cooled, carefully trim the domed tops of the layers with a serrated knife to create flat surfaces.
4. Can I make this cake into cupcakes?
Absolutely! Pour the batter into cupcake liners, filling them about two-thirds full. Bake for 18-22 minutes, or until a toothpick comes out clean. Adjust cooking time accordingly.
5. How far in advance can I make the cream cheese frosting?
You can prepare the cream cheese frosting up to 2-3 days in advance. Store it in an airtight container in the refrigerator. Before using, let it come to room temperature and re-whip it with an electric mixer until fluffy again.