Chewy, Spiced Perfection: Unlocking the Magic of Homemade Molasses Cookies
Ever found yourself craving that heartwarming aroma and irresistible chewiness of a perfect batch of cookies, only to be disappointed by store-bought blandness? If you’re yearning for a baking experience that truly delivers, you’ve landed in the right place. Today, we’re diving deep into the delightful world of Molasses Cookies, a classic that promises to fill your home with an intoxicating fragrance and your palate with unparalleled joy. Preparing these at home isn’t just about crafting a dessert; it’s about creating memories, customizing flavors, and enjoying a treat that’s far superior to anything you’ll find pre-packaged. Get ready to master a Molasses cookie recipe that will become a staple in your kitchen.
Ingredients & Kitchen Tools
Gather your culinary arsenal; precision in preparation leads to perfection in taste!
- All-Purpose Flour (2 ¾ cups): The backbone of our cookies. Sift for best results to avoid lumps.
- Ground Ginger (2 teaspoons): Essential for that signature zing. Don’s skimp on this!
- Ground Cinnamon (1 ½ teaspoons): Adds warmth and aromatic complexity.
- Ground Cloves (½ teaspoon): A hint of spice that deepens the flavor profile.
- Baking Soda (2 teaspoons): Our leavening agent, ensuring a soft, chewy texture.
- Salt (¼ teaspoon): Enhances all the other flavors.
- Unsalted Butter (¾ cup / 1 ½ sticks), softened: Provides richness and tender crumb. Ensure it’s at room temperature for easy creaming.
- Granulated Sugar (½ cup): For sweetness and to create a crisp exterior when rolled.
- Brown Sugar, packed (½ cup): Adds moisture and a caramel-like depth of flavor.
- Large Egg (1), room temperature: Binds ingredients and adds richness.
- Molasses (½ cup): The star ingredient! Use unsulphured molasses for the best flavor (not blackstrap, which is too bitter for baking).
- Extra Granulated Sugar (for rolling): To achieve that delightful sugary crust.
Kitchen Tools:
- Large Mixing Bowls (2): One for dry, one for wet ingredients.
- Electric Mixer (stand or hand-held): Makes creaming butter and sugar a breeze.
- Whisk: For combining dry ingredients evenly.
- Spatula: For scraping bowls and folding.
- Measuring Cups & Spoons: Accuracy is key in baking!
- Baking Sheets: Preferably heavy-duty, to prevent burning.
- Parchment Paper or Silicone Baking Mats: For easy cleanup and prevents sticking.
- Wire Cooling Rack: Essential for preventing soggy bottoms.
Prep Time & Cooking Schedule
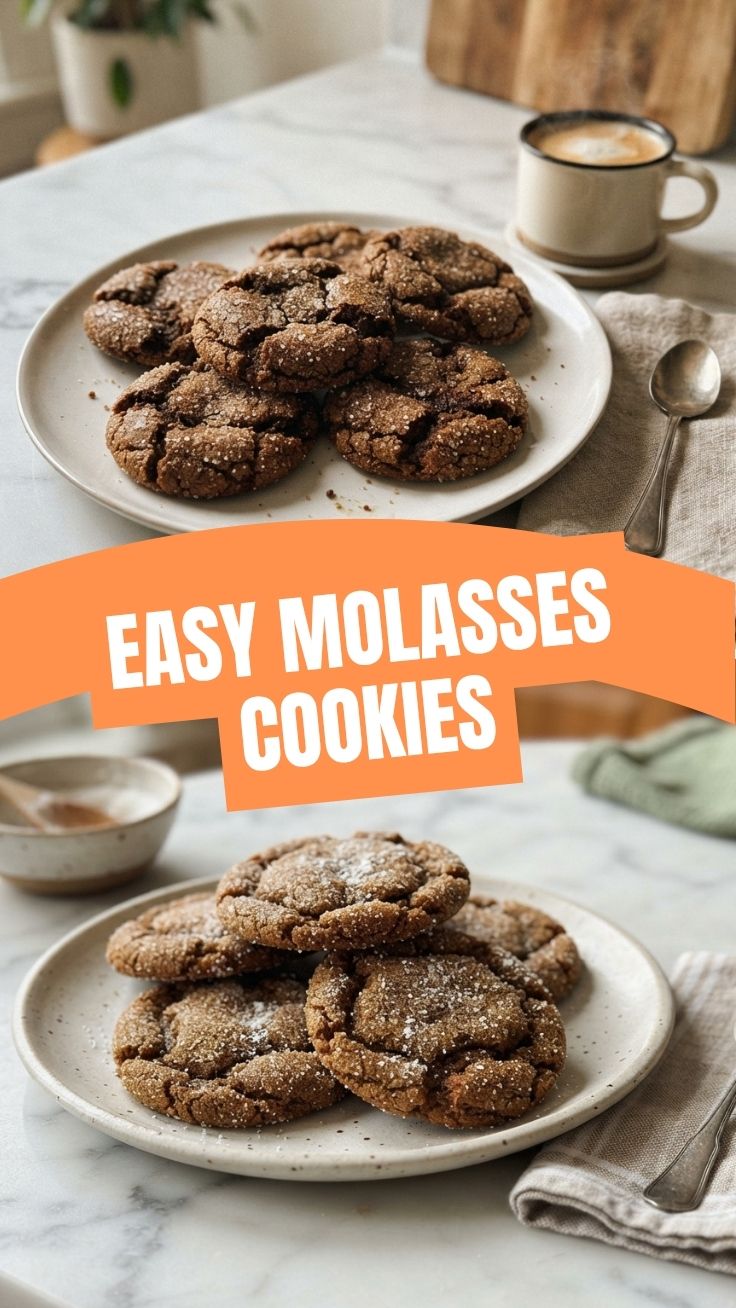
Good things come to those who plan! Here’s how to schedule your baking adventure:
- Prep Time: 20 minutes (plus 30 minutes chilling time)
- Cook Time: 8-10 minutes per batch
- Resting Time: 5 minutes on the baking sheet, then fully cool on a wire rack.
Aim to start at least an hour before you want to serve, accounting for the chill time which is crucial for preventing spread and ensuring optimal texture. The dough also benefits from an overnight chill if you’re planning ahead!
Step-by-Step Instructions
Let’s turn those ingredients into golden, chewy masterpieces!
1. Combine Dry Ingredients: In a medium bowl, whisk together the flour, ground ginger, ground cinnamon, ground cloves, baking soda, and salt. Set aside.
2. Cream Wet Ingredients: In a large bowl, using an electric mixer, cream together the softened unsalted butter, granulated sugar, and brown sugar until light and fluffy (about 2-3 minutes).
3. Add Egg & Molasses: Beat in the large egg until fully incorporated, then add the molasses. Mix until smooth, scraping down the sides of the bowl as needed. The mixture might look a bit curdled, but that’s okay!
4. Combine Wet and Dry: Gradually add the dry ingredients to the wet ingredients, mixing on low speed until just combined. Be careful not to overmix; overmixing can lead to tough cookies.
5. Chill the Dough: Cover the dough with plastic wrap and refrigerate for at least 30 minutes. This step is vital for preventing the cookies from spreading too much and achieving that perfect chewiness. This chilling process significantly enhances the structure of your Molasses Cookies.
6. Preheat & Prepare: Preheat your oven to 375°F (190°C). Line baking sheets with parchment paper or silicone mats. Place extra granulated sugar in a shallow bowl for rolling.
7. Scoop & Roll: Scoop rounded tablespoons of dough and roll them completely in the granulated sugar until coated. Place them about 2 inches apart on the prepared baking sheets. This simple step is key to a beautiful and delicious Molasses cookie recipe.
8. Bake: Bake for 8-10 minutes, or until the edges are set and lightly browned, but the centers still look soft. They will continue to set as they cool. Do not overbake!
9. Cool: Let the cookies cool on the baking sheet for 5 minutes before transferring them to a wire rack to cool completely.
Nutritional Benefits & Advantages
Beyond their delicious taste, these cookies offer some surprising benefits. Molasses, especially blackstrap (though we use unsulphured for flavor here), is a good source of iron, calcium, magnesium, and potassium. While these are treats, not health food, the use of wholesome spices like ginger and cinnamon also brings anti-inflammatory and antioxidant properties to the table. Plus, homemade means you control the ingredients, avoiding artificial flavors and preservatives often found in commercial baked goods.
Tips, Variations & Cooking Advice
- Spice It Up: For an extra kick, add a pinch of black pepper or a dash of cardamom to the dry ingredients.
- Chewier Cookies: For an even chewier cookie, slightly underbake them. The residual heat will continue to cook them as they cool.
- Gluten-Free Option: Substitute regular flour with a 1:1 gluten-free baking flour blend.
- Darker Molasses: If you prefer a more robust, slightly bitter flavor, you can use a darker molasses, but adjust sugar if needed as darker molasses has less sweetness.
- Orange Zest: A teaspoon of fresh orange zest can add a delightful citrus note that brightens the spice profile.
Common Mistakes to Avoid
- Overmixing the Dough: Leads to tough cookies. Mix only until just combined.
- Not Chilling the Dough: Results in flat, spread-out cookies. Don’t skip the chill time!
- Overbaking: Turns chewy cookies into hard, dry ones. Pull them from the oven when the centers still look slightly soft.
- Using Blackstrap Molasses: Unless you specifically want a very strong, bitter flavor, use unsulphured molasses for a balanced taste.
- Crowding the Baking Sheet: Give your cookies space to spread slightly and cook evenly.
Storage & Meal Prep Tips
Storage: Store cooled Molasses Cookies in an airtight container at room temperature for up to 5-7 days. To keep them extra soft, you can add half a slice of bread to the container.
Freezing Dough: You can freeze scooped, rolled cookie dough balls on a baking sheet until solid, then transfer them to a freezer-safe bag for up to 3 months. Bake from frozen, adding an extra minute or two to the baking time.
Freezing Baked Cookies: Fully baked and cooled cookies can be frozen in a freezer-safe container or bag for up to 3 months. Thaw at room temperature.
Conclusion
Baking Molasses Cookies at home is a richly rewarding experience, transforming simple ingredients into an extraordinary treat. With this comprehensive guide and a little patience, you’ll master this Molasses cookie recipe, creating cookies that are perfectly spiced, delightfully chewy, and infused with that unmistakable warmth of homemade goodness. We encourage you to try this recipe and share your results! What are your favorite spices to add? Let us know in the comments below.
FAQs
Q1: Why are my molasses cookies flat?
A1: Flat cookies are often due to using butter that’s too warm, not chilling the dough enough, or using too much leavening agent. Ensure your butter is softened but still cool to the touch, and don’t skip the refrigeration step.
Q2: Can I substitute honey for molasses?
A2: While honey can add sweetness, it won’t provide the same deep, caramel-like flavor and color that molasses imparts. The texture will also be different, so it’s not recommended if you want the classic molasses cookie experience.
Q3: How do I prevent my cookies from becoming hard?
A3: The key is not to overbake them! Pull them from the oven when the edges are set but the centers still look slightly soft. They will firm up as they cool on the baking sheet.
Q4: Can I make the dough ahead of time?
A4: Absolutely! The dough can be made up to 2-3 days in advance and stored in the refrigerator, tightly covered. In fact, longer chilling can sometimes enhance the flavors.
Q5: What’s the difference between unsulphured and blackstrap molasses?
A5: Unsulphured molasses is made from mature sugarcane and has a milder, sweeter flavor. Blackstrap molasses is a byproduct of the third boiling of sugar syrup, resulting in a very dark, bitter, and nutrient-rich molasses primarily used for medicinal purposes or in savory dishes, generally too strong for most cookie recipes.