The Ultimate Homemade Green Bean Casserole: A Timeless Classic Perfected
Ever wondered how to truly elevate a classic comfort food to gourmet status right in your own kitchen? Preparing dishes at home not only guarantees fresh ingredients but also allows for personalized touches that transform good into unforgettable. Today, we’re diving deep into the art of crafting the perfect Green Bean Casserole – a beloved fixture on holiday tables and family dinners alike. We’ll explore how to make this iconic side dish shine, ensuring every bite is rich, creamy, and bursting with flavor, centered around fresh, vibrant green beans. Get ready to impress!
Ingredients & Kitchen Tools
Crafting the perfect casserole requires specific, high-quality ingredients and the right tools.
Ingredients:
- 2 lbs fresh green beans, trimmed and snapped: Freshness is key for crisp texture and vibrant flavor.
- 10.5 oz can cream of mushroom soup (condensed): The classic creamy base; consider a low-sodium or homemade version for better control.
- 1 cup whole milk: Adds richness and complements the soup base.
- 1 tsp garlic powder: Enhances the savory depth.
- 1/2 tsp black pepper: For a touch of warmth and spice.
- 1 cup crispy fried onions, divided: The iconic crunchy topping; some for mixing in, some for the top.
- 1 tbsp unsalted butter: For sautéing or greasing the dish.
- Optional: 4 oz fresh mushrooms, sliced: For an extra earthy boost and texture.
- Optional: 1/2 cup shredded cheddar cheese: For an even richer, cheesy twist.
Kitchen Tools:
- 9×13 inch casserole dish: Standard size for family-style servings.
- Large pot: For blanching the green beans.
- Large mixing bowl: To combine all ingredients.
- Whisk: For smoothing out the sauce.
- Measuring cups and spoons: For precise ingredient amounts.
- Colander: To drain the green beans.
Prep Time & Cooking Schedule
- Prep Time: 20 minutes
- Cook Time: 30-35 minutes
- Resting Time: 5 minutes (before serving to allow the casserole to set)
This schedule allows you ample time to get other dishes prepared while your casserole bakes to golden perfection. The blanching step for the green beans is crucial and can be done in advance.
Step-by-Step Instructions
1. Preheat & Prep Green Beans: Preheat your oven to 375°F (190°C). Bring a large pot of salted water to a rolling boil. Add the trimmed green beans and blanch for 4-5 minutes until tender-crisp. Immediately drain and plunge into an ice bath to stop cooking and preserve their vibrant green color. Drain thoroughly.
2. Combine Ingredients: In a large mixing bowl, whisk together the cream of mushroom soup, milk, garlic powder, and black pepper until smooth. If using, sauté sliced fresh mushrooms in butter until tender, then add to the mixture. Stir in the blanched green beans and half of the crispy fried onions.
3. Assemble Casserole: Lightly grease your 9×13 inch casserole dish. Pour the green bean mixture into the prepared dish, spreading evenly. If adding cheese, sprinkle it over the top now.
4. Bake: Bake for 20-25 minutes, or until the casserole is bubbly and heated through.
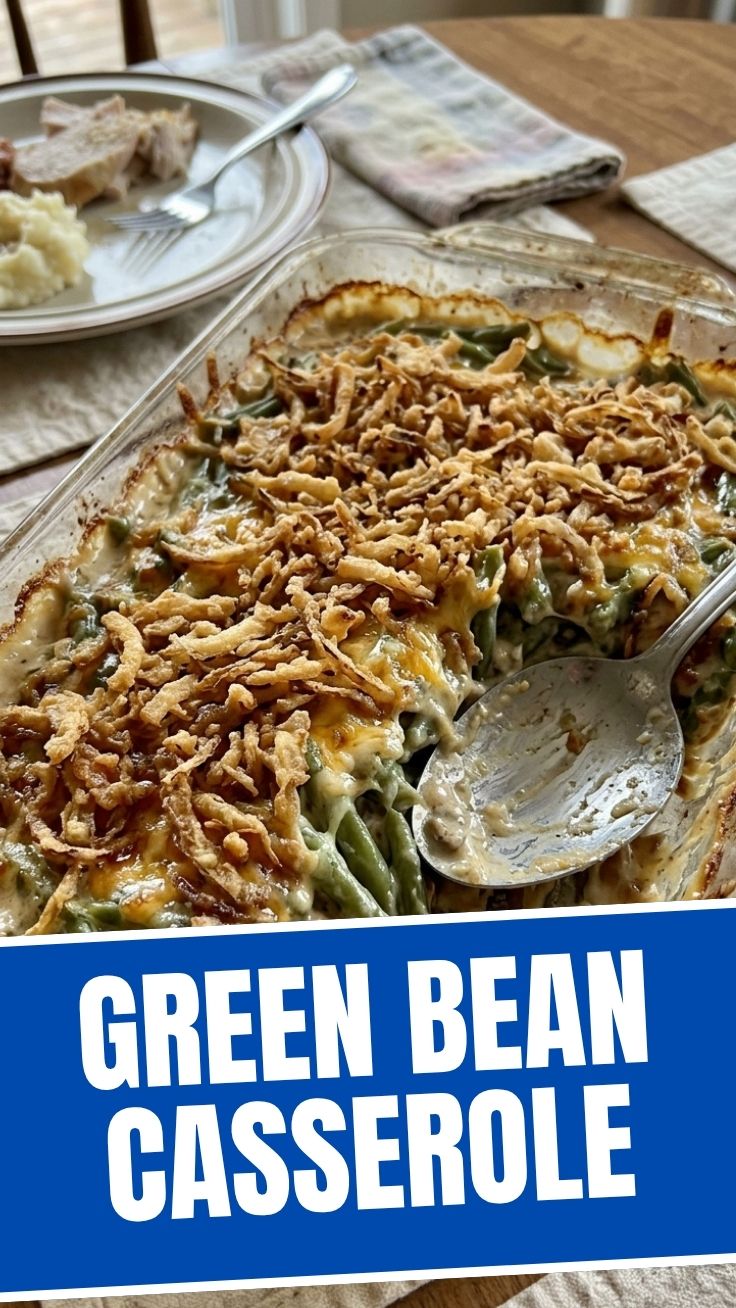
5. Add Final Topping: Remove the casserole from the oven. Sprinkle the remaining half of the crispy fried onions evenly over the top. Return to the oven and bake for another 5-10 minutes, or until the onions are golden brown and crispy. This final bake ensures a beautifully crunchy topping for your homemade Green Bean Casserole.
6. Serve: Let the casserole rest for 5 minutes before serving to allow it to set.
Nutritional Benefits & Advantages
This homemade Green Bean Casserole, especially when made with fresh green beans, offers a host of nutritional benefits. Green beans are packed with vitamins K, C, and A, as well as fiber and folate, supporting bone health, immunity, and digestion. By opting for fresh ingredients and potentially a homemade soup base, you reduce sodium and artificial additive intake often found in store-bought versions. The added mushrooms bring additional B vitamins and antioxidants, while the milk provides calcium.
Tips Variations & Cooking Advice
- Homemade Cream of Mushroom Soup: For a truly gourmet experience, make your own cream of mushroom soup. It offers superior flavor and allows you to control ingredients.
- Cheese Please: Experiment with different cheeses! Gruyere adds a nutty, sophisticated flavor, while Parmesan offers a salty, umami kick.
- Spice It Up: A pinch of cayenne pepper or a dash of hot sauce can add a subtle warmth.
- Vegetable Boost: Incorporate other blanched vegetables like corn, peas, or diced bell peppers for added color and nutrients.
- Gluten-Free: Use a gluten-free cream of mushroom soup (or make your own with GF flour) and ensure your crispy fried onions are gluten-free.
- Dairy-Free: Substitute dairy-free cream of mushroom soup, use unsweetened plant-based milk (like almond or oat), and ensure fried onions are dairy-free.
- Crispy Topping Alternatives: Crushed Ritz crackers mixed with melted butter, panko breadcrumbs, or even crushed potato chips can offer a delightful textural contrast.
Common Mistakes to Avoid
- Overcooking Green Beans: This results in mushy green beans, losing their texture and vibrant color. Always blanch until tender-crisp.
- Skipping the Ice Bath: Important for stopping the cooking process and maintaining the green beans’ bright hue.
- Not Seasoning Enough: A bland casserole is easily avoided. Taste your sauce mixture and adjust salt and pepper before baking.
- Adding Onions Too Early: If you add all the fried onions at the beginning, they will become soggy. Reserve half for the last few minutes of baking to ensure crispiness.
- Too Much Sauce: While creamy is good, an overly watery sauce can make the casserole soupy. Ensure your green beans are well-drained and stick to the milk measurements.
Storage & Meal Prep Tips
Leftover Green Bean Casserole can be stored in an airtight container in the refrigerator for up to 3-4 days. To reheat, cover with foil and bake at 350°F (175°C) until heated through, then remove foil for the last few minutes to re-crisp crunchy onions if desired. Freezing is possible, though the texture of the green beans and the creaminess of the sauce might change slightly upon thawing. Freeze in an airtight container for up to 3 months. Thaw overnight in the refrigerator before reheating. For meal prep, you can blanch the green beans and prepare the sauce up to 2 days in advance, storing them separately. Assemble and bake just before serving.
Conclusion
Mastering the homemade Green Bean Casserole is a culinary triumph that’s well within reach for any home cook. By focusing on fresh ingredients, especially those vibrant green beans, and following these detailed steps, you can create a truly exceptional dish that will be remembered and requested for years to come. Don’t shy away from personalizing it with your favorite twists and variations. We encourage you to try this recipe, share your delicious creations with us, and explore other comforting classics on our blog. Happy cooking!
FAQs
Q1: Can I use frozen green beans instead of fresh?
A1: Yes, you can. Ensure they are thawed and thoroughly drained to prevent a watery casserole. You might skip the blanching step depending on their pre-cooked state.
Q2: How can I make my green bean casserole less salty?
A2: Opt for low-sodium cream of mushroom soup, reduce or omit any added salt, and consider making your soup from scratch to control sodium content effectively.
Q3: What if I don’t like mushrooms?
A3: If you dislike mushrooms entirely, you can use a cream of celery or cream of chicken soup as a substitute for the cream of mushroom soup base.
Q4: Can I prepare this casserole ahead of time?
A4: You can assemble the casserole (without the final crispy onion topping) up to 24 hours in advance. Cover and refrigerate. Add the remaining crispy onions right before baking.
Q5: My crispy onions got soggy. What went wrong?
A5: This usually happens if they’re added too early. Always add the final layer of crispy onions during the last 5-10 minutes of baking to ensure they remain delightfully crunchy.