Unlock Restaurant-Quality Flavor at Home: Your Ultimate Guide to Perfect Teriyaki Chicken
Ever wished you could recreate that irresistible, sticky-sweet Teriyaki Chicken from your favorite restaurant right in your own kitchen? The good news is, you absolutely can! Preparing this beloved dish at home isn’t just about saving money; it’s about control – control over the quality of ingredients, the depth of flavor, and tailoring it exactly to your taste. Forget bland, dry chicken; we’re diving into a recipe that guarantees juicy, flavorful results every single time. And whether you prefer it pan-seared, baked, or even as a delicious Grilled Chicken, this guide will empower you to master the art of homemade teriyaki.
Ingredients & Kitchen Tools
Boneless, Skinless Chicken Thighs (1.5-2 lbs): Thighs retain moisture better than breasts, resulting in a juicier, more flavorful dish. Can substitute with chicken breasts, but cooking time may vary.*
Soy Sauce (1/2 cup, low sodium preferred): The salty, umami backbone of our teriyaki. Low sodium helps control overall saltiness.*
Mirin (1/4 cup): Sweet rice wine, essential for authentic teriyaki flavor and a glossy finish. If unavailable, a dry sherry or sake with a pinch of sugar can be used, but flavor will differ slightly.*
Sake (2 tablespoons, optional): Another Japanese rice wine that adds depth, but can be omitted if not on hand. Can substitute with dry white wine or chicken broth.*
Brown Sugar (2-3 tablespoons, packed): Provides sweetness and helps create that signature sticky glaze. Adjust to your preferred sweetness level.*
Fresh Ginger (1 tablespoon, grated): Adds a pungent, zesty kick. Use freshly grated for the best flavor.*
Garlic (2 cloves, minced): Aromatic and savory, a perfect complement to ginger. Freshly minced is key.*
Cornstarch (1 tablespoon): Used to thicken the sauce into a beautiful glaze. Can substitute with arrowroot powder for a gluten-free option.*
- Water (2 tablespoons): To create a cornstarch slurry.
Sesame Oil (1 teaspoon, toasted): Adds a nutty, aromatic finish. A little goes a long way.*
- Green Onions (2-3, sliced): For garnish, adding a fresh, mild onion flavor and vibrant color.
- Sesame Seeds (1 tablespoon, toasted): Optional garnish for texture and visual appeal.
Kitchen Tools:
- Large Skillet or Wok: For searing the chicken and simmering the sauce.
- Whisk: For combining sauce ingredients smoothly.
- Measuring Cups and Spoons: For accurate ingredient portions.
- Grater or Microplane: For ginger.
- Cutting Board and Sharp Knife: For preparing chicken and aromatics.
- Tongs: For handling chicken during cooking.
Prep Time & Cooking Schedule

- Prep Time: 15 minutes (mainly for chopping and sauce mixing)
- Marinating Time (Optional but Recommended): 30 minutes – 2 hours (or even overnight for deeper flavor). This step significantly enhances the flavor of your Teriyaki Chicken.
- Cook Time: 20-25 minutes
- Resting Time: 5 minutes (for cooked chicken before slicing)
This recipe is very manageable for a weeknight meal. While marinating adds depth, a quick 30-minute soak will still yield fantastic results. Plan to have your ingredients prepped and ready before you start cooking to ensure a smooth, enjoyable process.
Step-by-Step Instructions
1. Prepare the Chicken: Pat the chicken thighs dry with paper towels. Trim any excess fat. You can leave them whole or cut them into bite-sized pieces for quicker cooking.
2. Whisk the Teriyaki Marinade/Sauce: In a medium bowl, combine the soy sauce, mirin, sake (if using), brown sugar, grated ginger, and minced garlic. Whisk until the sugar is fully dissolved.
3. Marinate (Optional but Recommended): Place the chicken in a shallow dish or zip-top bag and pour about half of the teriyaki mixture over it. Reserve the other half for the sauce. Marinate in the refrigerator for at least 30 minutes, or up to 2 hours. If short on time, you can skip this, but the flavor won’t be as profound.
4. Cook the Chicken: Heat 1 tablespoon of cooking oil (vegetable or canola) in a large skillet or wok over medium-high heat. Once hot, add the marinated chicken (discarding any excess marinade from the chicken bag/dish). Cook for 5-7 minutes per side, or until beautifully browned and cooked through. If using cut pieces, cook until golden and no longer pink inside. Remove the cooked Teriyaki Chicken from the pan and set aside.
5. Thicken the Sauce: Reduce the heat to medium. Pour the reserved teriyaki sauce mixture into the same skillet. In a small bowl, whisk together the cornstarch and water to form a slurry. Slowly add the cornstarch slurry to the simmering sauce, whisking constantly until the sauce thickens into a glossy glaze. This should take 1-2 minutes. The sauce should coat the back of a spoon.
6. Combine and Glaze: Return the cooked chicken to the skillet, tossing gently to coat evenly with the luscious teriyaki glaze. If you prepared Grilled Chicken, you can toss it in the skillet with the sauce or brush the sauce over the grilled pieces. Stir in the toasted sesame oil.
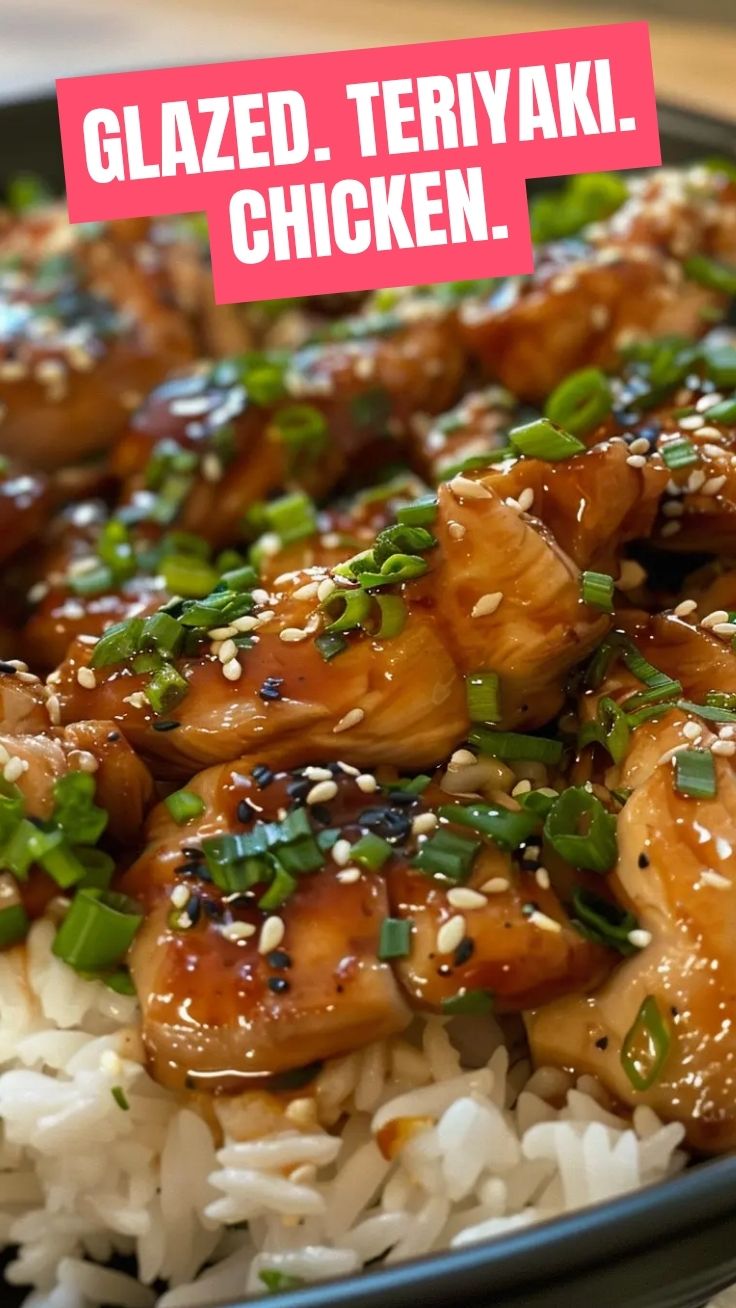
7. Serve: Garnish generously with sliced green onions and toasted sesame seeds. Serve immediately over steamed rice, with stir-fried vegetables, or in a wrap.
Nutritional Benefits & Advantages
This homemade Teriyaki Chicken offers a fantastic balance of protein and flavor. Chicken thighs are a good source of lean protein, essential for muscle repair and growth, and also provide iron and B vitamins. By making your own sauce, you significantly reduce the amount of sodium and refined sugar found in many store-bought varieties, allowing you to control your intake. The ginger and garlic not only add incredible flavor but also boast antioxidant and anti-inflammatory properties. Paired with plenty of vegetables, this dish becomes a wholesome and satisfying meal.
Tips, Variations & Cooking Advice
- Spicy Kick: Add a pinch of red pepper flakes to the sauce for a delightful heat.
- Citrus Brightness: A squeeze of fresh orange or lime juice in the finished sauce can add a wonderful zing.
- Vegetable Boost: Sauté some broccoli florets, bell peppers, or snap peas in the same pan after cooking the chicken, then toss them with the glazed chicken for a complete meal.
- Gluten-Free: Use tamari instead of soy sauce and ensure your mirin is gluten-free (some brands contain wheat). Use arrowroot powder for the slurry.
- Alternative Cooking Methods: This recipe can easily be adapted for baking (bake at 375°F/190°C for 20-25 minutes, then glaze) or grilling (brush the sauce on during the last few minutes of grilling).
Common Mistakes to Avoid
- Overcooking the Chicken: This is the quickest way to dry and tough chicken. Use a meat thermometer to ensure chicken reaches 165°F (74°C) internal temperature, then remove it promptly.
- Not Reducing the Sauce Enough: A watery sauce won’t cling to the chicken. Ensure it thickens sufficiently to a glossy glaze. If it’s too thin, simmer a little longer. If too thick, add a tablespoon of water or broth.
- Burning the Garlic/Ginger: Add these aromatics to the pan only when the heat is medium, and cook briefly before adding the sauce to prevent them from scorching and turning bitter.
- Not Patting Chicken Dry: Excess moisture will steam the chicken instead of searing it, preventing a beautiful brown crust. Always pat chicken thoroughly dry.
Storage & Meal Prep Tips
Leftover Teriyaki Chicken stores wonderfully. Place cooled chicken and any remaining sauce in an airtight container and refrigerate for up to 3-4 days. For longer storage, it freezes well for up to 2-3 months. Thaw frozen portions overnight in the refrigerator. To reheat, gently warm in a skillet over medium-low heat or in the microwave until heated through, adding a splash of water or broth if the sauce seems too thick. This recipe is fantastic for meal prep; simply cook a larger batch and portion it out with rice and vegetables for easy weekday lunches or dinners.
Conclusion
Mastering homemade Teriyaki Chicken is a culinary triumph that rewards you with incredible flavor and the satisfaction of cooking from scratch. Whether you’re craving a classic stir-fry or prefer the juicy char of Grilled Chicken, this versatile recipe provides a foundation for delicious, healthy meals. We encourage you to try this recipe, experiment with the variations, and truly make it your own. Share your photos and cooking adventures with us – we can’t wait to see your perfectly glazed chicken creations! Happy cooking!
FAQs
Q1: Can I use chicken breast instead of thighs?
A1: Yes, you can. However, chicken breasts are leaner and can dry out more easily. Be careful not to overcook them, and consider cutting them into thicker pieces to retain moisture.
Q2: My sauce isn’t thickening. What should I do?
A2: Ensure your cornstarch slurry is fully mixed into a thin paste before adding. If it’s still too thin, mix another small slurry (1 tsp cornstarch with 1 tsp water) and whisk it into the simmering sauce. Give it a minute or two to heat and thicken.
Q3: How can I make this less sweet?
A3: Reduce the amount of brown sugar by half a tablespoon to start, and taste the sauce before adding it all. You can always add more sugar if needed.
Q4: Can I marinate the chicken overnight?
A4: Absolutely! Marinating overnight (up to 12-18 hours) will result in even deeper flavor penetration. Just ensure the chicken is covered and refrigerated.
Q5: What are good side dishes for Teriyaki Chicken?
A5: Steamed jasmine rice, brown rice, quinoa, stir-fried broccoli, snap peas, roasted asparagus, or a simple crisp green salad all pair wonderfully.