Unlock the Secret to the Perfect Thanksgiving Centerpiece: Old-Fashioned Sage Stuffing
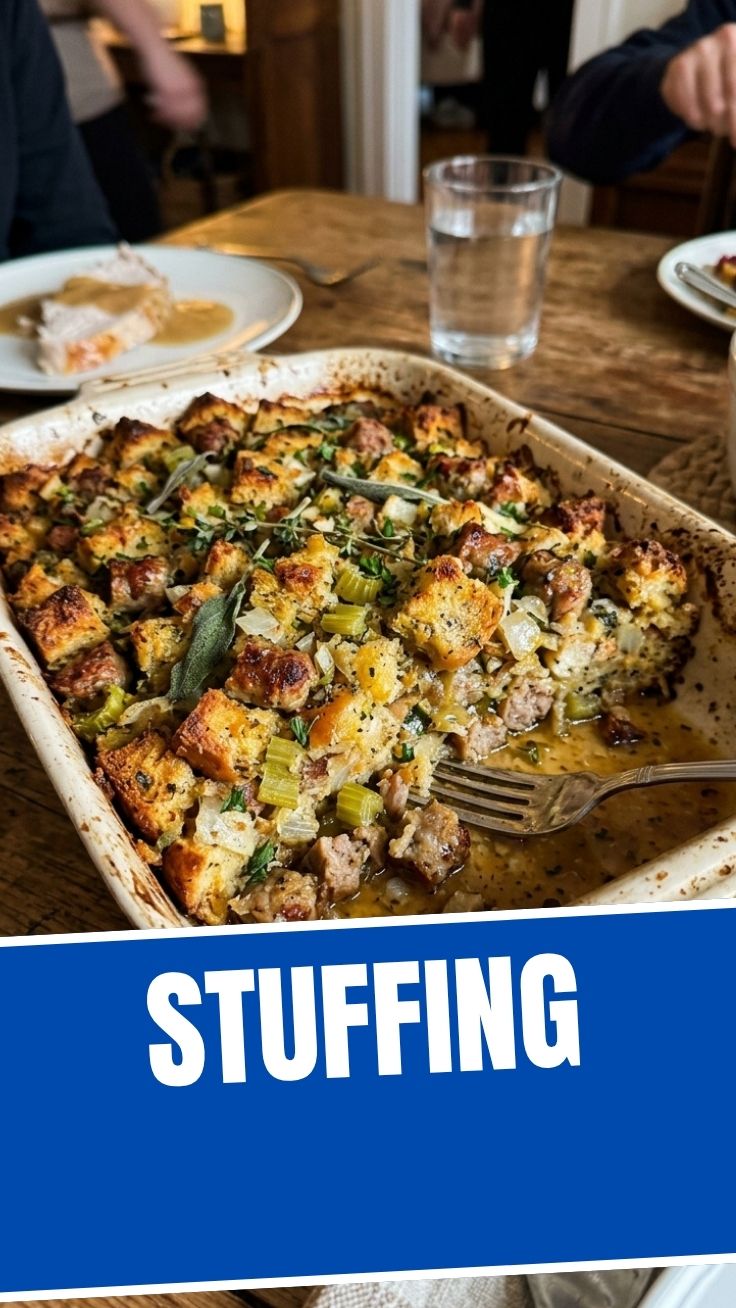
Are you ready to elevate your holiday feast from memorable to legendary? This year, ditch the box and embrace the rich, aromatic tradition of homemade Old-Fashioned Sage Stuffing. There’s something undeniably comforting and utterly irresistible about a perfectly seasoned, deeply flavored Stuffing, brimming with savory herbs and tender vegetables. Preparing this classic dish at home isn’t just about cooking; it’s about crafting an experience, infusing your kitchen with the scents of the season, and creating a truly personalized side that will have everyone clamoring for a second helping. We’ll guide you through using the freshest ingredients to achieve a stuffing that’s moist on the inside with a delightful crispy top.
Ingredients & Kitchen Tools
To embark on this culinary adventure, gather the following:
- 1 pound day-old bread, cut into ½-inch cubes (stale bread absorbs liquid better; an artisan loaf or French bread works wonders)
- 1 cup unsalted butter (for richness and flavor)
- 2 large yellow onions, finely chopped (aromatic foundation)
- 4 celery stalks, finely chopped (adds texture and a hint of freshness)
- 4 cloves garlic, minced (flavor booster)
- 1 tablespoon fresh sage, chopped (the star herb, providing that classic holiday aroma)
- 1 teaspoon fresh thyme, chopped (earthy complement to sage)
- ½ teaspoon fresh rosemary, chopped (piney notes that round out the herbal blend)
- 1 teaspoon salt (enhances all flavors)
- ½ teaspoon black pepper (a touch of warmth and spice)
- 2 cups chicken or vegetable broth, hot (moisture for a tender texture; adjust as needed)
- 2 large eggs, lightly beaten (binds the ingredients together)
- Optional additions: ½ cup chopped fresh parsley (for color and brightness), ½ cup toasted pecans or walnuts (for crunch), ½ cup dried cranberries (for a touch of sweetness and tartness).
Kitchen Tools:
- Large baking dish (9×13 inch recommended)
- Large mixing bowls
- Large skillet
- Sharp knife and cutting board
- Measuring cups and spoons
Prep Time & Cooking Schedule
- Prep Time: 25 minutes
- Cook Time: 40-50 minutes
- Resting Time: 10 minutes (after baking)
Plan to prepare your bread cubes a day ahead, allowing them to dry out. This will prevent your Stuffing from becoming soggy. The sautéing of the aromatics can even be done an hour or two in advance, making assembly on Thanksgiving day a breeze.
Step-by-Step Instructions
1. Prepare the Bread: Spread the bread cubes in a single layer on a baking sheet. Leave them out uncovered overnight to dry, or bake in a 250°F (120°C) oven for 15-20 minutes until lightly toasted and dry. This crucial step ensures a crispy exterior without a mushy interior.
2. Sauté the Aromatics: In a large skillet over medium heat, melt the butter. Add the chopped onions and celery and cook until softened, about 8-10 minutes. Avoid browning; we’re looking for a translucent, tender texture. Add the minced garlic, chopped sage, thyme, and rosemary. Cook for another 1-2 minutes until fragrant. Season with salt and pepper.
3. Combine ingredients: In a large mixing bowl, combine the dried bread cubes with the sautéed aromatic mixture. Add any optional additions like nuts, cranberries, or parsley.
4. Moisten and Bind: In a separate small bowl, whisk together the hot broth and lightly beaten eggs. Gradually pour this liquid mixture over the bread and vegetable mixture, tossing gently until all the bread is moistened. Be careful not to overmix, as this can lead to a dense Stuffing. The goal is to achieve a uniformly damp, but not soggy, consistency. You might not need all the broth, or you might need a little extra depending on your bread.
5. Bake: Transfer the Stuffing mixture to your prepared baking dish. Cover loosely with foil and bake for 30 minutes.
6. Achieve Golden Perfection: Remove the foil and continue baking for an additional 10-20 minutes, or until the top is golden brown and crispy. The internal temperature should reach 165°F (74°C).
7. Rest and Serve: Let the Stuffing rest for 10 minutes before serving. This allows the flavors to meld and the texture to set.
Nutritional Benefits & Advantages
Homemade Old-Fashioned Sage Stuffing, when made with fresh ingredients, offers more than just incredible flavor. It’s a good source of fiber from the bread and vegetables, promoting digestive health. Herbs like sage and thyme are rich in antioxidants, contributing to overall wellness. By controlling the amount of butter and broth, you can actually customize its caloric and fat content compared to pre-made versions.
Tips, Variations & Cooking Advice
- Flavor Boost: For extra depth, sauté a finely chopped apple or a few ounces of diced cooked sausage with the onions and celery.
- Gluten-Free: Substitute gluten-free bread for regular bread. Ensure your broth is also gluten-free.
- Vegetarian/Vegan: Use vegetable broth instead of chicken broth. For a completely vegan version, use a plant-based butter substitute and a ‘flax egg’ (1 tbsp ground flaxseed mixed with 3 tbsp water per egg, let sit for 5 minutes) in place of chicken eggs.
- Crispier Top: For maximum crunch, broil for the last 2-3 minutes, watching carefully to prevent burning.
- Moister Stuffing: Add more warm broth, a tablespoon at a time, until desired consistency is reached.
Common Mistakes to Avoid
- Using fresh bread: Will result in soggy Stuffing. Always use day-old or lightly toasted bread.
- Overmixing: Leads to dense, chewy Stuffing. Mix just until combined.
- Not enough seasoning: Stuffing needs robust seasoning. Taste and adjust salt and pepper after mixing.
- Overcooking without foil: Can lead to a dry, overly crispy exterior. Start with foil to lock in moisture.
Storage & Meal Prep Tips
Leftover Old-Fashioned Sage Stuffing should be stored in an airtight container in the refrigerator for up to 3-4 days. It can also be frozen for up to 3 months. To reheat, thaw if frozen, then warm in a 350°F (175°C) oven, covered with foil, until heated through. For a crisper top, remove the foil for the last 5-10 minutes.
Conclusion
Crafting your own Old-Fashioned Sage Stuffing is a rewarding experience that adds unparalleled flavor and warmth to any holiday spread. By following these steps and using quality ingredients, you’ll create a dish that embodies the spirit of home and tradition. Don’t settle for less – make this cherished classic your signature dish. We encourage you to try this recipe and share your delectable results in the comments below! What are your favorite Stuffing variations?
FAQs
Q1: Can I make this Stuffing ahead of time?
A1: Yes, absolutely! You can prepare the bread cubes and sauté the aromatics a day or two in advance. Combine everything on the day of, or even assemble the entire dish and refrigerate, then bake on the big day – just add an extra 10-15 minutes to the baking time.
Q2: What kind of bread is best for Stuffing?
A2: Day-old artisan bread, French bread, or good quality white sandwich bread work best. Avoid overly soft or heavily flavored breads that might overpower the sage and other herbs.
Q3: How do I prevent my Stuffing from being too dry or too wet?
A3: The key is in the liquid. Start with a conservative amount of broth and add more as needed until the bread cubes are uniformly moistened but not soaking. Dried bread is crucial for preventing sogginess.
Q4: Can I bake this Stuffing inside the turkey?
A4: While traditional, baking Stuffing inside the turkey requires careful attention to food safety. The internal temperature of the Stuffing must reach 165°F (74°C), which means the turkey will likely be overcooked. For best results and safety, we recommend baking it in a separate dish.