Unlock Flavor: Crafting the Perfect Homemade Quesadillas
Ever stared at a restaurant menu, craving that perfect, cheesy, satisfying Quesadillas, only to balk at the price or wonder about the freshness of the ingredients? What if I told you that creating an authentic, mouthwatering experience of this beloved Mexican food staple in your own kitchen is not only incredibly easy but also deeply rewarding? Beyond the simple preparation, making this iconic dish at home allows for endless customization, ensuring every bite is tailored precisely to your taste. Forget bland, pre-made versions; it’s time to elevate your culinary game and bring the vibrant flavors of Mexico right to your dining table.
Ingredients & Kitchen Tools
Here’s everything you’ll need to embark on your Quesadillas journey:
- Flour Tortillas (8-inch or 10-inch): The foundation of our dish. Choose good quality, soft tortillas for the best results. Corn tortillas can also be used for a gluten-free option, but ensure they are fresh to prevent cracking.
- Shredded Cheese (2 cups): A blend of Monterey Jack, cheddar, or a Mexican cheese blend works best. The key is a cheese that melts well and offers a good flavor profile. Avoid pre-shredded cheeses coated with anti-caking agents if possible, as they can hinder melting.
- Cooked Protein (1 cup, optional): Shredded chicken, seasoned ground beef, black beans, or sautéed vegetables like bell peppers and onions. This adds substance and additional flavor.
- Butter or Oil (1-2 tablespoons): For cooking the tortillas to achieve that perfect golden crispness. Butter adds a richer flavor, while oil is a good neutral alternative.
- Salsa, Guacamole, Sour Cream: Essential toppings for serving, offering a burst of freshness and tang.
- Large Frying Pan or Griddle: A non-stick pan or a well-seasoned cast iron skillet is ideal for even cooking.
- Spatula: For flipping and serving.
- Cutting Board & Pizza Cutter (or knife): For slicing the Quesadillas into wedges.
Prep Time & Cooking Schedule
- Prep Time: 10 minutes (assuming pre-cooked protein)
- Cook Time: 3-5 minutes per Quesadillas
- Total Time: 15-20 minutes
This recipe is perfect for a quick weeknight dinner or a last-minute gathering. The cooking process is swift, so have all your ingredients prepped and ready to go before you start heating the pan.
Step-by-Step Instructions
1. Prepare Your Filling: If using cooked protein or vegetables, ensure they are prepped and ready. This could mean shredding chicken, browning ground beef, or sautéing your preferred veggies. Having everything at arm’s reach streamlines the process.
2. Heat the Pan: Place a large frying pan or griddle over medium heat. Once hot, add about half a tablespoon of butter or a drizzle of oil. The pan should be hot enough to sizzle gently when a drop of water is added, but not smoking. Proper temperature control is crucial for perfectly golden, non-burnt tortillas.
3. Assemble the Quesadillas: Place one flour tortilla in the hot pan. Immediately sprinkle about half a cup of shredded cheese evenly over one half of the tortilla. If using, add a small amount of your cooked protein or vegetables on top of the cheese. The quantity should be enough to fill but not overstuff, allowing for easy folding.
4. Fold and Cook: Once the cheese begins to melt and the bottom of the tortilla turns a light golden brown (this usually takes 1-2 minutes), carefully fold the empty half of the tortilla over the filled half. Gently press down with your spatula to create a compact half-moon shape.
5. Flip and Crisp: Cook for another 1-2 minutes until both sides are golden brown and the cheese is fully melted and gooey. The tortilla should feel slightly crisp to the touch. This attention to texture ensures a satisfying bite.
6. Remove and Repeat: Carefully transfer the cooked Quesadillas to a cutting board. Add more butter or oil to the pan and repeat with the remaining tortillas and fillings.
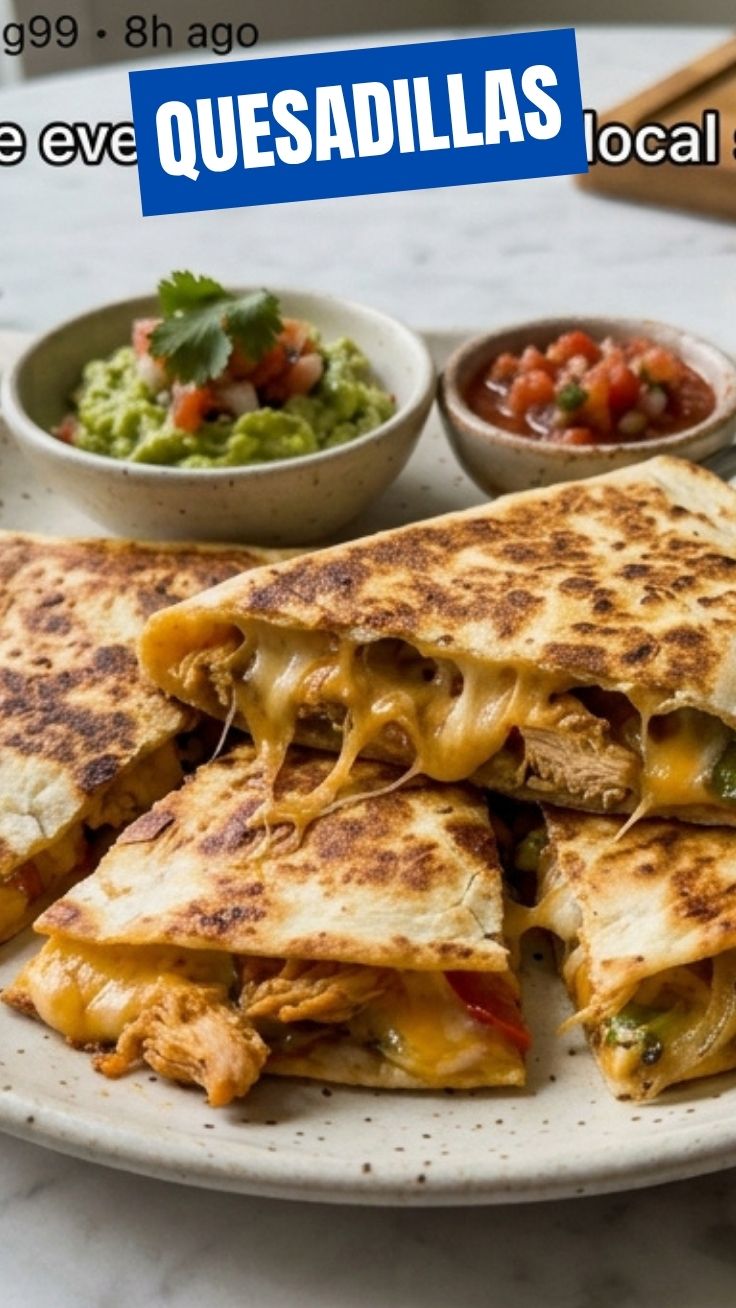
7. Serve: Once all your Quesadillas are cooked, slice them into wedges using a pizza cutter or a sharp knife. Serve immediately with your favorite accompaniments like salsa, guacamole, and sour cream, completing this delightful Mexican food experience.
Nutritional Benefits & Advantages
Quesadillas, when made with mindful ingredients, can be a surprisingly wholesome meal. The cheese provides a good source of calcium and protein for muscle repair and bone health. Whole wheat tortillas add fiber, aiding digestion and promoting satiety. Incorporating lean proteins like chicken or black beans boosts the protein content further, while adding a generous amount of vegetables like spinach, bell peppers, or mushrooms can significantly increase your intake of vitamins, minerals, and antioxidants. This dish offers a balanced meal that can be easily adapted to various dietary needs.
Tips, Variations & Cooking Advice
- Flavor Variations: Experiment with different cheese blends! Chipotle cheddar adds a smoky kick, while a mix of Oaxaca and Chihuahua delivers authentic Mexican flavors.
- Ingredient Swaps:
* Gluten-Free: Use corn tortillas or your favorite gluten-free tortilla brand.
* Dairy-Free: Opt for plant-based shredded cheese alternatives.
* Vegan: Combine black beans, corn, sautéed onions, bell peppers, and vegan cheese.
* Spice It Up: Add a pinch of chili powder or cayenne pepper to your filling, or serve with a spicy habanero salsa.
- Alternative Cooking Methods:
Oven Baked: Assemble *Quesadillas on a baking sheet and bake at 375°F (190°C) for 10-15 minutes, flipping halfway, until golden and crispy. This is great for larger batches.
* Air Fryer: Cook at 375°F (190°C) for 5-7 minutes, flipping once, until crisp and melted.
- Portion Changes: Adjust the tortilla size and filling quantity based on desired serving size.
Common Mistakes to Avoid
- Overstuffing: Too much filling makes it difficult to fold and can cause the Quesadillas to fall apart. Less is more for a cohesive melt.
- High Heat: Cooking on heat that is too high will burn the tortilla before the cheese has a chance to melt through, resulting in a burnt exterior and cold interior.
- Cold Pan: Starting with a cold pan leads to soggy tortillas. Always preheat your pan properly.
- Not Enough Fat: A little butter or oil is essential for achieving that desirable golden-brown, crispy exterior. Don’t skimp!
Storage & Meal Prep Tips
Leftover Quesadillas can be stored in an airtight container in the refrigerator for up to 3-4 days. For best results, allow them to cool completely before storing to prevent sogginess.
- Reheating: Reheat in a dry frying pan over medium heat until crispy and warmed through. You can also use a toaster oven or air fryer for a crispier result. Microwaving is an option, but it often leads to a softer, less appealing texture.
- Freezing: Assemble and partially cook Quesadillas (until cheese is just melted but not fully browned), then cool completely. Wrap individually in plastic wrap and then foil, and freeze for up to 2 months. Reheat from frozen in a pan or oven until fully warmed and crispy.
Conclusion
There you have it – the ultimate guide to crafting perfect homemade Quesadillas. This versatile and delicious main dish proves that truly wonderful Mexican food is within everyone’s reach, offering endless opportunities for customization and creative exploration in your kitchen. We encourage you to try this simple yet satisfying recipe tonight and discover the joy of making a classic from scratch. Share your amazing creations in the comments below – we can’t wait to see your personalized twists on this fantastic culinary staple!
FAQs
Q1: Can I use corn tortillas instead of flour?
A1: Yes, you can! Corn tortillas will give a different flavor and texture, often slightly chewier. Ensure they are fresh to prevent cracking when folding.
Q2: How do I prevent my Quesadillas from getting soggy?
A2: The key is not to overstuff, cook on medium heat with a little fat for crisping, and avoid stacking them immediately after cooking. Let them rest briefly on a wire rack if making a large batch.
Q3: What are some good vegetarian filling options?
A3: Sautéed mushrooms and onions, roasted sweet potatoes, black beans and corn, or a mix of spinach and feta are all excellent vegetarian choices.
Q4: My cheese isn’t melting properly. What am I doing wrong?
A4: This usually means your pan isn’t hot enough, or you’re using a cheese that doesn’t melt well (like some low-fat or hard aged cheeses). Ensure your pan is preheated to medium and use a good melting cheese blend.
Q5: Can I make these ahead for a party?
A5: While best served fresh, you can partially cook them and then quickly reheat in an oven or on a griddle before serving. For optimal crispiness, a complete reheat is recommended rather than fully cooking and then just warming.