Unveiling Autumn’s Delight: Your Guide to Irresistible Homemade Pumpkin Bars
Ever wondered how to capture the very essence of autumn in a single bite? As the leaves turn golden and a crisp chill fills the air, there’s a particular warmth that only home baking can deliver. And when it comes to seasonal treats, very few recipes embrace fall’s bounty quite like homemade Pumpkin Bars. Preparing these delightful squares at home offers an unparalleled freshness and allows you to control every ingredient, ensuring a wholesome and incredibly flavorful experience. Forget store-bought imitations; embrace the joy of creating a dessert that will truly impress. This comprehensive guide will walk you through crafting the perfect Pumpkin Bars Recipe, from selecting the finest ingredients to mastering every technique.
Ingredients & Kitchen Tools
Crafting these delectable Pumpkin Bars requires a blend of common pantry staples and a few essential kitchen tools.
Ingredients:
- 1 ½ cups all-purpose flour: The foundational structure of our bars. You can substitute with a gluten-free all-purpose blend for a GF option.
- 1 teaspoon baking soda: Our leavening agent, creating a light and airy texture.
- 1 teaspoon ground cinnamon: Essential for that classic autumn spice profile.
- ½ teaspoon ground nutmeg: Adds depth and warmth to the spice blend.
- ¼ teaspoon ground cloves: A potent spice that complements the pumpkin beautifully.
- ¼ teaspoon salt: Balances the sweetness and enhances other flavors.
- 1 cup granulated sugar: Provides sweetness and contributes to the bar’s tenderness.
- ½ cup packed light brown sugar: Adds a deeper, molasses-rich sweetness and moisture.
- ½ cup unsalted butter, softened: Crucial for richness and a tender crumb.
- 2 large eggs: Binds the ingredients and provides structure.
- 1 cup pumpkin puree (not pumpkin pie filling): The star of the show. Ensure it’s pure pumpkin for the best flavor and texture.
- For the Cream Cheese Frosting (Optional but highly recommended!):
* 8 ounces cream cheese, softened: The base of our tangy, creamy frosting.
* ½ cup unsalted butter, softened: Adds richness and smooth texture to the frosting.
* 2 cups powdered sugar, sifted: Provides sweetness and a silky-smooth finish.
* 1 teaspoon vanilla extract: Enhances the overall flavor of the frosting.
Kitchen Tools:
- 9×13 inch baking pan: The ideal size for evenly baked bars.
- Mixing bowls (large and medium): For combining wet and dry ingredients separately.
- Electric mixer (stand or hand-held): For efficient creaming of butter and sugar, and for whipping the frosting.
- Whisk: For combining dry ingredients.
- Rubber spatula: For scraping down bowls and folding ingredients.
- Measuring cups and spoons: For precise ingredient measurements.
- Parchment paper: For easy removal and cleanup.
Prep Time & Cooking Schedule
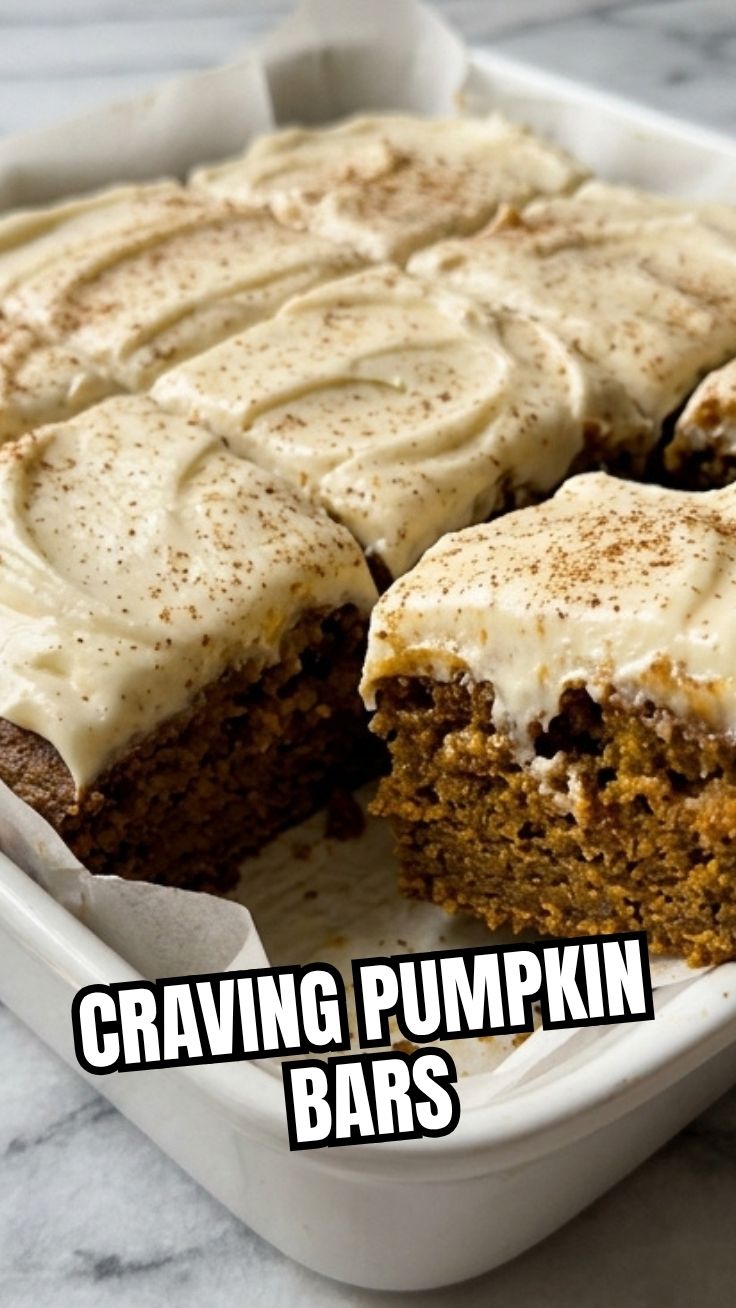
Planning is key to a stress-free baking experience. These delightful Pumpkin Bars have a relatively straightforward timeline.
- Prep Time: 20 minutes
- Bake Time: 25-30 minutes
- Cooling Time: 30-60 minutes (before frosting)
- Frosting Time: 10 minutes
- Total Time: Approximately 1 hour 30 minutes
The cooling time is crucial before frosting to prevent the frosting from melting and becoming runny. You can prepare these in advance and store them, making them perfect for potlucks or an easy weeknight dessert.
Step-by-Step Instructions
Let’s dive into the creation of your perfect Pumpkin Bars. Follow these steps for a consistently delicious result.
1. Preheat and Prepare: Preheat your oven to 350°F (175°C). Line a 9×13-inch baking pan with parchment paper, leaving an overhang on the sides for easy lifting. This ensures your bars don’t stick.
2. Combine Dry Ingredients: In a medium bowl, whisk together the all-purpose flour, baking soda, ground cinnamon, ground nutmeg, ground cloves, and salt. Set aside.
3. Cream Wet Ingredients: In a large mixing bowl, using an electric mixer, cream together the softened unsalted butter, granulated sugar, and packed light brown sugar until light and fluffy (about 2-3 minutes). This aeration is crucial for a tender crumb.
4. Add Eggs and Pumpkin: Beat in the eggs one at a time, ensuring each is fully incorporated before adding the next. Scrape down the sides of the bowl as needed. Gradually beat in the pumpkin puree until well combined. The mixture will look a bit curdled, but that’s perfectly normal.
5. Combine Wet and Dry: Gradually add the dry ingredients to the wet ingredients, mixing on low speed until just combined. Be careful not to overmix, as this can lead to tough bars. A few streaks of flour are okay.
6. Bake: Pour the batter into the prepared baking pan and spread evenly. Bake for 25-30 minutes, or until a wooden skewer inserted into the center comes out clean.
7. Cool Completely: Remove the pan from the oven and let the bars cool completely in the pan on a wire rack. This is a critical step for the best frosting application and makes the Pumpkin Bars Recipe truly shine.
8. Prepare Frosting (if using): While the bars cool, prepare the cream cheese frosting. In a medium bowl, beat the softened cream cheese and softened unsalted butter with an electric mixer until smooth and creamy. Gradually beat in the sifted powdered sugar until smooth, then stir in the vanilla extract.
9. Frost and Serve: Once the bars are completely cool, spread the cream cheese frosting evenly over the top. Cut into squares and serve.
Nutritional Benefits & Advantages
These Pumpkin Bars are more than just a delicious treat; they offer some surprising nutritional advantages. Pumpkin, the star ingredient, is naturally low in calories and packed with essential nutrients. It’s an excellent source of Vitamin A (in the form of beta-carotene), which is vital for vision, immune function, and skin health. It also contains Vitamin C, potassium, and dietary fiber, which aids in digestion and helps maintain a feeling of fullness. While these are certainly a dessert, enjoying a homemade version allows you to control sugar levels and avoid artificial ingredients often found in store-bought options.
Tips Variations & Cooking Advice
- Spice it up: For an extra kick, add ½ teaspoon of ground ginger to the spice blend.
- Nutty addition: Fold in ½ cup of chopped pecans or walnuts to the batter for added crunch and flavor.
- Chocolate lover’s dream: Mix in ½ cup of chocolate chips to the batter for a delightful chocolatey twist.
- Gluten-Free: As mentioned, use a 1:1 gluten-free all-purpose flour blend. Baking times may vary slightly, so keep an eye on them.
- Dairy-Free: Substitute dairy butter with a plant-based butter alternative and use a dairy-free cream cheese for the frosting.
- Portion Control: Cut the bars into smaller squares for easier portion management, especially when serving a crowd.
- Don’t overmix: Overmixing the batter develops the gluten in the flour, leading to tough, dense bars. Mix until just combined.
- Softened butter and cream cheese: Ensure both are at room temperature for the best results, both in the bars and the frosting. This prevents lumps and ensures a smooth consistency.
Common Mistakes to Avoid
- Using pumpkin pie filling: This is a common mistake! Pumpkin pie filling already contains spices and sweeteners, which will throw off the balance of this recipe. Always use pure pumpkin puree.
- Overbaking: Overbaked bars will be dry and crumbly. Keep a close eye on them during the last few minutes of baking.
- Frozing warm bars: As tempting as it is, resist the urge to frost warm bars. The frosting will melt, making a sticky mess and ruining the presentation.
- Not sifting powdered sugar: For the frosting, sifted powdered sugar prevents lumps and ensures a smooth, velvety consistency.
- Overmixing the frosting: While you want it smooth, overmixing cream cheese frosting can make it runny. Mix until just combined and smooth.
Storage & Meal Prep Tips
These Pumpkin Bars are excellent for meal prep and storing for later enjoyment.
- Refrigeration: Store frosted Pumpkin Bars in an airtight container in the refrigerator for up to 5 days. The frosting contains dairy, so refrigeration is essential.
- Freezing (unfrosted): For longer storage, bake and cool the bars completely without frosting. Wrap tightly in plastic wrap, then aluminum foil, and freeze for up to 2-3 months. Thaw overnight in the refrigerator before frosting and serving.
- Freezing (frosted): You can also freeze frosted bars. Place them on a baking sheet in the freezer until the frosting is firm (about 1-2 hours). Then, wrap individual bars in plastic wrap and store them in an airtight container in the freezer. Thaw in the refrigerator before serving.
- Reheating: Pumpkin Bars are best enjoyed at room temperature, straight from the refrigerator, or slightly warmed in the microwave for a few seconds.
Conclusion
There you have it—a comprehensive guide to creating effortlessly delicious Pumpkin Bars that will become a cherished autumn tradition. From the perfectly spiced, moist bar to the tangy, creamy frosting, this recipe truly embodies the flavors of the season. Embrace the warmth and comfort of home baking with this fantastic Pumpkin Bars Recipe. Don’t hesitate to share your creations with us, try out some of the variations, and savor every bite of this fall favorite. Happy baking!
FAQs
- Can I use canned pumpkin pie filling instead of pumpkin puree?
No, it’s crucial to use pure pumpkin puree. Pumpkin pie filling already contains sweeteners and spices, which will alter the flavor profile of this recipe.
- How do I know when the bars are done baking?
The best way to tell is to insert a wooden skewer or toothpick into the center of the bars. If it comes out clean, they are done.
- My cream cheese frosting is too runny. What can I do?
This usually happens if the cream cheese or butter wasn’t cold enough, or if it was overmixed. Try adding a little more sifted powdered sugar, one tablespoon at a time, until it reaches the desired consistency. Chilling the frosting for a bit can also help it firm up.
- Can I make these bars in advance?
Absolutely! These bars are excellent for making ahead. Store them unfrosted in an airtight container at room temperature for up to 2 days, or frosted in the refrigerator for up to 5 days. They can also be frozen for longer storage.
- What if I don’t have all the spices?
While the combination of cinnamon, nutmeg, and cloves provides the best flavor, you can certainly adjust. If you only have cinnamon, that’s fine, though the bars won’t have the same depth. A pre-made “pumpkin pie spice” blend can also be used as a convenient alternative.