Unlock the Secret to the Creamiest Mashed Potatoes You’ll Ever Make
Ever wondered how restaurants achieve that velvety, melt-in-your-mouth Mashed Potatoes perfection? The kind that makes you want to skip the main course and just dive into a bowl of pure comfort? Preparing them yourself at home is not just about saving money; it’s about control over ingredients, personalized flavor, and the sheer satisfaction of creating something truly spectacular from scratch. This isn’t just about smashing some spuds; it’s an art, and we’re here to guide you through every step, ensuring your homemade version is far superior to any store-bought alternative, especially when paired with a rich, savory gravy. Get ready to elevate your culinary game with this classic side dish that truly shines.
Ingredients & Kitchen Tools
Here’s everything you’ll need to create your culinary masterpiece:
- 2 lbs Russet Potatoes: The best choice for fluffy Mashed Potatoes due to their high starch content. Other waxy varieties can work but may result in a gummier texture.
- ½ cup Unsalted Butter: Adds richness and flavor. Can be substituted with a dairy-free alternative or olive oil for a lighter version.
- ½ cup Heavy Cream (warmed): Contributes to the creamy texture. Whole milk or half-and-half can be used for a slightly lighter result.
- 1-2 cloves Garlic (minced, optional): For an aromatic depth of flavor. Garlic powder can be used as a substitute.
- Salt & Freshly Ground Black Pepper: To taste, crucial for balancing flavors.
- ¼ cup Milk (as needed, warmed): To adjust consistency.
- Large Pot: For boiling the potatoes.
- Potato Masher or Ricer: A ricer makes for the smoothest, lump-free mash.
- Measuring Cups & Spoons: For accurate ingredient measurement.
- Rubber Spatula or Wooden Spoon: For mixing.
Prep Time & Cooking Schedule
- Prep Time: 15 minutes (peeling and chopping potatoes)
- Cook Time: 20-25 minutes (boiling potatoes)
- Resting Time: 5 minutes (after mashing, before serving)
Plan to start peeling your potatoes about 45 minutes before you want to serve, allowing ample time for boiling and mashing without rushing. The warm cream and butter can be prepared while the potatoes boil.
Step-by-Step Instructions
1. Prepare the Potatoes: Peel the Russet potatoes and cut them into 1-inch uniform cubes. This ensures even cooking. Rinse them under cold water to remove excess starch, which helps prevent a gummy texture.
2. Boil to Perfection: Place the potato cubes in a large pot and cover them with cold water by about an inch. Add a generous pinch of salt to the water (this seasons the potatoes from the inside out). Bring to a boil, then reduce heat and simmer until the potatoes are fork-tender, about 15-20 minutes.
3. Drain Thoroughly: Carefully drain the cooked potatoes in a colander. Return the empty pot to the stovetop over low heat for a minute or two to evaporate any remaining moisture from the pot. This crucial step helps dry out the potatoes, preventing watery Mashed Potatoes.
4. Add Fat & Flavor: Remove the pot from the heat. Add the unsalted butter and optional minced garlic to the warm, empty pot. Let the butter melt, and the garlic gently infuse.
5. Mash Away: Add the drained potatoes back into the pot with the melted butter and garlic. Using a potato ricer or masher, mash the potatoes until mostly smooth. Do not over-mash, as this can lead to a gluey texture.
6. Incorporate Liquids: Gradually pour in the warmed heavy cream, mixing gently with a rubber spatula until combined and creamy. Add additional warmed milk, a tablespoon at a time, until your preferred consistency is reached. Remember that the consistency of your Mashed Potatoes is critical, especially if you plan to serve it alongside a rich gravy.
7. Season & Serve: Season generously with salt and freshly ground black pepper to taste. Mix well and serve immediately.
Nutritional Benefits & Advantages
Potatoes, often misunderstood, are a powerhouse of nutrition when prepared correctly. They are an excellent source of Vitamin C, Vitamin B6, potassium, and dietary fiber (especially if you leave some skin on). While butter and cream add calories, they also contribute to satiety and provide essential fat-soluble vitamins. This homemade version allows you to control the quality of ingredients, opting for organic dairy or reducing salt if desired, making it a wholesome and comforting addition to any meal.
Tips Variations & Cooking Advice
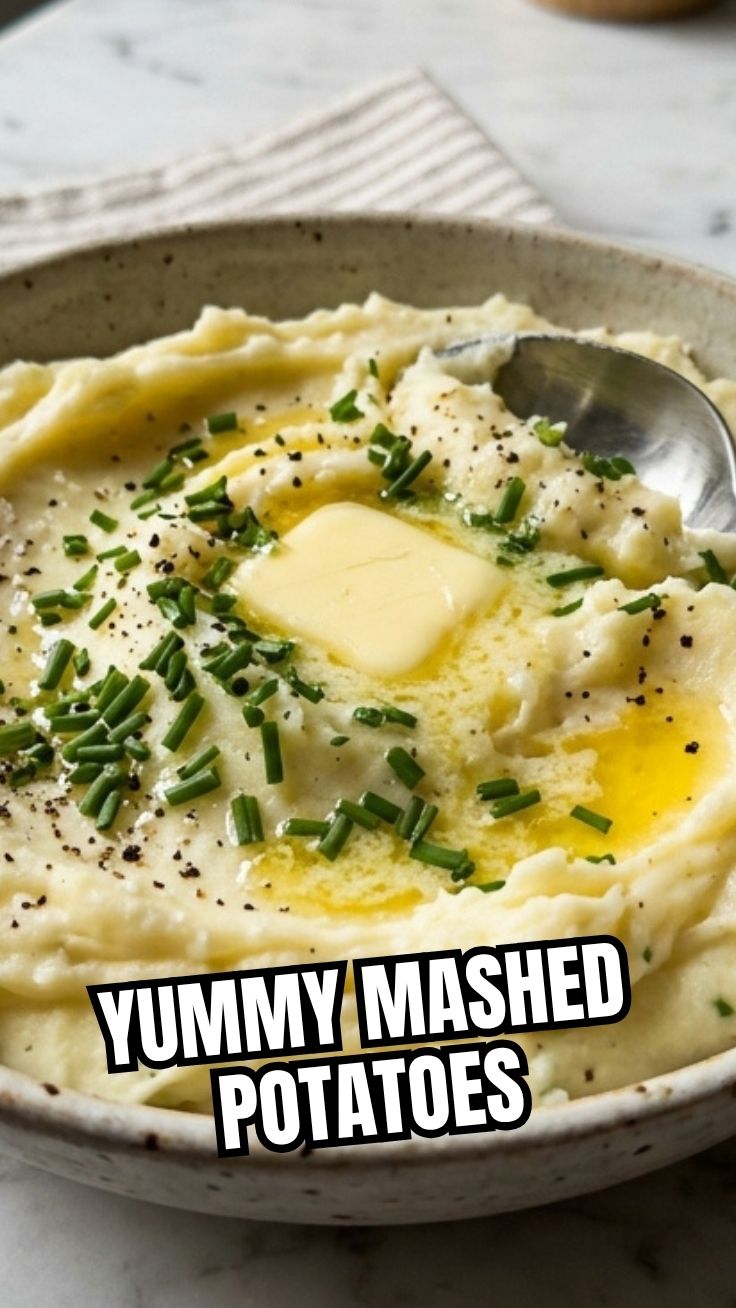
- Garlic & Herb: Roast a whole head of garlic until soft, then squeeze the pulp into the potatoes before mashing. Add fresh chives, parsley, or rosemary for an aromatic twist.
- Cheesy Delight: Fold in grated Parmesan, cheddar, or Gruyère cheese for a rich, savory flavor.
- Dairy-Free: Use plant-based butter (like Miyoko’s Kitchen) and unsweetened plant milk (almond, oat, or soy) for a delicious dairy-free option.
- Spicy Kick: A pinch of cayenne pepper or a dash of hot sauce can add an unexpected warmth.
- Consistency Control: For a thinner mash, add more warmed milk gradually. For a thicker consistency, reduce the amount of added liquids.
Common Mistakes to Avoid
- Undercooked Potatoes: Leads to lumpy, hard Mashed Potatoes. Ensure they are fork-tender before draining.
- Over-Mashing: Releases too much starch, resulting in a gummy, glue-like texture. Use a ricer for best results or mash just until smooth.
- Cold Liquids: Adding cold butter or cream can cool down the potatoes too quickly and make them harder to incorporate smoothly. Always warm your dairy.
- Not Enough Seasoning: Mashed Potatoes need a good amount of salt to shine. Taste and adjust repeatedly.
Storage & Meal Prep Tips
Store leftover Mashed Potatoes in an airtight container in the refrigerator for up to 3-4 days. For reheating, gently warm on the stovetop over low heat, adding a splash of milk or cream to restore creaminess. Avoid microwaving if possible, as it can dry them out. While you can freeze Mashed Potatoes, the texture may change slightly upon thawing. If freezing, do so in individual portions for easier reheating.
Conclusion
Mastering the art of creamy, flavorful Mashed Potatoes is a kitchen essential, transforming a simple side dish into a star. By following these detailed steps and embracing the nuances of temperature and technique, you’ll consistently achieve that luxurious texture and rich taste that perfectly complements any meal, especially when generously drizzled with a homemade gravy. Don’t be shy – dive in, experiment with the variations, and truly make this recipe your own. We encourage you to try this recipe, share your results in the comments below, and explore our other content for more culinary inspiration!
FAQs
Q1: Can I make Mashed Potatoes ahead of time?
A1: Yes, you can prepare Mashed Potatoes up to a day in advance. Reheat gently on the stovetop with a little extra milk or cream to regain their smooth consistency.
Q2: What’s the best potato variety for mashing?
A2: Russet potatoes are ideal due to their high starch content, which results in a light and fluffy texture. Yukon Golds also work well for a slightly creamier, naturally buttery flavor.
Q3: How can I prevent my Mashed Potatoes from becoming gummy?
A3: Avoid over-mashing and make sure to thoroughly drain the potatoes after boiling. Using a potato ricer instead of an electric mixer also helps prevent gumminess.
Q4: Can I make this recipe dairy-free?
A4: Absolutely! Substitute butter with a plant-based butter alternative and heavy cream/milk with unsweetened plant-based milk (like almond, oat, or soy milk).
Q5: What are some flavor variations I can try?
A5: You can add roasted garlic, fresh herbs (chives, rosemary), various cheeses (Parmesan, cheddar), or even a touch of horseradish for a zesty kick.