Unlock Tender Perfection: Your Guide to Mouthwatering BBQ Ribs at Home
Ever wondered how top pitmasters achieve those fall-off-the-bone, melt-in-your-mouth ribs right in their own backyard? You’re about to discover the secrets to crafting truly spectacular BBQ ribs, a dish that transcends mere cooking to become an event. Forget overpriced restaurant meals; mastering the art of ribs at home not only saves you money but also puts you in control of every delicious nuance. This Labor Day, imagine impressing your friends and family with your perfectly smoked, succulent Labor Day BBQ Ribs. We’ll walk you through every step, ensuring your homemade rendition is not just good, but legendary. From selecting the right cut to achieving that ideal smoke ring, prepare to elevate your grilling game.
Ingredients & Kitchen Tools
Crafting the perfect rack of ribs requires quality ingredients and the right culinary arsenal. Below is a comprehensive list:
- Pork Spareribs or Baby Back Ribs (2-3 racks, about 3-4 lbs each): The foundation of our feast. Baby backs are leaner and cook faster; spareribs are fattier and more flavorful.
- Yellow Mustard (1/4 cup): Acts as a binder for the rub, helping it adhere to the meat and adding subtle tang.
- Your Favorite BBQ Rub (1/2 cup): A blend of spices like paprika, brown sugar, garlic powder, onion powder, salt, and black pepper. Pre-made or homemade, this is key to flavor.
- Apple Cider Vinegar (1/2 cup): Used in a spritz for moisture and tenderization.
- Apple Juice (1/2 cup): Adds sweetness and moisture to the spritz.
- Brown Sugar (1/2 cup, packed): For wrapping the ribs, contributing to caramelization and tenderizing.
- Unsalted Butter (1/4 cup, sliced): Melts into the ribs during the wrap, adding richness.
- Your Favorite BBQ Sauce (1-2 cups): For basting during the final stage. Choose a sweet, tangy, or spicy variety to suit your taste.
- Aluminum Foil (Heavy-duty): Essential for the “Texas Crutch” (wrapping method).
- Large Roasting Pan or Disposable Aluminum Pan: For cooking and catching drippings.
- Sharp Knife: For trimming and sectioning ribs carefully.
- Cutting Board: A large, sturdy surface for prep.
- Meat Thermometer (Instant-read): Crucial for ensuring doneness.
- Basting Brush: For applying sauce evenly.
- Spray Bottle: For applying the apple cider vinegar/apple juice spritz.
- Gloves (Optional): Food-safe gloves make handling the rub much cleaner.
- Cutting Board: A large, sturdy surface for prep.
- Smoking Wood Chunks/Chips (Cherry, Apple, Hickory): For infusing that desired smoky flavor.
Prep Time & Cooking Schedule
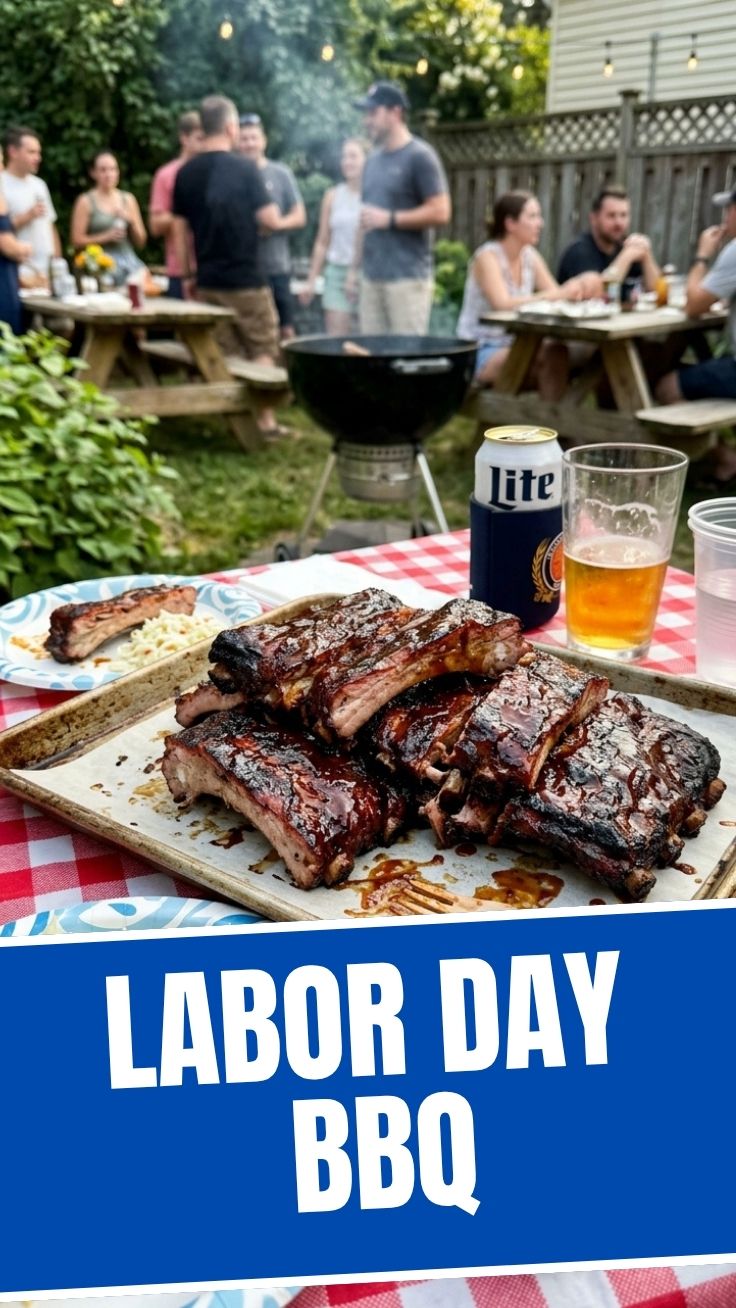
Planning is paramount for perfect ribs. Here’s a breakdown to help you schedule your cook:
- Prep Time: 20-30 minutes (includes membrane removal, trimming, and applying rub)
- Smoking/Cooking Time: 5-6 hours total (varies by rib type and desired tenderness)
- Resting Time: 15-20 minutes
Detailed Schedule:
1. Morning (Day Before or Early Cook Day): Trim ribs, remove membrane, apply mustard binder and rub. Allow to rest at room temperature for 30 minutes or refrigerate for several hours (or overnight) for deeper flavor integration.
2. Mid-morning: Preheat smoker or oven to 225-250°F (107-121°C).
3. Smoking/Cooking Phase 1 (3 hours): Smoke ribs (or bake, if using an oven) directly on the grates. Spritz every 45-60 minutes.
4. Wrapping Phase (2 hours): Wrap ribs tightly in foil with butter, brown sugar, and a splash of spritz.
5. Saucing Phase (30-60 minutes): Unwrap, baste with BBQ sauce, and finish cooking.
6. Resting Phase: Let ribs rest before slicing.
Step-by-Step Instructions
Achieving legendary ribs involves a systematic approach. Follow these steps for success:
1. Prepare the Ribs: Pat the ribs dry with paper towels. On the bone side, locate the thin, silvery membrane. Using a paper towel for grip, pull it off completely. Trim any excess fat or loose flaps of meat.
2. Apply Binder & Rub: Spread a thin layer of yellow mustard evenly over both sides of the ribs. This acts as a binder. Generously coat the ribs with your chosen BBQ rub, ensuring every crevice is covered. For the best flavor, allow the ribs to sit at room temperature for 30 minutes, or refrigerate for 2-4 hours, or even overnight.
3. Preheat Smoker/Oven: Preheat your smoker or oven to a consistent 225-250°F (107-121°C). If using a smoker, add your preferred wood chunks/chips once it reaches temperature.
4. Smoke/Cook Phase 1 (3 hours): Place the ribs directly on the grates, bone-side down. Close the lid and maintain temperature. Every 45-60 minutes, spritz the ribs lightly with a mixture of equal parts apple cider vinegar and apple juice. This keeps them moist and aids tenderization.
5. The “Texas Crutch” (Wrapping Phase – 2 hours): After 3 hours, the ribs should have developed a nice bark. Lay out two large sheets of heavy-duty aluminum foil, creating a sturdy base. Place one rack of ribs in the center, meat-side up. Sprinkle with brown sugar, dot with butter slices, and add a splash of the apple cider vinegar/apple juice spritz (about 1/4 cup). Tightly seal the foil around the ribs, creating a packet. Return the foil-wrapped ribs to the smoker/oven and cook for another 2 hours. This steaming process further tenderizes the meat. This method is incredibly effective for creating succulent Labor Day BBQ Ribs, especially when you’re aiming for that fall-off-the-bone texture without them getting dry.
6. Saucing & Finishing Phase (30-60 minutes): Carefully remove the foil-wrapped ribs from the smoker/oven. Unwrap them, discarding the foil and any excess liquid (or saving it for a sauce). Place the ribs back on the grates, meat-side up. Baste generously with your favorite BBQ sauce. Cook for another 30-60 minutes, or until the sauce is caramelized and slightly tacky. This is where many home cooks excel in making delicious Slow Cooker Ribs by adapting the saucing process. The internal temperature of the ribs should reach 200-205°F (93-96°C) for optimal tenderness.
7. Rest & Serve: Remove the ribs from the heat and let them rest, loosely tented with foil, for 15-20 minutes before slicing and serving. This allows the juices to redistribute, resulting in a more tender and flavorful product.
Nutritional Benefits & Advantages
Pork ribs, especially leaner cuts like baby backs, offer a good source of protein, essential for muscle repair and growth. They also provide B vitamins (B12, niacin, thiamine), which are crucial for energy metabolism and nervous system function. While often perceived as indulgent, portion control and homemade preparation allow you to manage sodium and sugar content from rubs and sauces, making them a healthier choice than many processed alternatives.
Tips, Variations & Cooking Advice
- Flavor Variations: Experiment with different rub profiles. For a spicier kick, add cayenne pepper to your rub. For a sweeter profile, increase the brown sugar.
- Ingredient Swaps: No apple cider vinegar? Use white vinegar or even beer in your spritz.
- Alternative Cooking Methods: While this guide focuses on smoking/baking, you can adapt these principles for grilling (indirect heat) or even using an Instant Pot for a quick start before finishing on the grill for char.
- Gluten-Free/Dairy-Free Options: Ensure your BBQ rub and sauce are certified gluten-free and dairy-free. Most homemade rubs are naturally free of these allergens.
- Spice Level: Adjust chili powder or cayenne in your rub for mild to extra-hot ribs.
Common Mistakes to Avoid
- Not Removing the Membrane: This tough membrane prevents rub absorption and creates a chewy texture. Always remove it!
- Overcooking: While “fall-off-the-bone” is desirable, overcooking can lead to dry, mushy meat. Aim for tender but still structurally intact.
- Under-seasoning: Don’t be shy with the rub. Ribs can handle a generous coating.
- Cooking at Too High a Temperature: Low and slow is the mantra for tender ribs. High heat dries them out.
- Not Resting the Meat: Skipping the resting period means juices will escape when you slice, leaving you with less flavorful, drier ribs.
Storage & Meal Prep Tips
Storage: Leftover ribs can be stored in an airtight container in the refrigerator for 3-4 days. For longer storage, wrap individual portions tightly in plastic wrap, then foil, and freeze for up to 3 months.
Reheating:
- Oven: Preheat oven to 250-300°F (120-150°C). Place ribs in an oven-safe dish with a splash of water or broth, cover tightly with foil, and heat until warmed through (20-30 minutes).
- Grill: Reheat over indirect medium heat, loosely wrapped in foil, to prevent drying.
- Microwave: Not recommended as it can make ribs rubbery.
Conclusion
There’s immense satisfaction in pulling perfectly cooked ribs from the smoker or oven, knowing you’ve mastered a true BBQ classic. From the initial rub to the final glaze, every step contributes to the incredible flavor and tenderness of these exquisite Labor Day BBQ Ribs. We encourage you to embark on this culinary adventure, confident that our detailed guide will lead you to success. Whether you’re a seasoned pitmaster or just starting, these techniques will transform your barbecue. Don’t be shy – dive in, experiment with flavors, and bring out your inner BBQ hero. And remember, the principles here can even be applied to making delicious Slow Cooker Ribs, demonstrating the versatility of these methods. Share your triumphs with us!
FAQs
Q1: Can I make these ribs if I don’t have a smoker?
A1: Absolutely! You can follow the same temperature and timing guidelines using your oven. You won’t get the smoke flavor, but the slow cooking method will still yield incredibly tender results.
Q2: How do I know when the ribs are done?
A2: There are a few indicators: the meat will have pulled back from the ends of the bones, the ribs will be very flexible when lifted in the middle (they’ll bend rather than stay stiff), and an instant-read thermometer inserted between the bones should read 200-205°F (93-96°C).
Q3: What if my ribs aren’t “fall-off-the-bone” tender?
A3: They likely need more cooking time, especially during the wrapped phase. Don’t be afraid to add another 30-60 minutes to that stage. Every rack is different!
Q4: Can I use different types of wood for smoking?
A4: Yes! Apple and cherry wood offer a mild, sweet smoke. Hickory provides a stronger, traditional BBQ flavor. Mesquite is very strong and best used sparingly or for shorter periods. Experiment to find your favorite.
Q5: What’s the best way to slice ribs for serving?
A5: After resting, place the rack bone-side up on a cutting board. Using a sharp knife, carefully slice between each bone. This ensures each serving gets a bone and a good portion of meat.