Mastering Homemade Hummus: Your Guide to Creamy Perfection
Are you tired of bland, store-bought spreads that lack that authentic, rich taste? Do you crave a versatile, healthy, and incredibly satisfying dip that elevates any meal? Look no further! This comprehensive guide will walk you through crafting the silkiest, most flavorful homemade Hummus you’ve ever tasted. Beyond just a simple dip, mastering this classic Middle Eastern staple opens up a world of culinary possibilities, from a vibrant spread for sandwiches to a wholesome accompaniment for grilled vegetables. Preparing your own hummus at home not only guarantees freshness and control over ingredients but also unlocks a depth of flavor simply unattainable with pre-packaged options. Get ready to transform your kitchen into a Mediterranean haven with this incredible Hummus recipe.
Ingredients & Kitchen Tools
To embark on your hummus-making journey, gather these essential items:
- Canned Chickpeas (15-ounce can, about 1.5 cups cooked): The star of our show! Opt for low-sodium if possible; rinsing thoroughly is key.
- Tahini (1/4 cup): Toasted sesame paste, providing the characteristic nutty flavor and creamy texture. Stir well before measuring.
- Lemon Juice (2-4 tablespoons, freshly squeezed): Brightens the flavor and adds a tangy kick. Adjust to taste.
- Garlic Clove (1-2 cloves): Freshly minced for aromatic depth. Roasting them beforehand offers a milder, sweeter flavor.
- Ice Water (2-4 tablespoons): The secret to super smooth hummus. Start with 2 and add more as needed.
- Olive Oil (2 tablespoons, plus more for drizzling): High-quality extra virgin olive oil for richness and a lovely finish.
- Cumin (1/2 teaspoon): Ground cumin for earthy warmth.
- Salt (1/2 teaspoon, or to taste): Fine sea salt is preferred for even distribution.
- Smoked Paprika (pinch, for garnish): Adds a beautiful color and a smoky aroma, optional but recommended.
- Food Processor: Essential for achieving that ultra-smooth, creamy consistency.
- Citrus Juicer: For hassle-free fresh lemon juice.
- Measuring Cups and Spoons: For accurate ingredient ratios.
- Spatula: To scrape down the sides of the food processor.
Prep Time & Cooking Schedule
- Prep Time: 10 minutes
- Cook Time: 0 minutes (if using canned chickpeas)
- Resting Time: 30 minutes (optional, but allows flavors to meld beautifully)
This Hummus is incredibly quick to prepare, making it a perfect last-minute appetizer or snack. Plan to allow at least 10 minutes for all chopping and measuring. While there’s no actual “cooking,” letting the finished hummus rest in the refrigerator for about 30 minutes to an hour will allow the flavors to deepen and meld, resulting in an even more delicious dip.
Step-by-Step Instructions
1. Prepare the Chickpeas: Drain and rinse the canned chickpeas thoroughly under cold water. For the smoothest Hummus, you can optionally remove the skins by gently rubbing them between your fingers. While this takes a few extra minutes, it makes a noticeable difference in texture.
2. Combine Ingredients: In the bowl of your food processor, combine the rinsed chickpeas, tahini, freshly squeezed lemon juice, minced garlic, cumin, and salt.
3. Process to Smoothness: Process the mixture for 1-2 minutes, scraping down the sides of the bowl as needed. The mixture will look thick and pasty.
4. Add Water Gradually: With the food processor running, slowly drizzle in the ice water, one tablespoon at a time, until the hummus reaches your desired creamy consistency. You may need more or less depending on your preference. The ice water helps aerate the hummus, making it incredibly light and fluffy. Continue processing until it’s velvety smooth, typically another 2-3 minutes. This step is crucial for achieving that irresistible texture that defines a great Hummus recipe.
5. Incorporate Olive Oil: Add 2 tablespoons of olive oil and pulse a few more times until fully incorporated.
6. Taste and Adjust: Taste the hummus and adjust seasonings as desired. You might want more lemon juice for tang, more salt, or an extra pinch of cumin.
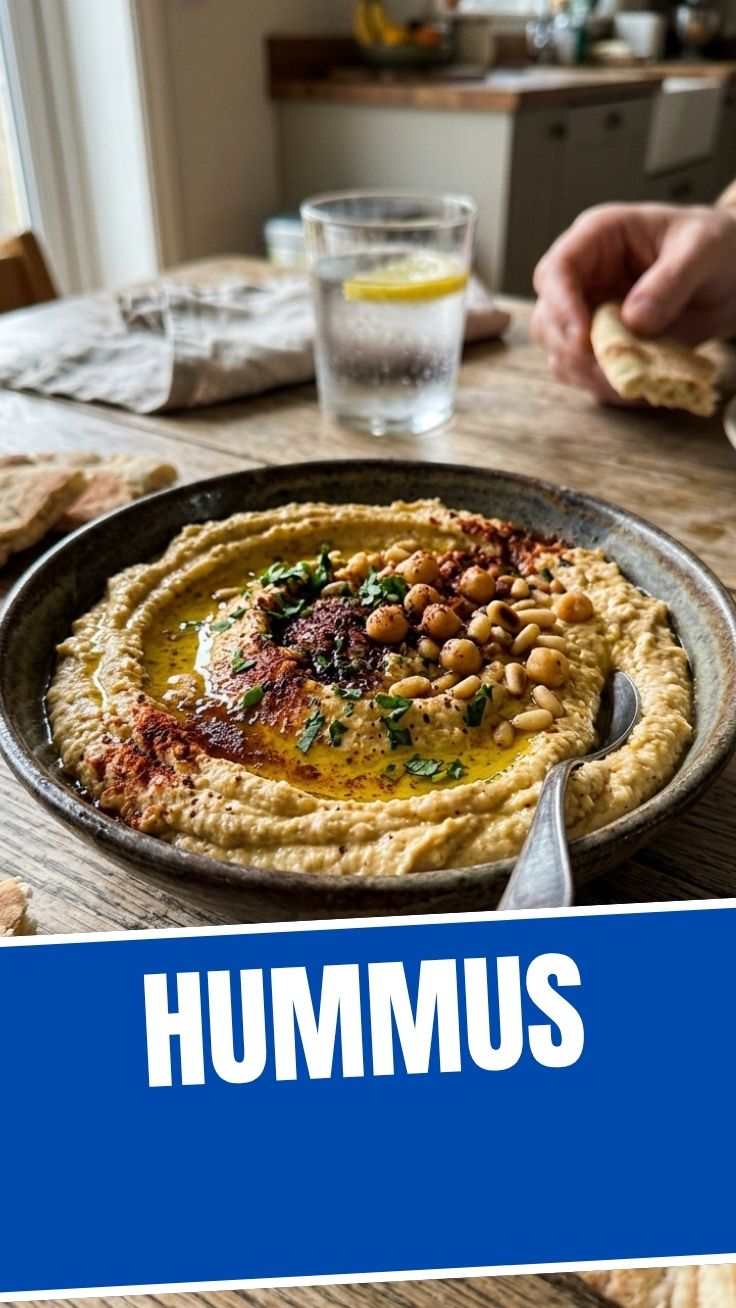
7. Serve: Transfer the finished hummus to a serving bowl. Drizzle with a generous amount of extra virgin olive oil, sprinkle with smoked paprika, and garnish with fresh parsley or
a few extra chickpeas if desired.
Nutritional Benefits & Advantages
Homemade hummus is a powerhouse of nutrition! Chickpeas are an excellent source of plant-based protein and dietary fiber, promoting satiety and digestive health. Tahini provides healthy fats, including monounsaturated and polyunsaturated fats, which are beneficial for heart health, along with essential minerals like calcium and iron. Lemon juice contributes Vitamin C, an antioxidant that boosts immunity, while garlic offers anti-inflammatory properties. This dip is naturally gluten-free and vegan, making it suitable for a wide range of dietary needs. Its high fiber content helps stabilize blood sugar levels, making it a smart choice for sustained energy.
Tips, Variations & Cooking Advice
- Roasted Garlic Hummus: For a milder, sweeter garlic flavor, roast whole garlic cloves (unpeeled) drizzled with olive oil at 400°F (200°C) for 15-20 minutes until soft. Squeeze out the pulp and add to the food processor.
- Spicy Hummus: Add a pinch of cayenne pepper, a dash of hot sauce, or a roasted jalapeño to your hummus.
- Herbaceous Hummus: Incorporate fresh herbs like cilantro, parsley, or dill for a vibrant twist.
- Sun-dried Tomato Hummus: Add 1/4 cup of oil-packed sun-dried tomatoes (drained) to the food processor for a savory, umami flavor.
- Beet Hummus: Roast a small beet, peel it, and add it to the food processor for a stunning pink hue and earthy sweetness.
Common Mistakes to Avoid
- Not Processing Long Enough: The key to creamy hummus is patience. Don’t be afraid to let your food processor run for a good 3-5 minutes, adding water as needed, until it’s absolutely silken.
- Skipping Ice Water: Cold water, especially ice water, emulsifies better with the tahini and olive oil, resulting in a lighter, fluffier texture.
- Too Much Garlic: Raw garlic can be potent. Start with one small clove and add more if you prefer a stronger garlic flavor. Roasted garlic offers a mellow alternative.
- Using Old Tahini: Tahini can separate and become bitter over time. Always stir your tahini well before measuring and use a fresh jar for the best flavor.
Storage & Meal Prep Tips
Homemade hummus can be stored in an airtight container in the refrigerator for up to 5-7 days. To prevent it from drying out and oxidizing, press a piece of plastic wrap directly onto the surface of the hummus before sealing the container. You can also drizzle a thin layer of olive oil on top.
For meal prep, make a large batch at the beginning of the week. It pairs wonderfully with vegetable sticks, pita bread, crackers, or as a spread in wraps and sandwiches. Hummus also freezes well for up to 3 months. Thaw overnight in the refrigerator and stir thoroughly before serving.
Conclusion
Creating your own Hummus at home is a rewarding experience that yields a superior product to anything found in stores. With just a few simple ingredients and a little patience, you can achieve that coveted creamy texture and rich, nuanced flavor. This versatile dip is not only delicious but also packed with health benefits, making it an ideal addition to any diet. So, what are you waiting for? Dive into the delightful world of homemade hummus and impress your taste buds and guests with this unforgettable Hummus recipe. Share your creations in the comments below – we’d love to see them!
FAQs
Q1: Can I use dried chickpeas instead of canned?
A1: Absolutely! Soak dried chickpeas overnight, then boil them until very tender (about 1-2 hours). This often yields an even creamier hummus, but adds significantly to prep time.
Q2: My hummus is too thick. How do I fix it?
A2: Slowly add a tablespoon or two of ice water while the food processor is running until you reach your desired consistency.
Q3: Why is my hummus bitter?
A3: Bitterness can come from old or poor-quality tahini. Ensure your tahini is fresh and well-mixed. Too much raw garlic can also contribute a sharp, bitter note.
Q4: Can I make hummus without a food processor?
A4: While a food processor is ideal for smoothness, you can use a blender (it may require more liquid and scraping) or even mash the chickpeas by hand for a rustic, chunky texture.
Q5: What are some good toppings for hummus?
A5: Beyond olive oil and paprika, consider toasted pine nuts, chopped fresh herbs (parsley, mint), sautéed mushrooms or spiced ground meat, or a sprinkle of za’atar.