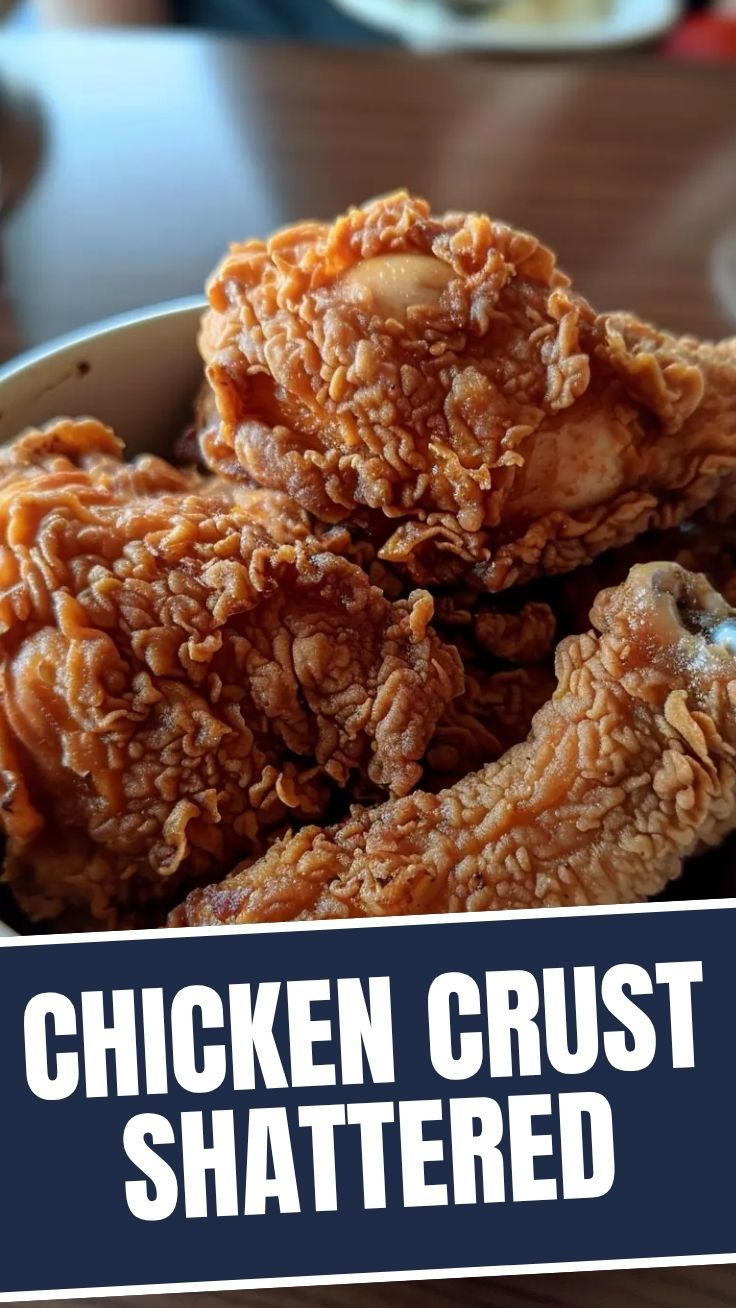
Unlock the Secret to Perfect Fried Chicken at Home
Ever wondered if you could replicate that crispy, juicy, and utterly irresistible Fried Chicken from your favorite restaurant right in your own kitchen? The answer is a resounding yes! There’s a unique satisfaction that comes from mastering a classic like Fried Chicken, especially when it results in a dish that far surpasses any takeout option. Not only does preparing it at home allow you to control the quality of ingredients, but it also opens up a world of flavor customization, ensuring a truly personalized culinary experience. This guide will walk you through every step, demystifying the process so you can achieve golden-brown perfection and truly exceptional Southern Fried Chicken.
Ingredients & Kitchen Tools
Crafting the perfect batch requires a few key items. Here’s what you’ll need:
- Chicken: 2.5-3 pounds bone-in, skin-on chicken pieces (drumsticks, thighs, wings, breasts). Bone-in offers more flavor and moisture.
- Buttermilk: 2 cups. Essential for tenderizing the chicken and helping the coating adhere.
- All-Purpose Flour: 3 cups. Forms the crispy crust.
- Cornstarch: 1/2 cup. Adds extra crispiness to the coating.
- Seasoning Blend: 1 tbsp smoked paprika, 1 tbsp garlic powder, 1 tbsp onion powder, 1 tbsp dried thyme, 1 tbsp black pepper, 2 tsp cayenne pepper (adjust to taste), 2 tsp salt. This blend is key for deep flavor.
- Eggs: 2 large. Acts as a binder for the coating.
- Hot Sauce: 1-2 tbsp (optional). Adds a subtle kick to the buttermilk marinade.
- Frying Oil: 4-6 cups (peanut, vegetable, or canola oil). Choose an oil with a high smoke point.
- Large Mixing Bowls (2-3): For marinating, flour mixture, and egg wash.
- Whisk: To combine dry ingredients evenly.
- Tongs: For safely handling chicken in and out of hot oil.
- Dutch Oven or Large Deep Pot: Ideal for maintaining consistent oil temperature during frying.
- Wire Rack & Baking Sheet: For draining excess oil and keeping chicken crispy.
- Meat Thermometer: Crucial for ensuring chicken is cooked through (internal temperature 165°F / 74°C).
Prep Time & Cooking Schedule
Planning is key for stress-free cooking and optimal results.
- Prep Time: 20 minutes (for seasoning and dredging)
- Marinating Time: Minimum 4 hours, ideally overnight (up to 24 hours). This step is non-negotiable for tender, flavorful chicken. The longer, the better!
- Cook Time: 20-30 minutes, depending on chicken piece size.
- Resting Time: 5-10 minutes after frying. This allows the juices to redistribute for maximum moisture.
Plan to start your marination the day before you intend to serve, allowing ample time for the buttermilk to work its magic.
Step-by-Step Instructions
Achieving that golden, crunchy exterior and juicy interior requires careful execution. Let’s make some amazing Fried Chicken!
1. Prepare the Chicken: Pat your chicken pieces very dry with paper towels. This helps the marinade adhere better.
2. Marinate: In a large bowl, whisk together the buttermilk, hot sauce (if using), and 2 teaspoons of the salt. Add the chicken pieces, ensuring they are fully submerged. Cover and refrigerate for at least 4 hours, or preferably overnight.
3. Create the Dry Dredge: In another large bowl, combine the flour, cornstarch, smoked paprika, garlic powder, onion powder, dried thyme, black pepper, and cayenne pepper. Whisk well to ensure all spices are evenly distributed.
4. Prepare the Egg Wash: In a shallow dish, beat the two eggs.
5. Set Up Dredging Station: Remove chicken from the buttermilk, letting excess drip off. Do not rinse. Your station should be: chicken from buttermilk -> egg wash -> flour mixture.
6. Dredge the Chicken: Dip each piece of chicken first into the egg wash, ensuring it’s fully coated, then transfer to the flour mixture. Press the flour mixture firmly onto all surfaces of the chicken, ensuring a thick, even coating. Place dredged chicken on a wire rack while you finish the rest.
7. Heat the Oil: In a Dutch oven or deep pot, pour frying oil to a depth of about 2-3 inches. Heat the oil to 325-350°F (160-175°C). Use a thermometer to monitor temperature closely; it’s crucial for perfect Southern Fried Chicken.
8. Fry the Chicken: Carefully lower 2-3 pieces of chicken into the hot oil (do not overcrowd the pot, which lowers oil temperature). Fry for 6-8 minutes per side, turning occasionally, until deeply golden brown and cooked through. Internal temperature should reach 165°F (74°C).
9. Drain and Rest: Transfer fried chicken to a clean wire rack set over a baking sheet to drain excess oil. Allow to rest for 5-10 minutes before serving.
Nutritional Benefits & Advantages
While often seen as an indulgence, homemade Fried Chicken can be a source of lean protein. Chicken is excellent for muscle repair and growth. By making it at home, you control the type and freshness of oil, and can manage sodium levels more effectively than with restaurant versions. The cornstarch in the coating provides minimal carbohydrates, and skin-on chicken offers healthy fats.
Tips, Variations & Cooking Advice
- Spice It Up: Add a pinch of MSG to the flour dredge for an ultimate umami boost.
- Herbaceous Twist: Incorporate finely chopped fresh rosemary or sage into the flour mixture.
- Gluten-Free: Substitute all-purpose flour with a 1:1 gluten-free flour blend for a celiac-friendly option.
- Air Fryer Version: For a lighter take, lightly spray dredged chicken with oil and air fry at 375°F (190°C) for 20-25 minutes, flipping halfway, until crispy and cooked through.
Double Dredge: For an extra thick and crunchy crust, dip chicken back into the buttermilk then* into the flour mixture a second time.
Common Mistakes to Avoid
- Overcrowding the Pot: This significantly drops oil temperature, leading to greasy, soggy chicken. Fry in batches.
- Inconsistent Oil Temperature: Too low, and chicken absorbs too much oil. Too high, and the outside burns before the inside cooks. Use a thermometer!
- Not Patting Chicken Dry: Excess moisture prevents the coating from adhering properly, leading to a weak crust.
- Skipping the Rest: Resting allows juices to redistribute, ensuring moist, tender meat.
Storage & Meal Prep Tips
Leftover Fried Chicken can be a delicious next-day meal.
- Refrigeration: Store in an airtight container for up to 3-4 days.
- Freezing: Wrap individual pieces tightly in plastic wrap, then aluminum foil, and store in a freezer-safe bag for up to 2-3 months.
- Reheating: For best results, reheat in an oven or air fryer at 350°F (175°C) for 10-15 minutes until heated through and crispy again. Microwaving tends to make it soggy.
Conclusion
Mastering homemade Fried Chicken is an incredibly rewarding culinary journey. By following these detailed steps and embracing the nuances of temperature control and seasoning, you can create a dish that is not only delicious but also a point of pride. This recipe for succulent Fried Chicken, with its perfectly crispy crust and juicy interior, ensures a truly memorable dining experience. We encourage you to try this recipe for a truly authentic Southern Fried Chicken experience, experiment with the variations, and share your golden creations with us!
FAQs
Q1: Can I use boneless chicken for this recipe?
A1: Yes, boneless chicken breasts or thighs can be used, but adjust frying time as they cook faster. Monitor internal temperature closely.
Q2: What if I don’t have buttermilk?
A2: You can make a substitute by adding 1 tablespoon of lemon juice or white vinegar to a measuring cup, then filling the rest with regular milk until it reaches 1 cup. Let it sit for 5-10 minutes until it slightly curdles.
Q3: How do I prevent the coating from falling off?
A3: Ensure chicken is patted very dry, press the flour mixture firmly onto the chicken, and allow dredged chicken to rest for a few minutes before frying. Don’t overcrowd the pot.
Q4: Can I reuse the frying oil?
A4: Yes, after it cools, strain the oil through a fine-mesh sieve or cheesecloth to remove any food particles. Store in an airtight container in a cool, dark place for up to 2-3 uses, depending on its condition.