Unlock Weekend Magic: Crafting the Perfect Dutch Baby Pancake at Home
Imagine waking up to the aroma of a golden-brown, puffed-up delight, ready to be adorned with your favorite toppings. That’s the magic of a Dutch Baby Pancake! While often mistaken for a traditional pancake, this oven-baked marvel, also known colloquially as a German Pancake, offers a uniquely satisfying experience. Why embark on this culinary adventure from your own kitchen? Beyond the sheer joy of creating something delicious, preparing a Dutch Baby Pancake at home allows for complete control over ingredients, ensuring freshness and customization to your taste. Plus, the process itself is surprisingly simple, yielding impressive results that will make weekend brunch feel effortlessly gourmet. It’s a fantastic recipe to master for both seasoned home cooks and eager beginners alike, promising a delightful start to any day.
Ingredients & Kitchen Tools
Crafting this puffy perfection requires a straightforward set of ingredients and basic kitchen essentials.
- Eggs (4 large): The foundation of the Dutch Baby Pancake‘s rise and custardy texture.
- Milk (1/2 cup): Whole milk is preferred for richness, but any milk will work.
- All-Purpose Flour (1/2 cup): Provides structure.
- Granulated Sugar (1 tbsp): Adds a touch of sweetness.
- Salt (1/4 tsp): Enhances overall flavor.
- Unsalted Butter (2 tbsp): Essential for that crispy, golden edge and to prevent sticking.
- Vanilla Extract (1 tsp, optional): For an extra layer of flavor.
Kitchen Tools:
- 10-inch Cast Iron Skillet or Oven-Safe Baking Dish: Crucial for achieving the signature high rise and even baking. A well-seasoned skillet is a game-changer.
- Blender or Whisk: For a smooth, lump-free batter. A blender is recommended for aeration.
- Large Measuring Cup: To measure liquids accurately.
- Oven Mitts: For safely handling the hot skillet.
Prep Time & Cooking Schedule
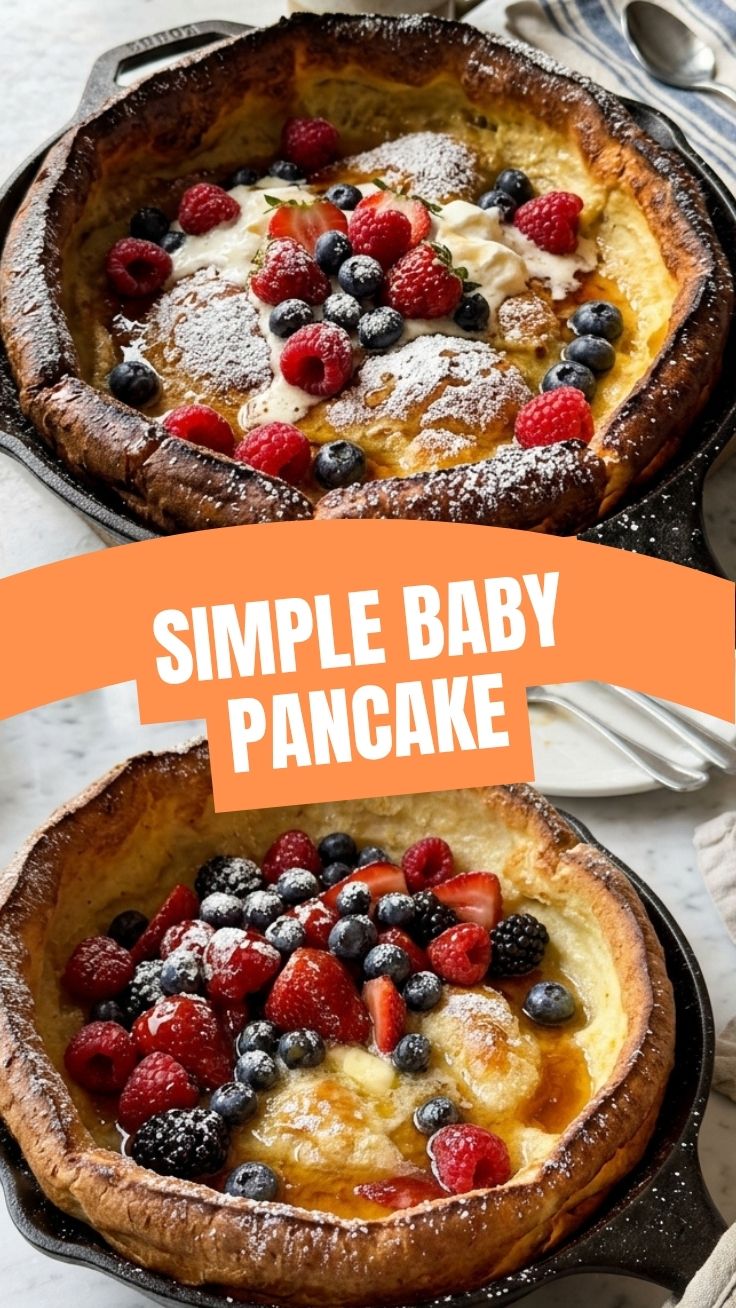
The beauty of this recipe lies in its efficiency. You’ll be enjoying your culinary masterpiece in under an hour!
- Prep Time: 5 minutes
- Cook Time: 20-25 minutes
- Resting Time (for batter): 10 minutes (optional, but recommended for a puffier result)
Plan to preheat your oven while the batter rests, ensuring a perfectly hot surface for the butter and skillet to meet. This synchronized timing is key to the impressive rise of your Dutch Baby Pancake.
Step-by-Step Instructions
Let’s get cooking! Follow these steps for an effortlessly impressive outcome:
1. Preheat Your Oven & Skillet: Place your cast iron skillet (or oven-safe dish) into a cold oven. Preheat the oven to 425°F (220°C). This ensures the skillet gets intensely hot, which is vital for the dramatic puff.
2. Combine Wet Ingredients: In a blender, combine the eggs, milk, and vanilla extract (if using). Blend on high for about 30 seconds until foamy. This aeration contributes to the light and airy texture.
3. Add Dry Ingredients: To the blender, add the flour, sugar, and salt. Blend again for another 30 seconds, scraping down the sides if necessary, until the batter is smooth and free of lumps. Avoid overmixing, as this can develop the gluten too much, resulting in a tougher pancake.
4. Melt the Butter: Once the oven is preheated, carefully remove the very hot skillet using oven mitts. Add the unsalted butter to the skillet and swirl it around until it’s fully melted and coats the bottom and sides. The butter should sizzle enticingly – a good sign! It’s this intensely hot, buttered surface that helps the Dutch Baby Pancake achieve its signature rise and crispy edges.
5. Pour and Bake: Carefully pour the prepared batter into the hot, buttered skillet. Immediately return the skillet to the oven. Bake for 20-25 minutes, or until the edges are deeply golden brown and have puffed dramatically, extending several inches above the skillet’s rim. The center may remain slightly softer but should not be wet. A perfectly baked German Pancake will look like a culinary masterpiece.
6. Serve Immediately: Remove from the oven and serve hot! The pancake will deflate slightly as it cools, so enjoy its majestic puff while you can.
Nutritional Benefits & Advantages
Beyond its impressive appearance and delightful taste, the Dutch Baby Pancake offers some worthwhile nutritional aspects. Eggs are a fantastic source of protein, essential for muscle repair and satiety. Milk provides calcium for bone health, and the dish can be a surprisingly wholesome way to start the day, especially when topped with fresh fruits.
Tips, Variations & Cooking Advice
- Sweet vs. Savory: While typically enjoyed sweet, a German Pancake also shines with savory toppings! Think sautéed mushrooms, cheese, and herbs, or even smoked salmon and crème fraîche.
- Gluten-Free: Substitute the all-purpose flour with a 1:1 gluten-free baking flour blend for a delicious gluten-friendly option.
- Dairy-Free: Swap regular milk for an unsweetened plant-based milk (almond or oat milk work well) and use a dairy-free butter substitute.
- Citrus Zest: Add a teaspoon of lemon or orange zest to the batter for a bright, aromatic twist.
- Spice It Up: A pinch of cinnamon or nutmeg in the batter can add warmth, especially in colder months.
Common Mistakes to Avoid
Cold Skillet: Baking in a cold or lukewarm skillet will result in a flat, uninspired pancake. Always preheat the skillet with* the oven.
- Opening the Oven Door: Resist the urge to peek during the first 15 minutes of baking. The sudden temperature drop can cause the pancake to deflate prematurely.
- Overmixing the Batter: Too much mixing develops gluten, leading to a chewy, rather than tender, pancake. Blend just until combined.
- Forgetting the Butter: The butter not only adds flavor but also prevents sticking and contributes to the crispy crust. Don’t skip it!
Storage & Meal Prep Tips
A freshly baked Dutch Baby Pancake is truly best enjoyed immediately. Its iconic puff will naturally deflate within minutes of leaving the oven. Leftovers, while still tasty, won’t have the same dramatic presentation. If you do have leftovers, store them in an airtight container in the refrigerator for up to 2-3 days. Reheat gently in a dry skillet or toaster oven for a few minutes until warmed through, though the texture will be softer.
Conclusion
There you have it – the complete guide to mastering the delightful Dutch Baby Pancake. This recipe isn’t just about creating a meal; it’s about making a moment. Its dramatic rise and custardy interior, a hallmark of a well-made German Pancake, make it an instantly impressive dish for any occasion, from simple weekend breakfasts to celebratory brunches. We encourage you to try this recipe and experience the joy of creating something truly special in your own kitchen. Share your puffed-up creations with us, and let’s celebrate the magic of home cooking together!
FAQs
Q1: My Dutch Baby Pancake didn’t puff. What went wrong?
A1: The most common culprit is a skillet that wasn’t hot enough. Ensure your skillet is preheated with the oven to 425°F (220°C) for at least 30 minutes, and avoid opening the oven door during baking.
Q2: Can I prepare the batter ahead of time?
A2: For the best results, it’s recommended to make the batter just before baking. However, you can prepare the batter up to an hour in advance and store it in the refrigerator. Whisk briefly before pouring.
Q3: What are the best toppings for a Dutch Baby Pancake?
A3: The possibilities are endless! Classic toppings include a dusting of powdered sugar, fresh berries, lemon juice, maple syrup, or fruit compotes. For a more decadent treat, try whipped cream or chocolate sauce.
Q4: Can I make this in a different size pan?
A4: Yes, but you may need to adjust the cooking time. For a smaller, 8-inch skillet, reduce cooking time by 2-3 minutes. For a larger, 12-inch skillet, you might need to add a few more minutes or increase the batter quantity slightly. The key is to watch for golden, puffed edges.