Unlock the Secret to Restaurant-Quality Chicken Piccata at Home
Ever wondered how to bring that vibrant, tangy, and utterly satisfying flavor of a gourmet Chicken Piccata to your own dinner table? Forget the bustling restaurant and the hefty bill. Mastering this classic dish, a cornerstone of delightful Italian recipes, isn’t just about recreating a meal; it’s about infusing your kitchen with the warmth of tradition and the joy of culinary accomplishment. Imagine golden-brown chicken cutlets, bathed in a bright lemon-caper sauce, ready in under an hour. This isn’t just a fantasy; it’s entirely achievable with a little guidance. This post will transform you from an eager home cook into a piccata pro, demonstrating how simple and rewarding it is to prepare this beloved dish from scratch.
Ingredients & Kitchen Tools
To embark on your culinary journey to a perfect piccata, gather these essentials:
- Boneless, Skinless Chicken Breasts (2 lbs): Choose high-quality breasts, as they are the star of the show. We’ll be butterflying and pounding them thin for even cooking.
- All-Purpose Flour (1/2 cup): Used for dredging the chicken, creating a beautiful golden crust.
- Salt & Black Pepper (to taste): Essential for seasoning, use freshly ground pepper for best flavor.
- Unsalted Butter (1/4 cup): For sautéing the chicken and building the rich sauce. Unsalted allows for better control over the final sodium content.
- Olive Oil (2 tbsp): A healthy fat for cooking, complements the butter beautifully.
- Lemons (2-3 large): The juice and zest are crucial for the signature tangy flavor. Opt for fresh lemons!
- Chicken Broth (1 cup): Low-sodium is preferred to manage saltiness. It forms the base of our luscious sauce.
- Caperts (2 tbsp, drained): These briny little buds add a tangy, salty punch that is quintessential to piccata.
- Fresh Parsley (1/4 cup, chopped): For garnish and to add a touch of freshness.
- Garlic (2 cloves, minced): Optional, but adds a wonderful aromatic depth to the sauce.
- Kitchen Mallet/Meat Tenderizer: For pounding the chicken to an even thickness.
- Shallow Dishes: Two plates or bowls for dredging flour.
- Large Skillet/Frying Pan: Preferably cast iron or stainless steel for excellent searing.
- Whisk: For emulsifying the sauce.
- Tongs: For handling the chicken.
Prep Time & Cooking Schedule
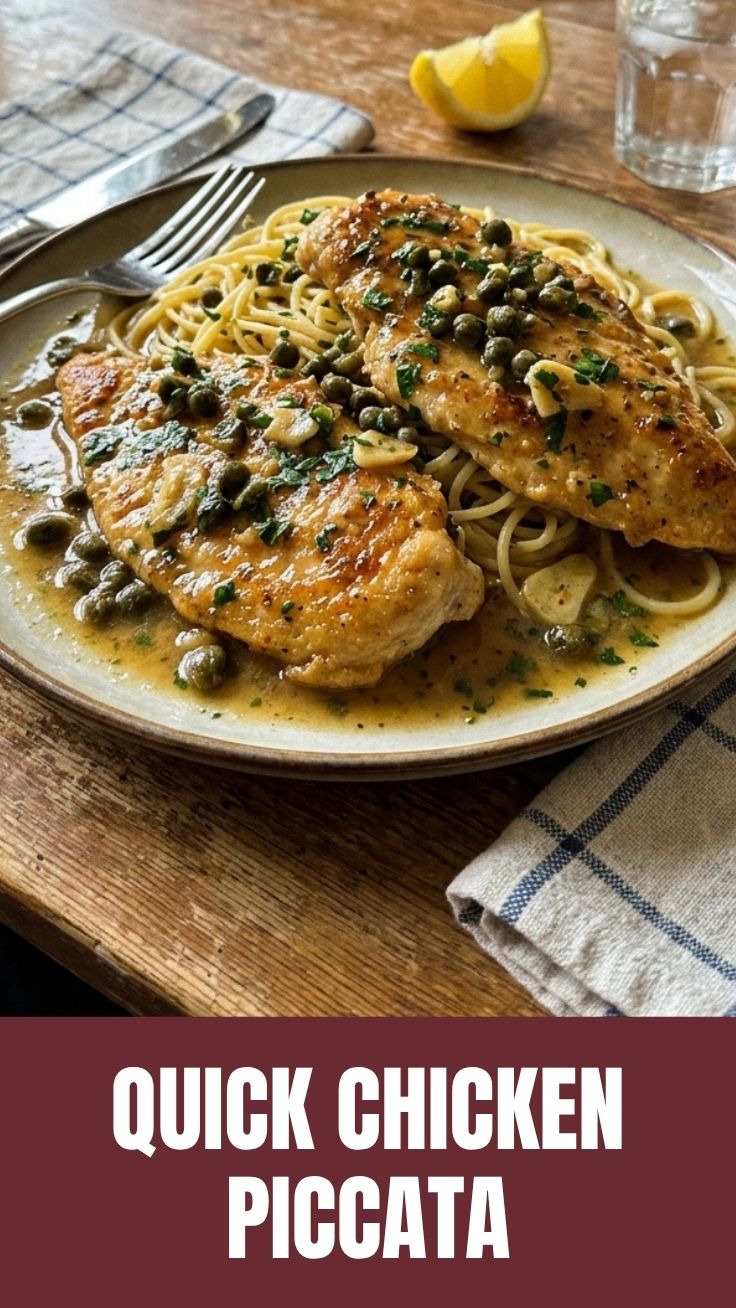
This recipe is surprisingly quick, making it ideal for a weeknight meal or an impressive last-minute dinner party.
- Prep Time: 15 minutes (includes butterflying and pounding chicken, mincing garlic, chopping parsley, and juicing lemons).
- Cook Time: 20-25 minutes (sautéing chicken in batches, then making the sauce).
- Total Time: Approximately 40 minutes.
This schedule is designed for efficiency. You can prepare your ingredients (mise en place) while the pan heats up, ensuring a seamless cooking experience.
Step-by-Step Instructions
1. Prepare the Chicken: Place one chicken breast between two sheets of plastic wrap. Using a meat mallet, pound it to an even 1/4-inch thickness. Repeat with the remaining chicken. Season both sides generously with salt and pepper.
2. Dredge the Chicken: Place flour in a shallow dish. Dredge each chicken cutlet in the flour, shaking off any excess. This light coating helps create a beautiful crust.
3. Sear the Chicken: Heat 1 tablespoon of olive oil and 1 tablespoon of butter in a large skillet over medium-high heat until the butter is melted and sizzling. Add chicken cutlets in a single layer, ensuring not to overcrowd the pan. Cook for 3-4 minutes per side, until golden brown and cooked through. Remove and set aside on a platter. Repeat with remaining chicken, adding more oil and butter as needed.
4. Craft the Sauce: In the same skillet (without cleaning it – those browned bits are flavor!), add the remaining butter. If using, add minced garlic and sauté for 30 seconds until fragrant. Pour in the chicken broth and lemon juice. Bring to a simmer, scraping up any browned bits from the bottom of the pan with a wooden spoon.
5. Finish the Sauce: Add the capers to the simmering sauce. Continue to simmer for 2-3 minutes, allowing the sauce to reduce slightly and thicken. Taste and adjust seasoning with salt and pepper.
6. Combine & Serve: Return the cooked Chicken Piccata to the pan, turning to coat evenly in the sauce. Garnish with fresh chopped parsley. Serve immediately, perhaps alongside pasta or roasted vegetables, for a truly authentic experience of Italian recipes at their finest.
Nutritional Benefits & Advantages
Beyond its incredible taste, this classic dish offers several nutritional perks. Chicken breast is a lean protein source, essential for muscle repair and satiety. The use of fresh lemon juice provides a boost of Vitamin C, an important antioxidant. Capers, though small, are rich in antioxidants and flavonoids. By pan-searing with a moderate amount of fat, we avoid deep-frying, making this a healthier alternative to many fried chicken dishes.
Tips, Variations & Cooking Advice
- Gluten-Free: Substitute all-purpose flour with a gluten-free all-purpose blend for dredging.
- Dairy-Free: Use a dairy-free butter alternative and ensure your chicken broth is dairy-free.
- Extra Tang: Add a small amount of lemon zest to the sauce for an even more pronounced citrus flavor.
- Spice It Up: A pinch of red pepper flakes can introduce a subtle heat.
- Wine Addition: A splash of dry white wine (like Sauvignon Blanc or Pinot Grigio) added after the garlic and reduced by half, can add complexity to the sauce.
- Mushrooms: Sautéed mushrooms can be added to the sauce during step 4 for an earthy dimension.
Common Mistakes to Avoid
- Overcrowding the Pan: This lowers the pan’s temperature, leading to steamed chicken instead of beautifully seared, golden-brown cutlets. Cook in batches if necessary.
- Pounding Unevenly: Thick and thin spots will cook disparately, resulting in some parts being dry and others undercooked. Aim for uniform thickness.
- Burning the Garlic: Garlic cooks quickly. Add it towards the end of the sautéing process for just 30 seconds to prevent bitterness.
- Oversalting: Capers are salty, and broth often contains sodium. Taste your sauce before adding more salt.
Storage & Meal Prep Tips
Leftover Chicken Piccata stores wonderfully. Place any remaining chicken and sauce in an airtight container and refrigerate for up to 3-4 days. For reheating, gently warm on the stovetop over low heat, or in the microwave on a medium setting, until heated through. To maintain texture, avoid overheating. Freezing isn’t recommended as the sauce can separate and the chicken may become rubbery upon thawing.
Conclusion
There you have it – a comprehensive guide to crafting delightful Chicken Piccata right in your own kitchen. This vibrant, lemony dish, a true testament to the elegance of Italian recipes, proves that gourmet flavors are well within reach for the home cook. With its balanced flavors and relatively quick preparation, it’s bound to become a regular in your meal rotation. Don’t just read about it; try it tonight and savor the satisfaction of creating something truly delicious from scratch. Let us know in the comments how your piccata turned out!
FAQs
- Can I use chicken thighs instead of breasts?
Yes, you can! Chicken thighs will result in a richer, moister dish, though they may require a slightly longer cooking time. Pound them thin just as you would with breasts.
- What can I substitute for capers?
While capers are essential for the authentic piccata flavor, if absolutely necessary, finely chopped green olives or even a touch of pickle relish can offer a similar briny kick, though the taste profile will differ.
- My sauce isn’t thickening enough. What can I do?
Continue to simmer the sauce for a few more minutes to allow it to reduce. If it’s still too thin, you can whisk in a cornstarch slurry (1 tsp cornstarch dissolved in 1 tbsp cold water) and simmer for another minute until thickened.
- Can I make this dish ahead of time?
It’s best made fresh, as the chicken maintains its crispness and the sauce is at its peak. However, you can prep the chicken (pound and dredge) a few hours ahead and keep it refrigerated.
- What side dishes pair well with Chicken Piccata?
Traditional pairings include pasta (linguine or spaghetti), rice, mashed potatoes, or steamed green vegetables like asparagus or broccoli.