Unlock Autumn’s Sweetest Secret: Homemade Caramel Apples
Are you ready to transform a simple fruit into an iconic autumnal delight? There’s something undeniably enchanting about a perfectly glossy, chewy Caramel Apple. While store-bought versions offer convenience, crafting these sweet treats at home elevates the experience, allowing for personalized touches and a depth of flavor that’s simply unparalleled. Imagine biting into the crisp tang of an apple, encased in a rich, buttery embrace of homemade caramel dip – a true symphony for the taste buds. This guide will walk you through creating these masterpieces, ensuring every bite is a celebration of fall.
Ingredients & Kitchen Tools
To embark on your Caramel Apple adventure, gather these essentials:
- Apples (6-8 medium): Firm, tart varieties like Granny Smith, Fuji, or Honeycrisp work best, providing a delightful contrast to the sweet caramel. Wash and thoroughly dry them.
- Granulated Sugar (2 cups): The foundation of our luscious caramel.
- Light Corn Syrup (1 cup): Prevents crystallization, ensuring a smooth, pliable caramel.
- Unsalted Butter (1/2 cup, 1 stick): Adds richness and a velvety texture to the caramel dip.
- Heavy Cream (1 cup): Contributes to the creamy consistency and luxurious mouthfeel.
- Vanilla Extract (1 teaspoon): Enhances the overall flavor profile.
- Salt (1/2 teaspoon): Balances the sweetness and deepens the caramel’s complexity.
- Wooden Skewers or Popsicle Sticks (6-8): For easy handling and dipping.
- Heavy-Bottomed Saucepan (3-quart minimum): Essential for even heat distribution and preventing scorching.
- Candy Thermometer: Crucial for achieving the perfect caramel consistency and preventing it from becoming too hard or too soft.
- Parchment Paper or Silicone Mat: For lining your cooling surface, preventing sticking.
- Baking Sheet: To hold the parchment-lined apples as they cool.
- Whisk: For stirring.
Prep Time & Cooking Schedule
- Prep Time: 20 minutes (includes washing apples and gathering ingredients)
- Cook Time: 20-30 minutes (active cooking of the caramel)
- Cooling/Setting Time: 30-60 minutes (or longer, depending on room temperature)
Plan to set aside a good hour to an hour and a half for this recipe, allowing for active cooking time and crucial cooling. The cooling time is flexible, but resist the urge to rush it – patience ensures the caramel sets beautifully.
Step-by-Step Instructions
1. Prepare the Apples: Wash and thoroughly dry your chosen apples. This step is critical; any moisture will prevent the caramel from adhering properly. Remove the stems and insert a wooden skewer firmly into the core of each apple. Line a baking sheet with parchment paper or a silicone mat.
2. Make the Caramel: In your heavy-bottomed saucepan, combine the granulated sugar, light corn syrup, and butter. Cook over medium heat, stirring constantly with a whisk, until the butter is melted and the sugar is dissolved.
3. Bring to a Boil: Once dissolved, stop stirring and bring the mixture to a rolling boil. Insert your candy thermometer and continue cooking without stirring until the temperature reaches 245°F (118°C) – the firm ball stage. This is the sweet spot for a chewy, yet not rock-hard, Caramel Apple coating.
4. Add Cream and Flavorings: Carefully remove the saucepan from the heat. Gradually whisk in the heavy cream, vanilla extract, and salt. The mixture will bubble vigorously – this is normal! Return the saucepan to low heat and stir until thoroughly combined and smooth, raising the temperature back to about 235°F (113°C) for a slightly softer caramel dip.
5. Dip the Apples: Allow the caramel to cool slightly in the saucepan for about 5-10 minutes, or until it thickens to a dippable consistency. Hold each apple by its skewer and dip it into the warm caramel, twirling to coat completely. Lift the apple and gently tap off any excess caramel by lightly tapping the stick against the edge of the saucepan.
6. Cool and Set: Place the dipped apples on your parchment-lined baking sheet. Allow them to cool at room temperature until the caramel is completely set, which may take 30-60 minutes. For a faster set, you can place them in the refrigerator for about 15-20 minutes, but avoid leaving them too long, as condensation can make the caramel sticky.
Nutritional Benefits & Advantages
While Caramel Apples are undoubtedly a treat, they do offer some surprising benefits! Apples themselves are a fantastic source of fiber, vitamins (like Vitamin C), and antioxidants, which support digestive health and boost immunity. Making them at home means you control the ingredients, avoiding artificial flavors and preservatives found in many commercially produced versions. Enjoying them in moderation as a delightful seasonal indulgence is key.
Tips, Variations & Cooking Advice
- Pristine Apples: Ensure your apples are free of wax. You can blanch them in boiling water for 5-10 seconds, then immediately plunge them into an ice bath, and dry thoroughly to remove any waxy coating.
- Flavour Boosts: Add a pinch of cinnamon or apple pie spice to your caramel dip for an extra autumnal kick.
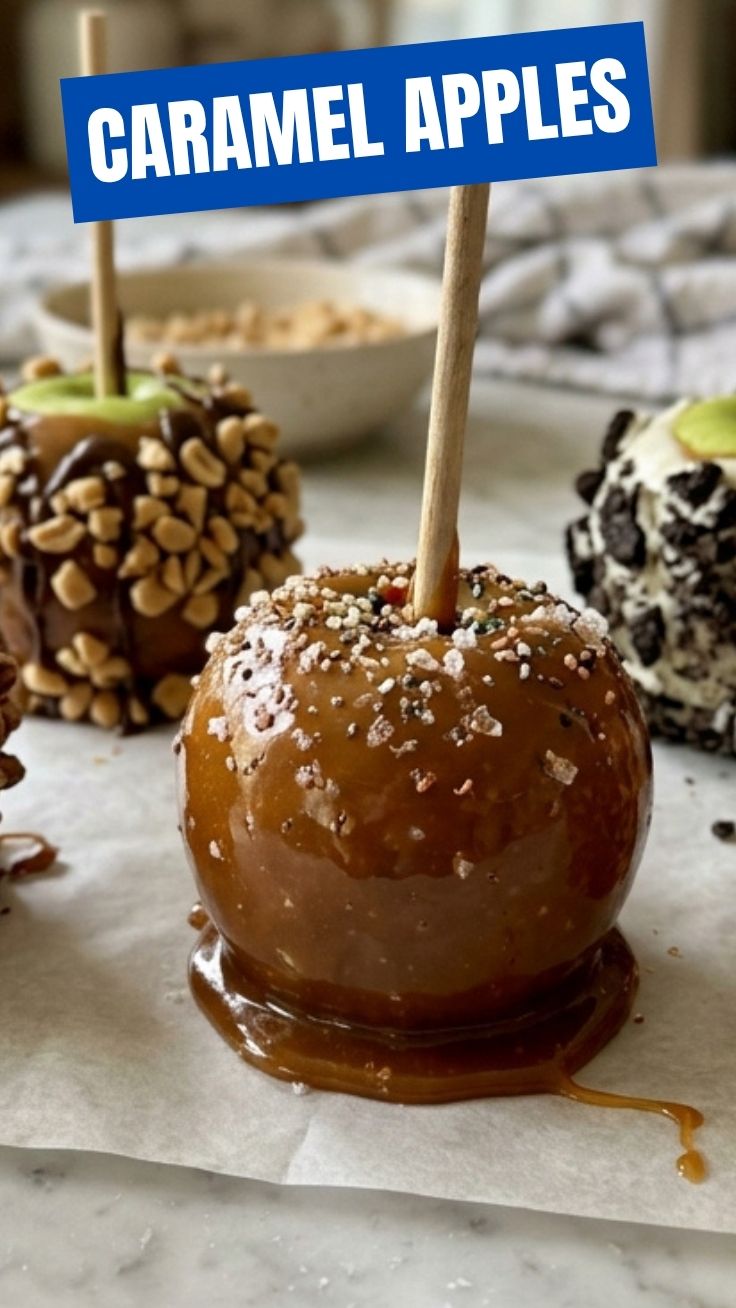
- Topping Extravaganza: Before the caramel sets, roll your apples in chopped nuts (pecans, peanuts), sprinkles, mini chocolate chips, crushed cookies, or shredded coconut for added texture and flavor.
- Dairy-Free Option: While challenging for classic caramel, a dairy-free version can be made using coconut cream and dairy-free butter alternatives, though the texture may vary slightly.
- Caramel Consistency: If your caramel is too thick, gently reheat it over low heat, stirring until it loosens. If it’s too thin, continue cooking until it reaches the desired temperature on your candy thermometer.
Common Mistakes to Avoid
- Wet Apples: As mentioned, moisture on the apples is the enemy of adherence. Ensure they are completely dry!
- Not Using a Candy Thermometer: Guessing the temperature often results in caramel that’s too soft and runny or too hard and brittle. A thermometer is indispensable.
- Over-Stirring the Caramel: Once the sugar is dissolved and it comes to a boil, avoid stirring the caramel, as this can cause crystallization. Only stir again when adding the cream and flavorings.
- Heating Too Quickly: Cooking the caramel over too high a heat can lead to scorching and uneven cooking. Be patient and cook at medium to medium-low heat.
Storage & Meal Prep Tips
Homemade Caramel Apples are best enjoyed within a few days. Store them individually wrapped in plastic wrap or an airtight container in the refrigerator to prevent sticking and keep the caramel fresh. They will retain their quality for up to 3-4 days. Freezing is not recommended, as the caramel can become grainy and the apple texture will suffer upon thawing.
Conclusion
There’s an undeniable magic in creating your own batch of homemade Caramel Apples. From the bubbling anticipation of the perfectly crafted caramel dip to the joy of biting into that crisp, sweet-tart perfection, this recipe offers a delightful culinary adventure. By following these detailed steps and embracing a few key tips, you’ll be well on your way to mastering this beloved autumn treat. So, gather your ingredients, set aside some time, and get ready to experience the pure bliss of handmade deliciousness! Don’t forget to share your creations and tell us your favorite toppings in the comments below!
FAQs
Q1: My caramel turned out too hard. What went wrong?
A1: The most common reason for hard caramel is cooking it to too high a temperature. Ensure your candy thermometer is accurate and that you remove it from the heat precisely at the target temperature (around 245°F/118°C for a firm but chewy caramel).
Q2: My caramel is sliding off the apples. How can I fix this?
A2: This usually happens if the apples are not completely dry or if they have a waxy coating. Ensure apples are thoroughly washed, dried, and blanched if necessary. Also, make sure the caramel isn’t too hot when dipping, as extremely hot caramel won’t adhere as well.
Q3: Can I cut the recipe in half?
A3: Yes, you can easily halve this recipe. Just be sure to use a smaller saucepan to maintain the appropriate depth for the caramel.
Q4: What’s the best way to reheat leftover caramel if I have some?
A4: Leftover caramel dip can be gently reheated in a saucepan over very low heat, stirring occasionally, until it reaches a dippable consistency. You can also use a microwave in 15-second intervals, stirring between each, until warm and fluid.