Craving a ridiculously easy, intensely satisfying treat? Get ready to bake the ultimate Blondies!
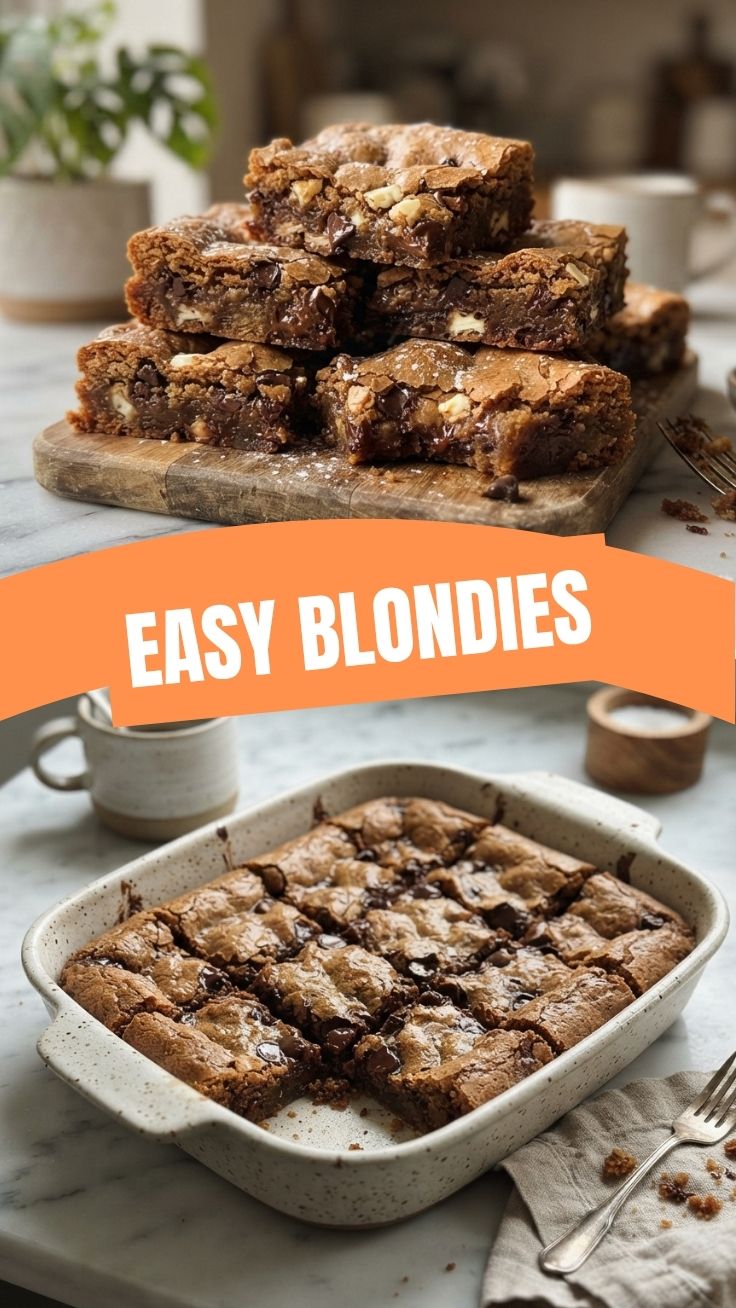
Who doesn’t love a gooey, chewy, melt-in-your-mouth dessert that comes together with minimal fuss? Today, we’re diving into the delightful world of homemade Blondies, often affectionately known as blonde brownies. This recipe isn’t just about creating a delicious treat; it’s about crafting a perfect moment of indulgence right in your own kitchen, tailor-made to your preferences. Forget those dry, store-bought approximations. We’re going to master the art of baking Blondies that are rich, buttery, and incredibly customizable. The satisfaction of pulling a warm tray of these golden squares from the oven is unmatched, and I’ll show you exactly how to achieve that blissful perfection.
Ingredients & Kitchen Tools
To embark on your Blondies adventure, gather these essentials:
1 cup (226g) Unsalted Butter: Melts down to give our Blondies their signature rich flavor and chewiness. Substitute with salted butter by reducing added salt in the recipe by ¼ teaspoon.*
1 ½ cups (300g) Light Brown Sugar, packed: Provides moisture and that deep, caramel-like sweetness. Dark brown sugar can be used for a more pronounced molasses flavor.*
2 large Eggs: Binds the ingredients, adds richness, and contributes to the chewy texture. For an egg-free option, use flax eggs (2 tbsp ground flaxseed mixed with 6 tbsp water, let sit for 5 minutes).*
1 teaspoon Vanilla Extract: Essential for enhancing all the other flavors. Pure vanilla extract is always recommended.*
2 cups (250g) All-Purpose Flour: The structural base for our delicious blonde brownies. For a slightly lighter texture, you can use cake flour.*
- ½ teaspoon Baking Powder: Helps the Blondies rise slightly and become tender.
- ¼ teaspoon Salt: Balances the sweetness and enhances the overall flavor profile.
1 cup (170g) Chocolate Chips: Your choice! Milk, semi-sweet, or dark chocolate work wonderfully. Feel free to use white chocolate chips, butterscotch chips, or chopped nuts for variety.*
- 9×13 inch baking pan: Essential for even baking.
- Parchment paper: For easy removal and cleanup.
- Large mixing bowl: For combining your ingredients.
- Whisk or electric mixer: For achieving smooth batter.
- Rubber spatula: For scraping down bowls and folding.
Prep Time & Cooking Schedule
- Prep time: 15 minutes
- Cook time: 25-30 minutes
- Cooling time: 30-60 minutes
This recipe is designed for ease! You can have your batter ready in less than 20 minutes, giving you plenty of time to get dinner ready while these golden beauties bake. Cooling is crucial for the perfect chewy texture, so resist the urge to cut into them too soon!
Step-by-Step Instructions
1. Preheat & Prep: Preheat your oven to 350°F (175°C). Line a 9×13 inch baking pan with parchment paper, leaving an overhang on the sides for easy lifting.
2. Melt Butter & Sugar: In a large microwave-safe bowl, melt the unsalted butter. Once melted, stir in the light brown sugar until thoroughly combined. The mixture will be thick and glossy. This step is key to the chewy texture of our Blondies.
3. Add Wet Ingredients: Whisk in the eggs one at a time, ensuring each is fully incorporated before adding the next. Stir in the vanilla extract. The mixture should become smoother and slightly lighter in color.
4. Combine Dry Ingredients: In a separate medium bowl, whisk together the all-purpose flour, baking powder, and salt.
5. Gently Combine: Gradually add the dry ingredients to the wet ingredients, mixing until just combined. Be careful not to overmix, as this can lead to tough Blondies. Overmixing develops gluten too much, taking away from that desirable chewy chew.
6. Fold in Chocolate Chips: Gently fold in your chosen chocolate chips or other mix-ins until evenly distributed throughout the batter. This is where your blonde brownies get their pockets of melty goodness.
7. Bake: Pour the batter into your prepared baking pan and spread evenly. Bake for 25-30 minutes, or until the edges are golden brown and a toothpick inserted into the center comes out with moist crumbs, but not wet batter.
8. Cool Completely: Let the Blondies cool completely in the pan on a wire rack before lifting them out with the parchment paper and cutting into squares. This cooling process is crucial for achieving that quintessential chewy texture.
Nutritional Benefits & Advantages
While Blondies are undoubtedly a treat, making them at home gives you control over the ingredients. Choosing high-quality butter and fresh eggs contributes to better nutrient profiles. Adding mix-ins like nuts can boost healthy fats and fiber, while opting for darker chocolate provides antioxidants. Plus, the sheer joy of a homemade dessert often outweighs the calorie count!
Tips, Variations & Cooking Advice
- Brown Butter Bliss: For an extra layer of nutty flavor, brown your butter before adding it to the sugar. Simply melt the butter in a saucepan over medium heat, stirring occasionally, until it turns amber and smells nutty. Let it cool slightly before proceeding.
- Nutty Additions: Enhance your Blondies with chopped pecans, walnuts, or macadamia nuts for added crunch and flavor.
- Citrus Zest: A teaspoon of orange or lemon zest can brighten the flavor profile beautifully.
- Salted Caramel Drizzle: After cooling, drizzle with homemade or store-bought salted caramel sauce for an indulgent finish.
- Gluten-Free Option: Substitute the all-purpose flour with a 1:1 gluten-free baking blend that contains xanthan gum.
- Dairy-Free Option: Use a high-quality plant-based butter substitute and ensure your chocolate chips are dairy-free.
Common Mistakes to Avoid
- Overmixing the Batter: This develops too much gluten, resulting in tough, cakey Blondies instead of the desired chewy kind. Mix until just combined.
- Overbaking: Pull your Blondies out when the edges are set and golden, but the center still looks slightly soft. They will continue to cook slightly as they cool. Overbaked Blondies are dry.
- Cutting Too Soon: Patience is a virtue here! Cutting into warm Blondies will lead to a crumbly mess. Let them cool completely for clean cuts and optimal chewiness.
Storage & Meal Prep Tips
Store leftover Blondies in an airtight container at room temperature for up to 3-4 days. For longer storage, they can be frozen for up to 2-3 months. Wrap individual squares tightly in plastic wrap, then place them in a freezer-safe bag or container. Thaw at room temperature for a few hours or in the microwave for 10-15 seconds for a warm treat.
Conclusion
There you have it—a foolproof guide to baking perfect, chewy, and utterly delicious homemade Blondies. Whether you call them Blondies or blonde brownies, this recipe delivers on all fronts: simplicity, flavor, and that irresistible texture. By following these steps and tips, you’ll be baking these golden masterpieces like a pro in no time. Give this recipe a try, and don’t forget to share your delectable results with us! Happy baking!
FAQs
1. Can I use white sugar instead of brown sugar?
* While you can, brown sugar is crucial for the signature chewy texture and rich, caramel notes of Blondies. White sugar will result in a crisper, more cake-like texture.
2. How do I know if my Blondies are done baking?
* The edges should be golden brown and set. A toothpick inserted into the center should come out with moist crumbs, not wet batter. If it comes out completely clean, they might be slightly overbaked.
3. My Blondies turned out cakey, what went wrong?
* This usually happens due to overmixing the batter or overbaking. Ensure you mix just until the ingredients are combined and pull them from the oven when they’re still slightly soft in the center.
4. Can I add nuts or other mix-ins to the batter?
* Absolutely! This recipe is incredibly versatile. Roughly chopped walnuts, pecans, macadamia nuts, or even dried cranberries make excellent additions to your blonde brownies.
5. How can I make these more decadent?
* Consider adding a swirl of peanut butter or nutella into the batter before baking, or drizzling with a warm chocolate ganache after they’ve cooled. A sprinkle of sea salt before serving also enhances the flavors.