Unlock Flavor & Convenience: Your Ultimate Guide to Easy Rotisserie Chicken Recipes
Ever wondered if you could recreate that perfectly seasoned, juicy rotisserie chicken from your favorite grocery store right in your own kitchen? The answer is a resounding yes! Preparing a delicious Rotisserie Chicken Recipes at home isn’t just about saving money; it’s about customizing flavors, controlling ingredients, and enjoying a wholesome meal that’s truly yours. Forget bland or dry chicken; with our simple yet effective guide, you’re about to master the art of effortless home-cooked poultry, making even Slow Cooker Rotisserie Chicken seem like a breeze. This comprehensive post will walk you through everything you need to know to achieve tender, flavorful results every single time.
Ingredients & Kitchen Tools
- Whole Chicken (3-4 lbs): Opt for a fresh, unfrozen bird for the best results. A smaller chicken cooks more evenly.
- Olive Oil (2 tablespoons): Helps with browning and adheres the seasoning.
- Smoked Paprika (1 tablespoon): Adds a beautiful color and a smoky, savory depth.
- Garlic Powder (1 tablespoon): Classic savory flavor enhancer.
- Onion Powder (1 tablespoon): Provides a complementary aromatic base.
- Dried Thyme (1 teaspoon): Earthy, herbaceous notes that pair well with chicken.
- Salt (1.5 teaspoons): Essential for seasoning and bringing out flavor.
- Black Pepper (1 teaspoon): Adds a subtle kick and aromatic complexity.
- Lemon (1, halved): Placed inside the cavity to infuse moisture and bright citrus notes.
- Onion (1, quartered): Also for the cavity, adds a sweet, savory aroma.
- Chicken Broth or Water (1/2 cup): To keep the bottom of the pan from scorching and add moisture if using an oven.
- Roasting Pan with Rack: Crucial for even air circulation around the chicken, ensuring crispy skin.
- Meat Thermometer: Non-negotiable for checking internal temperature and guaranteeing food safety.
- Twine (optional): To truss the chicken, promoting even cooking and a neater presentation.
Prep Time & Cooking Schedule
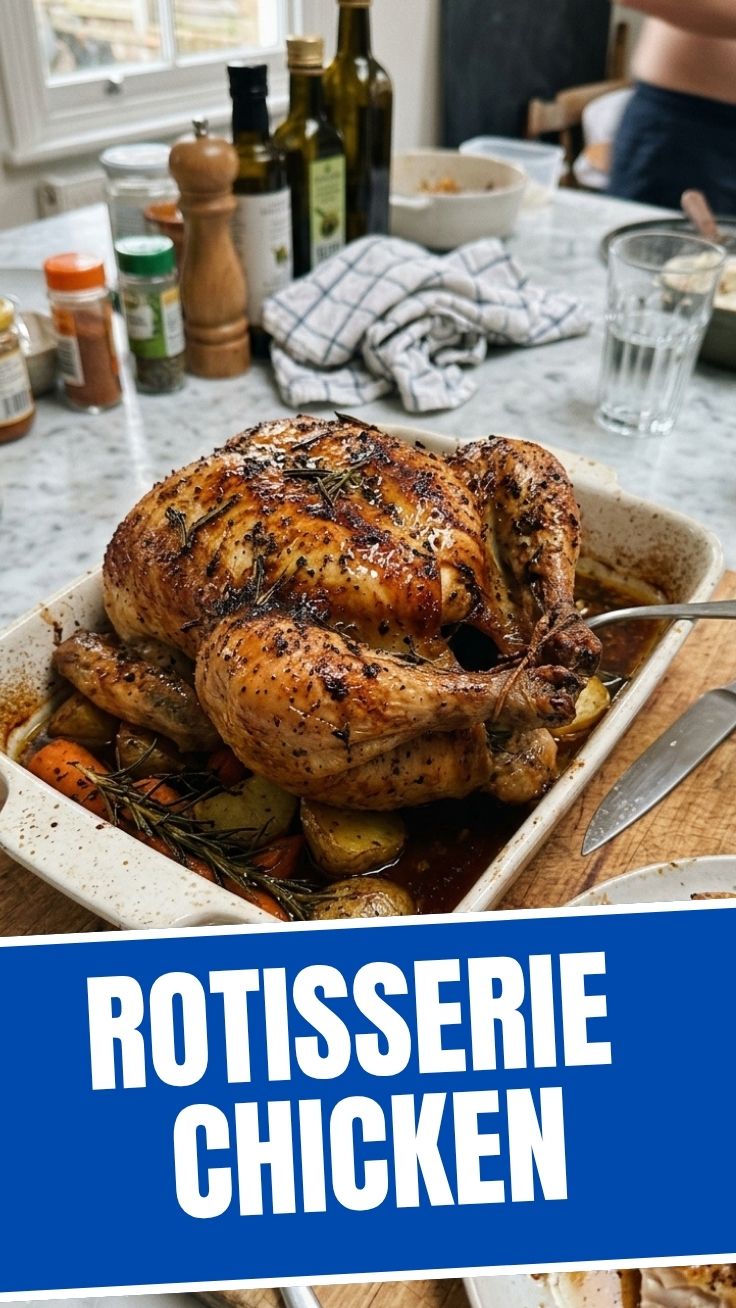
- Prep Time: 15 minutes
- Cook Time: 60-90 minutes (depending on chicken size and cooking method)
- Resting Time: 10-15 minutes
This recipe is designed for maximum flavor with minimal effort. You can prepare the spice rub ahead of time to make the assembly even quicker. The resting time is crucial—don’t skip it! It allows the juices to redistribute, resulting in a more tender and moist chicken. Plan to start cooking about 1.5 – 2 hours before you want to serve, factoring in the prep and resting time.
Step-by-Step Instructions
1. Preheat & Prepare: Preheat your oven to 400°F (200°C). If using a rotisserie attachment, follow its specific preheating instructions. Remove the giblets from the chicken cavity and pat the chicken completely dry with paper towels. This is a critical step for crispy skin!
2. Seasoning Creation: In a small bowl, combine smoked paprika, garlic powder, onion powder, dried thyme, salt, and black pepper. Mix thoroughly to create your aromatic spice rub.
3. Rub Down: Drizzle olive oil over the entire chicken, then generously rub the spice mixture all over the chicken, ensuring even coverage. Don’t forget under the wings and legs.
4. Stuff & Truss (Optional): Place the halved lemon and quartered onion inside the chicken cavity. If desired, truss the chicken legs together with twine and tuck the wings under the body. This helps the chicken cook more uniformly.
5. Roast or Rotisserie:
* Oven Roasting: Place the chicken on a rack in a roasting pan. Add ½ cup of chicken broth or water to the bottom of the pan to prevent drippings from burning and add moisture. Roast for 60-90 minutes, or until an internal meat thermometer inserted into the thickest part of the thigh (without touching bone) reads 165°F (74°C). For incredible Rotisserie Chicken Recipes, consider basting occasionally with pan juices.
* Rotisserie Cooking: Secure the chicken onto your rotisserie spit according to your appliance instructions. Position it in the oven or rotisserie grill. Cook until the internal temperature reaches 165°F (74°C). The constant rotation will ensure a wonderfully even cook and crispy skin, mirroring the convenience of a perfect Slow Cooker Rotisserie Chicken without the slow cooker.
6. Rest & Serve: Once cooked, carefully remove the chicken from the oven or rotisserie. Transfer it to a cutting board and tent loosely with foil. Let it rest for 10-15 minutes before carving. This resting period is vital for a juicy chicken.
Nutritional Benefits & Advantages
Homemade rotisserie chicken offers significant nutritional advantages. It’s a fantastic source of lean protein, essential for muscle repair and growth. By preparing it yourself, you control the amount of sodium and unhealthy fats, avoiding the often excessive additives found in store-bought versions. The spices used, like garlic and paprika, also offer antioxidant properties. A whole chicken provides collagen, beneficial for joint health, and a range of B vitamins crucial for energy metabolism.
Tips Variations & Cooking Advice
- Spice It Up: Experiment with different spice blends! Try a jerk seasoning, a Mediterranean blend with oregano and cumin, or a smoky chipotle rub.
- Herbaceous Boost: Tuck fresh rosemary or thyme sprigs into the cavity alongside the lemon and onion for added aroma.
Crispier Skin: For an extra crispy skin, pat the chicken very meticulously* dry, then rub with a mixture of baking powder (1/2 tsp) and salt before adding your spices. The baking powder helps absorb moisture and increases surface area for browning.
- Alternative Cooking: This spice rub also works wonderfully for a Slow Cooker Rotisserie Chicken preparation, or even for grilling smaller chicken pieces!
- Gluten-Free/Dairy-Free: This recipe is naturally gluten-free and dairy-free!
- Compound Butter: Mix softened butter with herbs and garlic, then spread it under the chicken skin for extra moisture and flavor.
Common Mistakes to Avoid
- Not Drying the Skin: Leads to rubbery skin instead of crispy. Always pat it thoroughly dry.
- Not Reaching Proper Temperature: Undercooked chicken is unsafe. Always use a meat thermometer.
- Overcooking: Results in dry, stringy chicken. Remove it promptly once it reaches 165°F.
- Not Resting the Chicken: Resting allows juices to redistribute, leading to a much juicier bird.
- Forgetting the Rack: Roasting directly on a pan will steam the bottom, preventing crispiness.
Storage & Meal Prep Tips
Leftover rotisserie chicken is incredibly versatile for meal prepping. Once cooled, carve the chicken and store the meat in airtight containers in the refrigerator for up to 3-4 days. For longer storage, freeze carved chicken meat in freezer-safe bags or containers for up to 3 months. Thaw overnight in the refrigerator before reheating. Reheat gently in the microwave, oven, or on the stovetop with a splash of broth to prevent drying out. Use it in sandwiches, salads, quesadillas, stir-fries, or pasta dishes!
Conclusion
Mastering homemade Rotisserie Chicken Recipes is a culinary superpower. It transforms a simple whole chicken into a versatile, flavorful, and incredibly satisfying meal, providing endless possibilities for delicious weeknight dinners and creative meal prep. By following these steps and embracing the power of your own kitchen, you’ll consistently achieve juicy, perfectly seasoned chicken that rivals any store-bought version, and you might even discover new ways to make weeknight meals like a Slow Cooker Rotisserie Chicken shine. We encourage you to try this recipe, experiment with the tips, and savor the homemade goodness. Share your creations and tell us your favorite ways to enjoy this classic dish!
FAQs
Q1: Can I use frozen chicken for this recipe?
A1: Yes, but you must thaw it completely in the refrigerator before preparing. A partially frozen chicken will cook unevenly.
Q2: My chicken skin isn’t crispy, what went wrong?
A2: The most common culprit is not patting the chicken dry enough. Moisture is the enemy of crispy skin. Also, ensure your oven temperature is accurate and don’t overcrowd the roasting pan.
Q3: How do I know when the chicken is done without a thermometer?
A3: While a thermometer is highly recommended for accuracy and safety, a less reliable indicator is to pierce the thickest part of the thigh; the juices should run clear, not pink.
Q4: Can I make this in an air fryer?
A4: Yes, if your air fryer can accommodate a whole chicken. Adjust cooking time and temperature according to your air fryer’s manual, typically at a slightly lower temperature (e.g., 375°F/190°C) and shorter duration.
Q5: What can I do with the leftover chicken carcass?
A5: Don’t throw it away! Use the carcass to make an incredibly rich and flavorful homemade chicken broth or stock. It’s excellent for soups, sauces, or just sipping.