Unlock Flavor Bliss: Your Ultimate Homemade Fried Pickle Dip Recipe!
Ever wondered how to capture that irresistible tangy, savory crunch of your favorite appetizer in a dip form right in your own kitchen? Look no further! Preparing your own Fried Pickle Dip at home isn’t just about saving money; it’s about customizing flavors, ensuring fresh ingredients, and impressing your guests with a truly unique and delicious offering. This creamy, flavor-packed dip, featuring the delightful tang of dill pickles and a rich, savory base, is perfect for parties, game nights, or just a sophisticated snack. Forget store-bought; our guide will show you how to craft a pickle brine dip that will become your new go-to.
Ingredients & Kitchen Tools
- Cream Cheese (8 oz block, softened): The creamy foundation of our dip. Full-fat is recommended for optimal texture and richness.
- Sour Cream (1/2 cup): Adds a tangy counterpoint and a lighter consistency. Greek yogurt can be substituted for a healthier twist.
- Mayonnaise (1/4 cup): Enhances creaminess and adds a subtle umami flavor.
- Dill Pickles (1 cup, finely chopped and well-drained): The star of the show! Use good quality, crunchy dill pickles. Draining well prevents a watery dip.
- Pickle Juice (2 tablespoons): Intensifies the pickle flavor and adds a refreshing tang.
- Garlic Powder (1 teaspoon): Aromatic depth.
- Onion Powder (1/2 teaspoon): Milder onion flavor without the crunch.
- Fresh Dill (2 tablespoons, chopped): Brightens the flavor and adds a fresh herbaceous note.
- Cheddar Cheese (1/2 cup, shredded): Adds a cheesy, savory element. Sharp cheddar works best.
- Panko Breadcrumbs (1/2 cup): For that signature crispy “fried” texture.
- Butter (2 tablespoons, melted): To toast the panko breadcrumbs.
- Salt and Black Pepper (to taste): Essential for seasoning.
Kitchen Tools:
- Mixing Bowls (medium and small): For combining ingredients and toasting breadcrumbs.
- Spatula or Electric Mixer: For blending the dip.
- Measuring Cups and Spoons: For accurate ingredient portions.
- Sharp Knife and Cutting Board: For chopping pickles and dill.
- Small Skillet: For toasting breadcrumbs.
Prep Time & Cooking Schedule
- Prep Time: 15 minutes
- Cook Time: 5 minutes (for breadcrumbs)
- Chilling Time: 30 minutes (minimum, for flavors to meld)
This recipe is incredibly quick to prepare, making it ideal for last-minute gatherings. The chilling time is crucial for the flavors to fully develop and for the dip to achieve its optimal consistency. You can prepare this dip several hours, or even a day, in advance, allowing the flavors to deepen even further – just be sure to add the toasted breadcrumbs right before serving to maintain their crispness.
Step-by-Step Instructions
1. Prepare the Crispy Topping: In a small skillet over medium heat, melt the butter. Add the panko breadcrumbs and toast, stirring frequently, until golden brown and crispy, about 3-5 minutes. Set aside to cool. This step is crucial for achieving the “fried” aspect of our Fried Pickle Dip.
2. Combine Wet Ingredients: In a medium mixing bowl, combine the softened cream cheese, sour cream, and mayonnaise. Beat with a spatula or electric mixer until smooth and well combined, ensuring there are no lumps.
3. Add Flavor Base: Stir in the pickle juice, garlic powder, and onion powder into the cream cheese mixture. Mix thoroughly.
4. Incorporate Pickles and Dill: Fold in the finely chopped and well-drained dill pickles, fresh dill, and shredded cheddar cheese. Mix gently until all ingredients are evenly distributed. This forms the heart of our delicious pickle brine dip.
5. Season and Chill: Season the dip with salt and black pepper to taste. Remember, pickles are already salty, so taste before adding too much. Cover the bowl and refrigerate for at least 30 minutes to allow the flavors to meld.
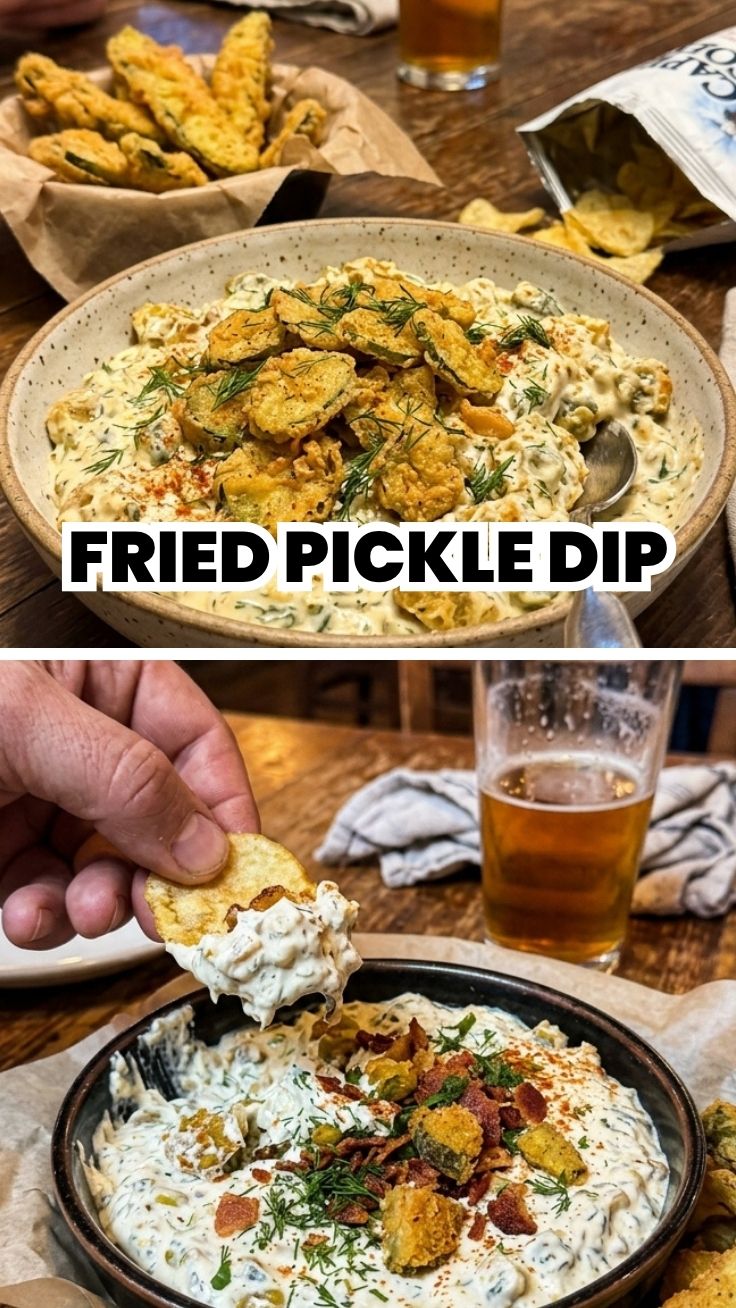
6. Serve: Transfer the chilled dip to a serving bowl. Just before serving, sprinkle the toasted panko breadcrumbs over the top for that delightful crunch. Serve with an assortment of dippers like potato chips, pita chips, crackers, or fresh vegetables.
Nutritional Benefits & Advantages
Dill pickles are known for their probiotic benefits, supporting gut health. While this dip is undoubtedly indulgent, the inclusion of fresh dill provides a source of vitamin A, vitamin C, and antioxidants. The protein from the cheese and the healthy fats from the cream cheese and mayonnaise offer satiety. Making it at home gives you control over the quality of ingredients, allowing you to choose organic dairy or lower-fat alternatives if desired, without compromising on flavor.
Tips, Variations & Cooking Advice
- Spicy Kick: Add a pinch of cayenne pepper or a dash of hot sauce to the dip mixture for a fiery twist.
- Cheesy Variations: Experiment with different cheeses like Monterey Jack, sharp white cheddar, or a blend of Italian cheeses.
- Herbaceous Swaps: While fresh dill is classic, you can try fresh chives or parsley for different fresh herb notes.
- Baked Version: For a warm, bubbly experience, transfer the dip (without breadcrumbs) to an oven-safe dish, top with cheese, and bake at 375°F (190°C) for 20-25 minutes, then add toasted breadcrumbs.
- Vegan Option: Use dairy-free cream cheese, sour cream, mayonnaise, and shredded cheese.
- Gluten-Free: Ensure your panko breadcrumbs are certified gluten-free, or simply omit them for a naturally gluten-free dip.
Common Mistakes to Avoid
- Not Draining Pickles: Excess moisture from the pickles will make your dip watery. Always squeeze out as much liquid as possible after chopping.
- Over-Salting: Pickles, especially commercial ones, are already quite salty. Taste the dip before adding extra salt.
- Mixing Breadcrumbs Too Early: Adding the toasted panko hours before serving will result in soggy breadcrumbs. Always add them right before presenting the dip.
- Not Chilling: While edible immediately, chilling allows the flavors to truly marry and the dip to firm up to a more enjoyable consistency.
Storage & Meal Prep Tips
Store leftover Fried Pickle Dip in an airtight container in the refrigerator for up to 3-4 days. Do not include the toasted breadcrumbs when storing, as they will get soggy. You can toast a fresh batch of breadcrumbs or rebake the original batch lightly in a dry skillet before serving leftovers. This dip does not freeze well due to the dairy-heavy base, which can separate upon thawing.
Conclusion
Creating your own Fried Pickle Dip is a rewarding experience that yields an undeniably delicious and crowd-pleasing appetizer. From the creamy base to the tangy dill pickles and delightful crunch of toasted panko, every element comes together to create a harmonious symphony of flavors and textures. We hope this comprehensive guide inspires you to whip up this amazing pickle brine dip and share it with your loved ones. Don’t forget to let us know how yours turned out in the comments below!
FAQs
Q1: Can I use sweet pickles instead of dill pickles?
A1: While you could, it would drastically change the flavor profile of the dip. The tang and sourness of dill pickles are key to the “fried pickle” experience. Sweet pickles would result in a much sweeter dip.
Q2: What are the best dippers for this dip?
A2: Potato chips (especially ridged ones), pita chips, pretzels, carrot sticks, celery sticks, bell pepper strips, crackers, or toasted baguette slices all work wonderfully.
Q3: Can I make this dip ahead of time?
A3: Absolutely! This dip benefits from chilling, so making it up to 24 hours in advance allows the flavors to deepen. Just remember to add the toasted panko breadcrumbs right before serving to maintain their crispness.
Q4: How can I make this dip thicker or thinner?
A4: To make it thicker, you can decrease the amount of sour cream or add a little extra cream cheese. To thin it out, add an extra tablespoon of pickle juice or a splash of milk until you reach your desired consistency.
Q5: Is there a way to make the dip spicier?
A5: Yes! You can add a pinch of cayenne pepper, a dash of hot sauce, or even finely minced jalapeños (deseeded for less heat) to the dip mixture to introduce a spicy kick.