Unlock the Secret to Perfect Homemade Chicken Parmesan: A Culinary Journey
Ever wondered if you could recreate that restaurant-quality Chicken Parmesan right in your own kitchen? The answer is a resounding yes! There’s an unparalleled satisfaction in preparing this beloved dish yourself, not only for the incredible flavors but also for the control you gain over ingredients and cooking methods. Forget bland takeout; embrace the rich heritage of Italian cuisine with this comprehensive guide designed for home cooks of all levels. By making your own, you unlock a world of fresh, wholesome ingredients and personalized culinary delight, transforming a simple meal into an unforgettable experience.
Ingredients & Kitchen Tools
To embark on this delicious journey, gather the following:
- Boneless, Skinless Chicken Breasts (4 pieces, 6-8 oz each): The star of our show! Opt for organic if possible.
- All-Purpose Flour (1/2 cup): For dredging, creating a crisp exterior.
- Eggs (2 large): Beaten, for binding the breadcrumbs to the chicken.
- Panko Breadcrumbs (1 cup): Offers superior crispiness compared to regular breadcrumbs.
- Grated Parmesan Cheese (1/2 cup, plus more for topping): Essential for flavor and a golden crust. Use freshly grated for best results.
- Marinara Sauce (2 cups): Your favorite store-bought or homemade. A good quality sauce elevates the dish significantly.
- Fresh Mozzarella Cheese (8 oz, sliced or shredded): For that irresistible gooey, melty topping.
- Fresh Basil Leaves (1/4 cup, chopped): For garnish and a burst of fresh aroma.
- Olive Oil (1/4 cup): For pan-frying the chicken.
- Salt & Freshly Ground Black Pepper (to taste): Basic seasonings, adjust to your preference.
- Garlic Powder (1 tsp): Adds an extra layer of savory flavor to the breading.
- Onion Powder (1 tsp): Complements the garlic powder in the breading.
Kitchen Tools:
- Shallow Bowls (3): For the dredging station (flour, egg, breadcrumbs).
- Large Skillet or Cast Iron Pan: For pan-frying the chicken.
- Baking Dish (9×13 inch): For baking the assembled Chicken Parmesan.
- Meat Mallet or Rolling Pin: For pounding the chicken breasts to an even thickness.
- Tongs: For handling the chicken during frying.
- Spatula: For serving.
Prep Time & Cooking Schedule
- Prep Time: 25 minutes (includes pounding chicken, breading, and chopping)
- Cook Time: 30-35 minutes (10-12 minutes pan-frying, 20-25 minutes baking)
- Resting Time: 5 minutes (after baking, allows cheese to set and flavors to meld)
This schedule ensures a seamless cooking experience. Start by preparing your dredging station, then move on to pan-frying, and finally, assemble and bake. The resting time is crucial for preventing cheese from sliding off when serving.
Step-by-Step Instructions
1. Prepare the Chicken: Place chicken breasts between two sheets of plastic wrap. Using a meat mallet or rolling pin, pound them to an even 1/2-inch thickness. This ensures even cooking. Season both sides with salt and pepper.
2. Set Up Dredging Station: In three shallow bowls, set up your dredging station. Bowl 1: Flour, garlic powder, and onion powder, mixed. Bowl 2: Beaten eggs. Bowl 3: Panko breadcrumbs and 1/2 cup grated Parmesan cheese, mixed.
3. Bread the Chicken: Dredge each chicken breast first in the flour mixture (shaking off excess), then dip in the egg wash, and finally coat thoroughly in the panko-Parmesan mixture, pressing gently to adhere.
4. Pan-Fry the Chicken: Heat olive oil in a large skillet over medium-high heat. Once hot, carefully place two breaded chicken breasts in the skillet. Cook for 5-6 minutes per side, until golden brown and cooked through. The internal temperature should reach 165°F (74°C). Repeat with the remaining chicken.
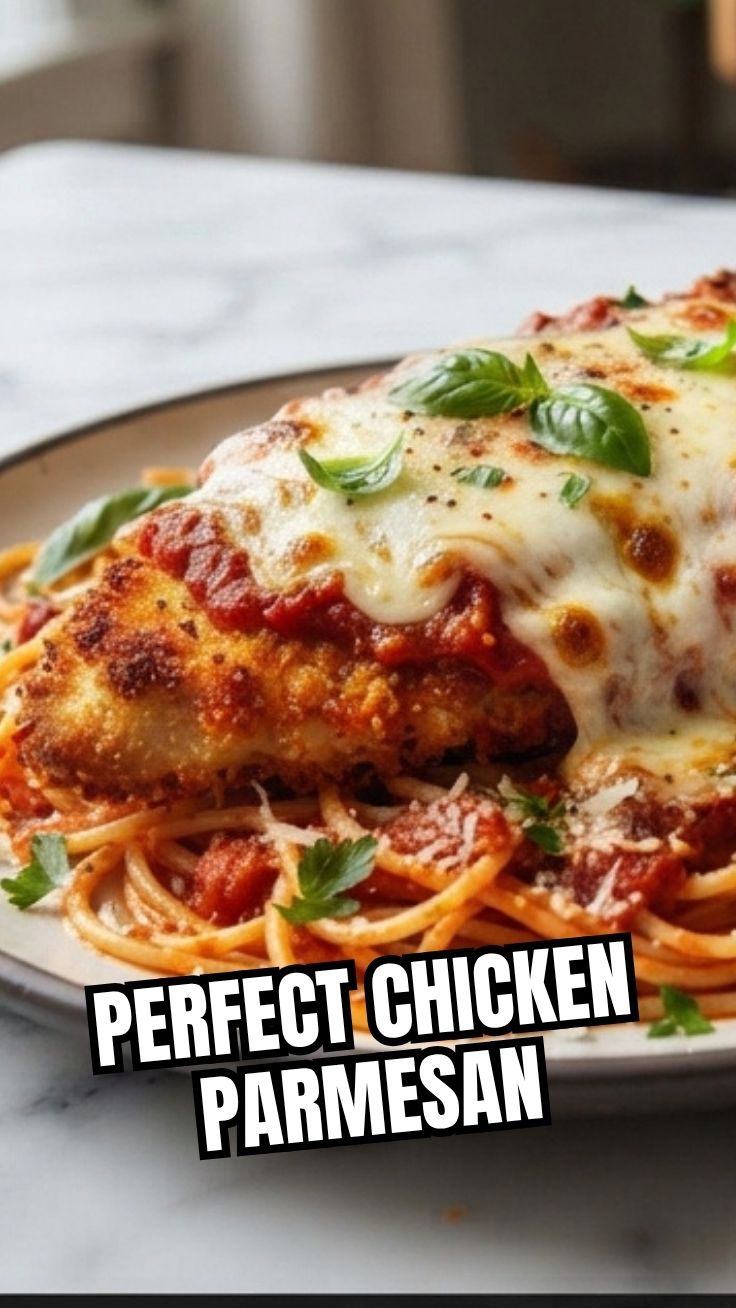
5. Assemble for Baking: Preheat your oven to 375°F (190°C). Pour 1 cup of marinara sauce into the bottom of your baking dish. Arrange the pan-fried chicken breasts over the sauce. Top each piece of Chicken Parmesan with more marinara sauce, fresh mozzarella slices/shreds, and a sprinkle of grated Parmesan. This layering technique is key to authentic Italian cuisine.
6. Bake: Bake for 20-25 minutes, or until the cheese is melted, bubbly, and slightly golden, and the chicken is heated through.
7. Garnish and Serve: Remove from oven, let rest for 5 minutes, then garnish with fresh basil. Serve hot with your favorite pasta or a side salad.
Nutritional Benefits & Advantages
This homemade Chicken Parmesan offers several nutritional upsides. Chicken breasts are an excellent source of lean protein, essential for muscle repair and growth. The use of fresh mozzarella provides calcium and healthy fats. While not a low-calorie dish, making it at home allows you to control the amount of oil, salt, and sugar in your marinara, making it a healthier alternative to many restaurant versions. Panko breadcrumbs also absorb less oil during frying, contributing to a lighter crust.
Tips, Variations & Cooking Advice
- Spice it Up: Add a pinch of red pepper flakes to the breading or marinara for a spicy kick.
- Herbal Boost: Incorporate dried oregano or Italian seasoning into the flour mixture for an extra layer of flavor.
- Vegetarian Option: Substitute chicken with eggplant slices for a delicious Eggplant Parmesan.
- Gluten-Free: Use gluten-free flour and gluten-free panko breadcrumbs.
- Dairy-Free: Utilize dairy-free mozzarella and Parmesan alternatives.
- Baking Instead of Frying: For a lighter version, you can bake the breaded chicken instead of pan-frying. Lightly spray with olive oil and bake at 400°F (200°C) for 20-25 minutes, flipping halfway.
Common Mistakes to Avoid
- Overcrowding the Pan: This lowers the oil temperature, leading to soggy chicken instead of crispy. Cook in batches.
- Not Pounding Chicken Evenly: Results in unevenly cooked chicken, with some parts dry and others undercooked.
- Skipping the Resting Time: The cheese will slide off when you cut into it. A few minutes of rest allows it to set.
- Using Cold Marinara Sauce: Warm your marinara gently before adding it to the baking dish to ensure even heating.
Storage & Meal Prep Tips
Leftover Chicken Parmesan can be stored in an airtight container in the refrigerator for up to 3-4 days. To reheat, place individual portions in a preheated oven at 350°F (175°C) for 15-20 minutes, or until heated through. Microwaving is an option but may result in a less crispy texture. For meal prep, you can bread the chicken a day in advance and store it in the refrigerator, ready for pan-frying and baking.
Conclusion
Mastering homemade Chicken Parmesan is a rewarding experience that brings the heart of Italian cuisine to your table. With its golden, crispy chicken, rich marinara, and gooey melted cheese, this dish is a crowd-pleaser that truly shines when prepared with care. We encourage you to try this recipe and savor the authentic flavors. Share your culinary creations and any personal twists you discover in the comments below!
FAQs
Q1: Can I use chicken thighs instead of breasts?
A1: Yes, you can. Adjust cooking times as thighs may take slightly longer to cook through.
Q2: How do I prevent the breading from falling off?
A2: Ensure your chicken is patted very dry before dredging, and press the panko breadcrumbs firmly onto the chicken to create a good seal.
Q3: Can I freeze cooked Chicken Parmesan?
A3: Yes, once cooled, wrap individual portions tightly in plastic wrap and then foil. Freeze for up to 2-3 months. Thaw overnight in the refrigerator and reheat as directed.
Q4: What’s the best pasta to serve with Chicken Parmesan?
A4: Spaghetti, fettuccine, or penne are classic choices, but any pasta you enjoy will work well.
Q5: My cheese isn’t melting evenly. What should I do?
A5: Ensure your oven is fully preheated and consider using fresh mozzarella, which melts more smoothly than pre-shredded varieties. You can also briefly place it under the broiler for a minute or two to achieve a perfect golden-brown bubbly top.