Unlock Sweet Nostalgia: Crafting the Perfect Chewy Rice Krispie Treats at Home!
Ever found yourself craving that irresistibly gooey, perfectly sweet crunch of a classic treat, but the store-bought versions just don’t hit the spot? Or perhaps you’re on the hunt for a simple, no-bake dessert that brings joy to all ages? Preparing homemade Rice Krispie Treats is not just about satisfying a sweet tooth; it’s about reclaiming control over ingredients, personalizing flavors, and creating cherished memories with minimal effort. This timeless confection, often referred to as Rice Krispie squares, is a testament to the magic that can happen with just a few pantry staples. Dive in as we unlock the secrets to crafting the ultimate chewy, delightful cereal bars that are bound to become a family favorite.
Ingredients & Kitchen Tools
- Unsalted Butter (4 tablespoons): Essential for that rich, buttery flavor and to prevent sticking. Unsalted gives you control over the overall saltiness.
- Mini Marshmallows (10 ounces): The heart and soul of the treats, providing sweetness and that signature gooey texture. Mini marshmallows melt more evenly.
- Crispy Rice Cereal (6 cups): The iconic cereal that gives these treats their delightful crunch.
- Vanilla Extract (1 teaspoon, optional): Enhances the flavor profile with a warm, aromatic note.
- Salt (Pinch, optional): Balances the sweetness and amplifies other flavors.
- Large Mixing Bowl: For combining all the ingredients.
- Large Saucepan/Pot: For melting the butter and marshmallows.
- 9×13 Inch Baking Dish: To shape and cool your treats.
- Parchment Paper or Non-Stick Spray: Essential for easy removal and cleanup.
- Spatula (rubber or silicone): For mixing and pressing the mixture into the pan.
Prep Time & Cooking Schedule
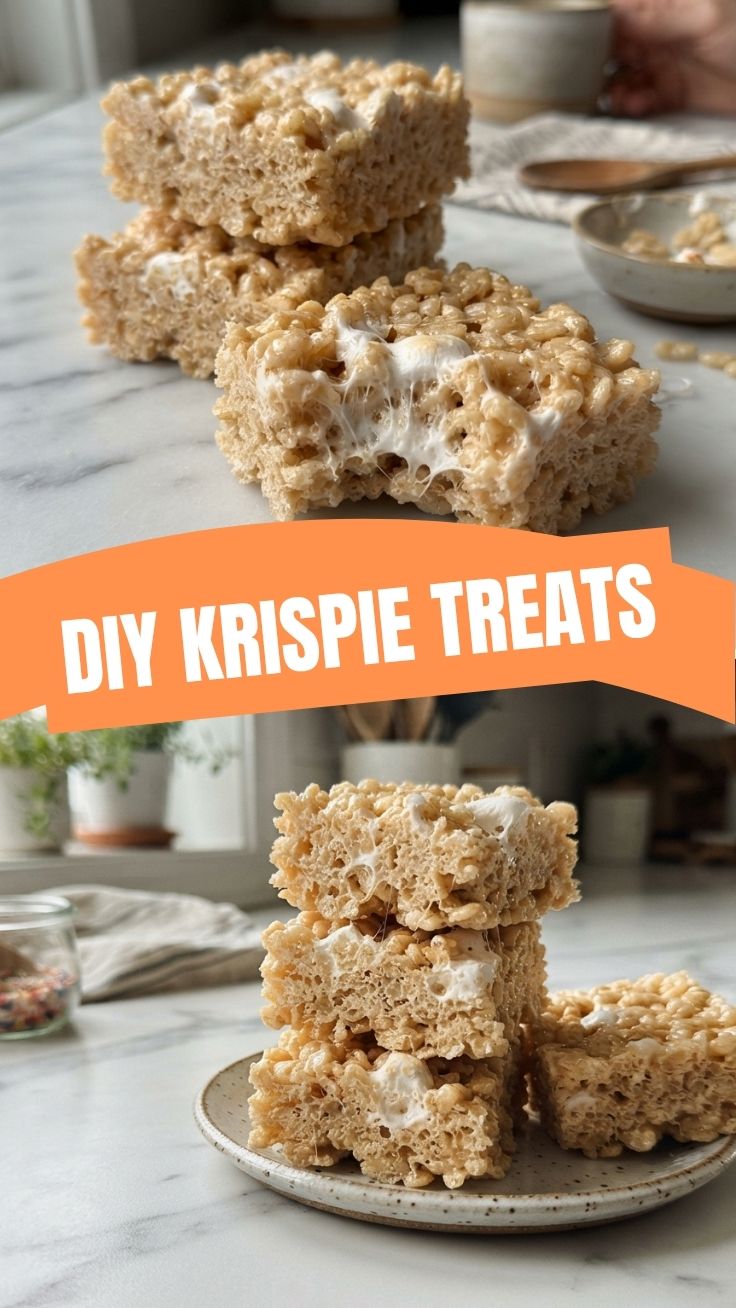
This recipe is incredibly quick, making it perfect for a last-minute dessert or a fun activity with kids.
- Prep Time: 5 minutes
- Cook Time: 5 minutes
- Resting Time: 30 minutes (for cooling and setting)
You can easily whip up a batch before dinner and have them set and ready for dessert!
Step-by-Step Instructions
1. Prepare Your Pan: Line a 9×13 inch baking dish with parchment paper, leaving an overhang on the sides for easy lifting, or generously spray with non-stick cooking spray. This crucial step ensures your treats won’t stick.
2. Melt Butter & Marshmallows: In a large saucepan over low heat, melt the unsalted butter. Once melted, add the mini marshmallows, stirring constantly until they are fully melted and smooth. Be patient and keep the heat low to prevent scorching. For truly amazing Rice Krispie Treats, this careful melting is key.
3. Flavor (Optional): Remove from heat and stir in the vanilla extract and a pinch of salt, if using.
4. Combine with Cereal: Add the crispy rice cereal to the marshmallow mixture. Stir quickly and gently with a rubber spatula until the cereal is evenly coated. Don’t overmix, as this can crush the cereal and lead to a less chewy texture.
5. Press into Pan: Transfer the mixture to your prepared baking dish. Using a buttered spatula or your lightly buttered hands, gently and evenly press the mixture into the pan. Avoid pressing too firmly, as this can result in hard, dense Rice Krispie squares. A light, even press is all you need.
6. Cool and Cut: Let the treats cool completely at room temperature for at least 30 minutes, or in the refrigerator for 15 minutes, to allow them to set. Once set, lift them out of the pan using the parchment paper overhang and cut into squares.
Nutritional Benefits & Advantages
While these delightful bars are definitely a treat, they offer some unique advantages. Crispy rice cereal is often fortified with vitamins and minerals, providing a quick energy boost. Moreover, being a no-bake recipe, it retains more of these nutrients compared to baked goods. Opting for homemade means you control the sugar content and can choose high-quality butter, avoiding artificial additives often found in store-bought versions.
Tips Variations & Cooking Advice
- Brown Butter: For a richer, nuttier flavor, brown the butter before adding the marshmallows. Keep an eye on it to prevent burning.
- Add-ins Galore: Once the cereal is mixed in, fold in chocolate chips, sprinkles, chopped nuts, dried fruit, or even a drizzle of caramel or peanut butter for extra decadence.
- Dietary Adaptations:
* Gluten-Free: Ensure your crispy rice cereal is certified gluten-free. Most are, but always check the label.
* Dairy-Free: Use a plant-based butter alternative (like vegan butter sticks) and dairy-free marshmallows (some brands are available).
- Flavor Boosts: A touch of almond extract or a hint of citrus zest can elevate the taste.
- Smaller Batches: Halve the recipe for a smaller pan or fewer servings.
Common Mistakes to Avoid
- High Heat: Melting marshmallows over high heat will make them seize up and become hard, resulting in tough treats. Always use low heat.
- Over-Pressing: Packing the mixture too tightly into the pan will create dense, brick-like squares instead of soft, chewy ones.
- Expired Marshmallows: Old marshmallows lose their moisture and don’t melt as smoothly, affecting the texture.
- Too Much Cereal: An excess of cereal will lead to dry, crumbly treats. Stick to the specified ratio for optimal chewiness.
Storage & Meal Prep Tips
Store your homemade treats in an airtight container at room temperature for up to 3 days. There’s no need to refrigerate them, as this can cause them to harden. For longer storage, individual squares can be wrapped in plastic wrap and then placed in an airtight container for up to a week. They are best enjoyed fresh, but prepping a batch for school lunches or party platters ahead of time is a breeze.
Conclusion
There you have it – the definitive guide to creating irresistibly chewy and perfectly balanced Rice Krispie Treats. This simple yet satisfying recipe is a testament to the joy of homemade desserts, offering a blend of nostalgic flavors and customizable options. Whether you’re making them for a special occasion or just a sweet treat for yourself, these Rice Krispie squares are guaranteed to bring smiles. We encourage you to try this recipe, experiment with your own twists, and share your delightful creations! What’s your favorite variation? Let us know in the comments below!
FAQs
Q1: Why are my Rice Krispie Treats hard?
A1: This usually happens if you cooked the marshmallows over too high heat, causing them to become brittle, or if you pressed the mixture too firmly into the pan. Ensure low heat and a gentle press.
Q2: Can I use stale marshmallows?
A2: While technically possible, stale marshmallows have less moisture and won’t melt as smoothly, leading to a less desirable texture. Fresh marshmallows are always best for optimal chewiness.
Q3: How can I make them chewier?
A3: Using extra marshmallows (about 1-2 ounces more) beyond what the recipe calls for can significantly increase chewiness. Also, avoid overcooking the marshmallow mixture.
Q4: Can I add food coloring?
A4: Absolutely! Stir a few drops of food coloring into the melted marshmallow mixture before adding the cereal for fun, festive treats.
Q5: What’s the best way to cut them cleanly?
A5: For clean cuts, use a sharp, lightly greased knife or a pizza cutter. Allowing the treats to cool completely is also crucial for preventing sticking and tearing.