Unleash the Ultimate Crunch: Your Guide to Homemade Crunchy Chex Mix
Are you tired of lackluster, store-bought Chex Mix that never quite hits the mark? Imagine a homemade version, perfectly seasoned and addictively crunchy, that you can tailor to your exact cravings. Crafting your own batch isn’t just about saving money; it’s about unlocking a world of unparalleled flavor and texture, transforming simple ingredients into an extraordinary snack mix. This comprehensive guide will empower you to create the ultimate crunchy Chex Mix, a treat so good it’ll disappear faster than you can say “more!” Let’s dive into making this iconic snack a gourmet experience right in your own kitchen!
Ingredients & Kitchen Tools
Gather your culinary arsenal! Here’s what you’ll need to create your irresistible snack.
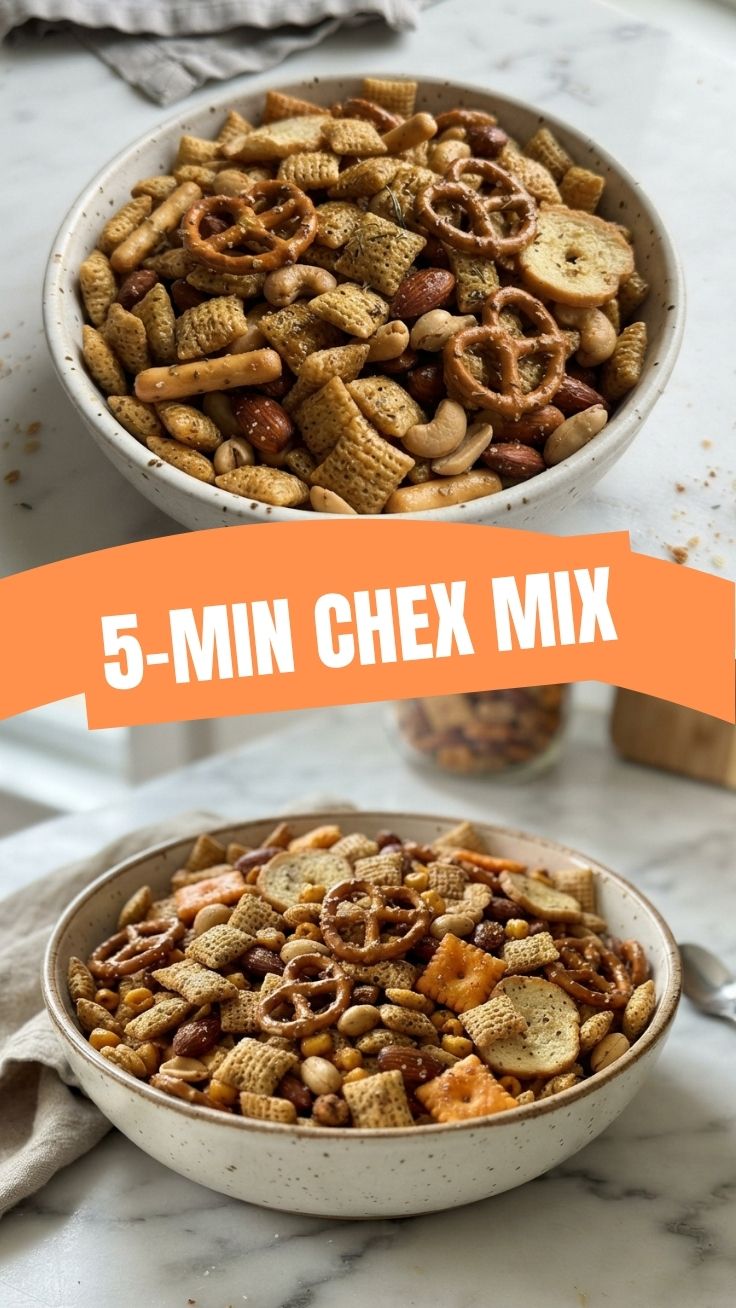
- 9 cups assorted Chex cereals (Rice, Corn, Wheat, or a mix): The foundation of our crunchy creation. Use your favorites!
- 3 cups mixed nuts (pecans, walnuts, cashews, almonds): Adds contrasting crunch and rich flavor.
- 2 cups pretzels (mini twists or sticks): Offers salty notes and a different textual dimension.
- 1 cup bagel chips or pita chips, broken into pieces: Extra savory crunch and substance.
- 6 tablespoons unsalted butter, melted: The binding agent for our seasonings.
- 2 tablespoons Worcestershire sauce: Adds a crucial umami depth.
- 1 ½ teaspoons seasoned salt: A flavorful salt blend to elevate taste.
- ¾ teaspoon garlic powder: Aromatic and essential for that classic savory profile.
- ½ teaspoon onion powder: Complements the garlic for a well-rounded savory base.
- ½ teaspoon smoked paprika (optional): For a subtle, smoky warmth.
- Large roasting pan or two baking sheets: To ensure even spreading and crisping.
- Large mixing bowl: For tossing all the ingredients together.
- Whisk: To combine the wet ingredients seamlessly.
- Rubber spatula or sturdy spoon: For thorough mixing and spreading.
Prep Time & Cooking Schedule
- Prep Time: 15 minutes – This includes measuring, mixing, and seasoning.
- Cook Time: 60 minutes – The crucial period for developing deep flavor and irresistible crunch.
- Cooling Time: 30-60 minutes – Essential for the mix to fully crisp up and prevent sogginess. Context: This recipe is perfect for a weekend afternoon, as it requires a bit of active cooking and cooling, but much of the cook time is hands-off. Plan to have it ready for game night or as a delicious party appetizer.
Step-by-Step Instructions
Follow these steps for a perfectly crunchy and flavorful Chex Mix every time.
1. Preheat & Prepare: Preheat your oven to 250°F (120°C). If using a large roasting pan, ensure it’s clean; otherwise, line two large baking sheets with parchment paper for easier cleanup.
2. Combine Dry Ingredients: In your large mixing bowl, gently combine the Chex cereals, mixed nuts, pretzels, and bagel chips. Ensure an even distribution of all components. This forms the backbone of your delicious snack mix.
3. Whisk Wet Ingredients: In a separate medium bowl, whisk together the melted butter, Worcestershire sauce, seasoned salt, garlic powder, onion powder, and smoked paprika (if using) until thoroughly combined.
4. Season the Mix: Pour the butter mixture over the dry ingredients in the large bowl. Using your rubber spatula or sturdy spoon, gently toss until all the dry ingredients are evenly coated. Be careful not to crush the cereals.
5. Bake to Perfection: Spread the seasoned mix in a single layer onto your prepared roasting pan or baking sheets. Bake for 1 hour, stirring every 15 minutes to promote even toasting and prevent burning. This constant stirring is key to achieving that uniform crunch.
6. Cool Completely: Remove the mix from the oven and spread it out on a fresh piece of parchment paper or a clean counter to cool completely. This cooling process is vital – it allows the mix to crisp up to its ultimate crunchiness. Resist the urge to snack until it’s fully cooled!
Nutritional Benefits & Advantages
While often seen as an indulgence, homemade Chex Mix offers advantages. By making it yourself, you control the ingredients, allowing for less processed alternatives. Nuts contribute healthy fats, protein, and fiber, while whole-grain Chex cereals provide dietary fiber. Opting for low-sodium pretzels and reducing butter slightly can further enhance its health profile compared to many commercial snacks.
Tips, Variations & Cooking Advice
- Spice It Up: Add a pinch of cayenne pepper or a dash of hot sauce to the butter mixture for a spicy kick.
- Sweet & Savory: Drizzle melted white chocolate or a maple glaze over the cooled mix for an intriguing sweet and savory contrast.
- Herbaceous Notes: Incorporate dried herbs like rosemary or thyme into the butter mixture for an aromatic twist.
- Gluten-Free: Ensure all your Chex cereals, pretzels, and bagel chips are certified gluten-free to make this a friendly treat for those with dietary restrictions. Corn and Rice Chex are typically GF.
- Dietary Fats: For a lower-fat option, use an olive oil spray in combination with a reduced amount of butter, ensuring adequate coating for the seasonings.
Common Mistakes to Avoid
- Overcrowding the Pan: This leads to steaming instead of toasting, resulting in a less crunchy mix. Use two pans if necessary.
- Skipping the Stirring: Failure to stir every 15 minutes can lead to uneven cooking, with some parts burnt and others undercooked.
- Not Cooling Completely: Cooling is crucial for the final crisp texture. If you store it warm, it will become soft and chewy.
- Using Stale Ingredients: Fresh ingredients make for the best flavor and crunch. Check expiration dates, especially for nuts and cereals.
- Over-seasoning: While generous seasoning is good, too much salt or seasoning can overpower the natural flavors. Taste as you go!
Storage & Meal Prep Tips
Store your homemade Chex Mix in an airtight container at room temperature for up to 2-3 weeks. A large zip-top bag works perfectly, or a decorative tin if you’re gifting it. It doesn’t require refrigeration. This snack is fantastic for meal prep as it holds up incredibly well and is great for packed lunches, road trips, or simply having a delicious snack on hand whenever hunger strikes. To refresh slightly, a quick toss in a warm oven for 5 minutes can sometimes revive a bit of crunch.
Conclusion
Creating your own crunchy Chex Mix is a truly rewarding experience, yielding a custom-made snack mix that far surpasses anything you can buy. With its customizable flavors and satisfying crunch, this recipe is sure to become a cherished favorite in your culinary repertoire. We encourage you to whip up a batch, experiment with your favorite ingredients, and share your delightful creations! Tell us in the comments below – what’s your secret ingredient for the perfect mix?
FAQs
Q1: Can I make this Chex Mix in a slow cooker?
A1: Yes, you can! Cook on low for 3-4 hours, stirring occasionally, until crisp. Be sure to cool completely afterward.
Q2: What if I don’t have all the types of Chex cereal?
A2: No problem! You can use any combination of Chex cereals you have on hand, as long as the total volume is 9 cups.
Q3: Can I add other ingredients like dried fruit or chocolate chips?
A3: While you can, it’s best to add these after the mix has cooled completely. Baking with them can cause burning or melting.
Q4: My Chex Mix isn’t as crunchy as I’d like. What went wrong?
A4: Most likely, it either wasn’t baked long enough, wasn’t stirred frequently enough, or wasn’t allowed to cool completely. Ensure even spreading and ample cooling time.
Q5: How can I adjust the saltiness?
A5: Start with 1 teaspoon of seasoned salt and taste the mixture before baking. You can add another ¼ to ½ teaspoon if you prefer more salt, or use a low-sodium seasoned salt.