Master the Art of Gourmet Sweet Treats: Crafting Perfect Candy Apples at Home
Ever wondered how those dazzling, glossy Candy Apples achieve their irresistible crunch and vibrant hue? While a classic carnival treat, mastering the art of homemade sweet treats like these or even delightful caramel apples is an incredibly rewarding culinary adventure. Beyond the nostalgia, preparing these iconic confections at home offers unparalleled control over ingredients, freshness, and flavor customization. Say goodbye to artificial colors and unknown additives; with this guide, you’ll transform simple apples into show-stopping beauties that taste as good as they look. Get ready to impress your family and friends with your newfound baking prowess!
Ingredients & Kitchen Tools
To embark on your sweet apple journey, gather these essentials:
- Apples (6-8 medium, firm, tart varieties like Granny Smith or Honeycrisp): These provide the best textural contrast and prevent the treat from being overly sweet.
- Granulated Sugar (2 cups): The backbone of your candy coating.
- Light Corn Syrup (1 cup): Prevents crystallization, ensuring a smooth, glossy finish.
- Water (1/2 cup): Helps dissolve the sugar for the syrup.
- Red Liquid Food Coloring (1-2 tsp or gel equivalent): For that iconic vibrant red. Adjust to your desired intensity.
- Vanilla Extract (1 tsp, optional): Enhances the overall flavor.
- Wooden Skewers or Craft Sticks (6-8): For easy handling and dipping.
- Heavy-Bottomed Saucepan (2-3 quart): Essential for even heat distribution to prevent scorching.
- Candy Thermometer: Crucial for achieving the perfect candy consistency. Don’t skip this!
- Baking Sheet Lined with Parchment Paper or Silicone Mat: For cooling the finished apples without sticking.
- Bowls (for washing/drying apples).
Prep Time & Cooking Schedule
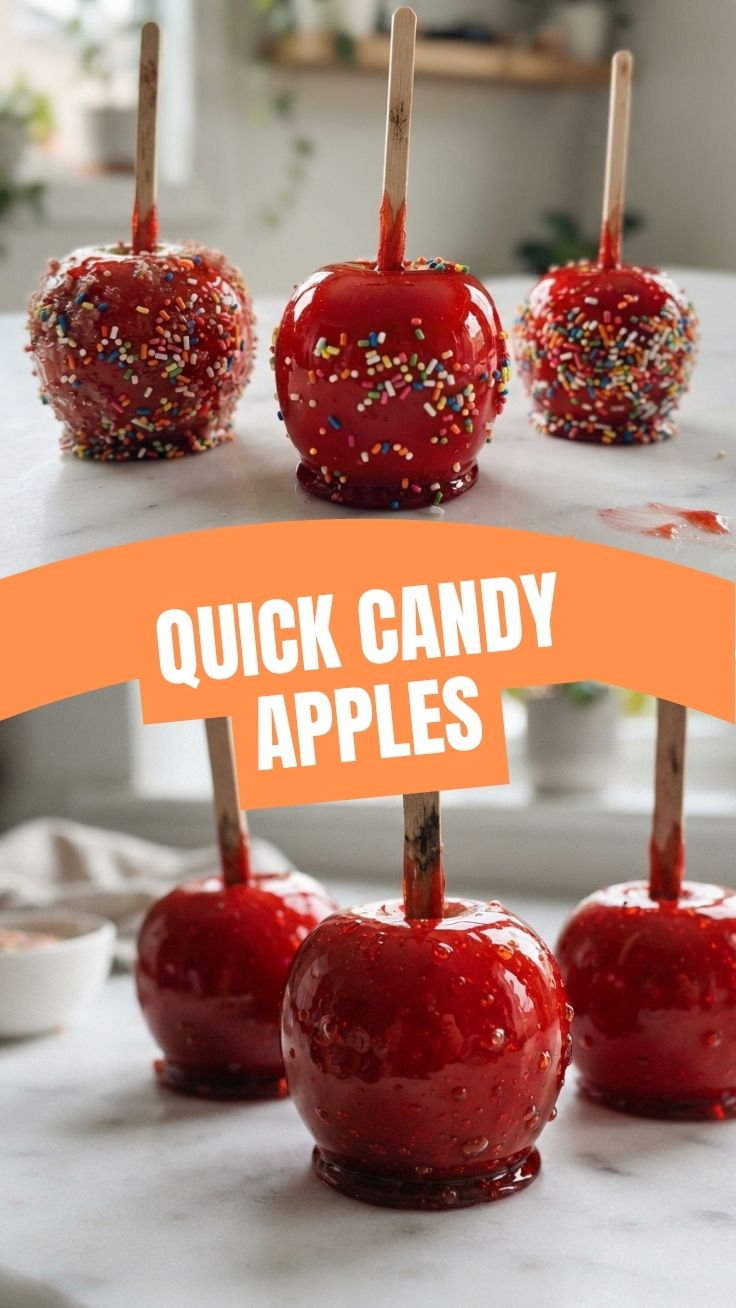
- Prep Time: 20-30 minutes (includes apple washing, drying, and skewering)
- Cook Time: 15-20 minutes (for the candy syrup)
- Resting Time: 30-60 minutes (for cooling and setting)
Plan to tackle this recipe when you have a dedicated block of time. The candy syrup requires continuous monitoring, so ensure your workspace is clear and all ingredients are prepped before you begin. Washing and thoroughly drying the apples beforehand is crucial for the candy to adhere properly.
Step-by-Step Instructions
1. Prepare the Apples: Wash and thoroughly dry each apple. This is critical! Any moisture will prevent the candy from sticking. Remove any stems. Insert a wooden skewer firmly into the core of each apple through the stem end. Set aside on a clean surface.
2. Combine Syrup Ingredients: In a heavy-bottomed saucepan, combine the granulated sugar, light corn syrup, and water. Stir gently over medium heat until the sugar dissolves completely. Avoid stirring once the sugar has dissolved to prevent crystallization.
3. Boil the Syrup: Increase the heat to medium-high and bring the mixture to a rolling boil. Insert your candy thermometer, ensuring it doesn’t touch the bottom of the pan. Continue to boil without stirring until the mixture reaches a temperature of 300-310°F (149-154°C), which is the hard crack stage. This is where the magic happens for the perfect Candy Apples!
4. Add Coloring and Flavor: Once the syrup reaches the hard crack stage, stir in the red liquid food coloring and vanilla extract (if using) quickly and carefully. Work swiftly as the syrup will continue to cook.
5. Dip the Apples: Immediately and carefully, dip each skewered apple into the hot candy syrup, tilting the pan as needed to fully coat the apple. Swirl to ensure even coverage, allowing any excess to drip back into the pan. If you prefer the softer bite of a caramel apples, ensure your caramel is slightly less viscous.
6. Cool and Set: Place the coated apples onto your prepared parchment-lined baking sheet. Allow them to cool completely at room temperature for at least 30-60 minutes until the candy hardens and sets.
Nutritional Benefits & Advantages
While Candy Apples are undoubtedly a treat, they still boast the inherent benefits of the fruit. Apples are a good source of dietary fiber, promoting digestive health and helping to regulate blood sugar. They also contain essential vitamins and antioxidants, such as Vitamin C and various polyphenols, which contribute to overall well-being. Opting for homemade means you control the quality of the apples and can avoid the high-fructose corn syrup often found in store-bought versions.
Tips, Variations & Cooking Advice
- Flavor Variations: Experiment with different extracts! Almond, lemon, or even a hint of cinnamon can add exciting twists.
- Color Play: Beyond red, try green or blue food coloring for festive occasions.
- Nutty Crunch: Before the candy sets, roll the dipped apples in chopped peanuts, walnuts, or sprinkles for added texture and visual appeal.
- Achieving Perfect Shine: Ensure your apples are free of any waxy residue (sometimes found on store-bought apples). A quick scrub with hot water and a towel can help remove it.
- Safety First: Candy syrup is extremely hot. Exercise extreme caution when working with it. Keep children and pets away from the cooking area.
Common Mistakes to Avoid
Wet Apples: This is the number one* culprit for candy sliding off. Dry your apples meticulously!
- Not Using a Candy Thermometer: Guessing the temperature leads to sticky candy (too low) or burnt, bitter candy (too high). Invest in one – it’s worth it.
- Stirring the Syrup During Boiling: This can cause sugar crystals to form, resulting in a grainy texture.
- Overcooking/Undercooking: Overcooked syrup will be brittle and might taste burnt; undercooked syrup will be sticky and won’t set properly.
- Humidity: High humidity can make it difficult for candy to set properly. Choose a dry day if possible.
Storage & Meal Prep Tips
Candy Apples are best enjoyed within 1-2 days of making them. Store them individually wrapped in cellophane or in an airtight container at room temperature. Refrigeration can cause the candy to become sticky and dull its shine due to condensation. They do not freeze well, as freezing will alter the texture of both the apple and the candy coating.
Conclusion
Crafting your own Candy Apples is not just about following a recipe; it’s about embracing a cherished tradition and transforming simple ingredients into a dazzling culinary masterpiece. The vibrant color, the satisfying crunch, and the sweet burst of apple make them an unforgettable treat. Whether you’re aiming for the classic red or exploring variations, the satisfaction of creating these confections at home is immense. And while we’ve focused on the hard, glassy coating here, remember that the creamy texture of caramel apples offers another delightful journey for your taste buds. So, grab your apples, fire up your stove, and get ready to create some sweet magic! Have you tried making them before? Share your results and tips in the comments below!
FAQs
Q1: Why did my candy not harden?
A1: The most common reason is that the syrup didn’t reach the hard crack stage (300-310°F / 149-154°C). Ensure your candy thermometer is accurate and not touching the bottom of the pan. High humidity can also be a factor.
Q2: My candy coating is sticky. What went wrong?
A2: This usually indicates the syrup was undercooked (didn’t reach the full hard crack stage) or there was too much moisture on your apples. Store them in a dry, cool place, not the refrigerator.
Q3: Can I use other types of apples?
A3: Yes, but firm, tart apples like Granny Smith, Honeycrisp, or Fuji work best. Softer, sweeter apples can become mushy or overly sweet when coated.
Q4: How can I prevent crystallization of the syrup?
A4: Use light corn syrup, avoid stirring the syrup once the sugar has dissolved, and clean down the sides of the pan with a wet pastry brush if sugar crystals form.
Q5: Can I reheat leftover candy syrup?
A5: While technically possible, it’s generally not recommended. Reheating can cause the syrup to crystallize or burn, affecting the final texture and flavor of new apples. It’s best to make a fresh batch for each use.