Elevate Your Breakfast: The Ultimate [Recipe Name] You Can Make Today!
Are you tired of bland breakfast routines or store-bought options that lack that homemade touch? Imagine starting your day with a delightful, nutritious, and incredibly flavorful bowl that not only satisfies your cravings but also energizes you for hours. Prepare to unlock the secrets to crafting the perfect [Recipe Name] right in your own kitchen! Making your own Granola is a deeply rewarding experience, offering unparalleled freshness and control over ingredients. Forget highly processed alternatives; with this recipe, you’ll discover how simple and satisfying it is to create a masterpiece using wholesome components, including incredible homemade granola.
Ingredients & Kitchen Tools
- Rolled Oats (3 cups): The star of our granola, providing a hearty, chewy base. Avoid instant oats as they can turn mushy.
- Mixed Nuts (1 cup): Almonds, walnuts, pecans (chopped). Adds crunch, healthy fats, and protein. Feel free to use your favorite blend.
- Mixed Seeds (½ cup): Chia seeds, flax seeds, pumpkin seeds, sunflower seeds. Boosts fiber, omega-3s, and adds textural variety.
- Maple Syrup or Honey (½ cup): Natural sweetener and binder. Adjust to your sweetness preference.
- Coconut Oil (¼ cup, melted): Helps achieve that irresistible crispiness and adds a subtle tropical note. Butter or olive oil can be used as an alternative.
- Vanilla Extract (1 tsp): Enhances overall flavor.
- Cinnamon (½ tsp): A warm spice that complements the other ingredients beautifully.
- Salt (¼ tsp): Balances sweetness and deepens flavors.
- Dried Fruit (½ cup): Cranberries, raisins, chopped apricots (optional). Adds chewiness and bursts of natural sweetness after baking.
- Baking Sheet: Large, rimmed to prevent spills.
- Parchment Paper: Prevents sticking and makes cleanup a breeze.
- Large Mixing Bowl: For combining all ingredients.
- Spatula or Wooden Spoon: For mixing and spreading.
Prep Time & Cooking Schedule
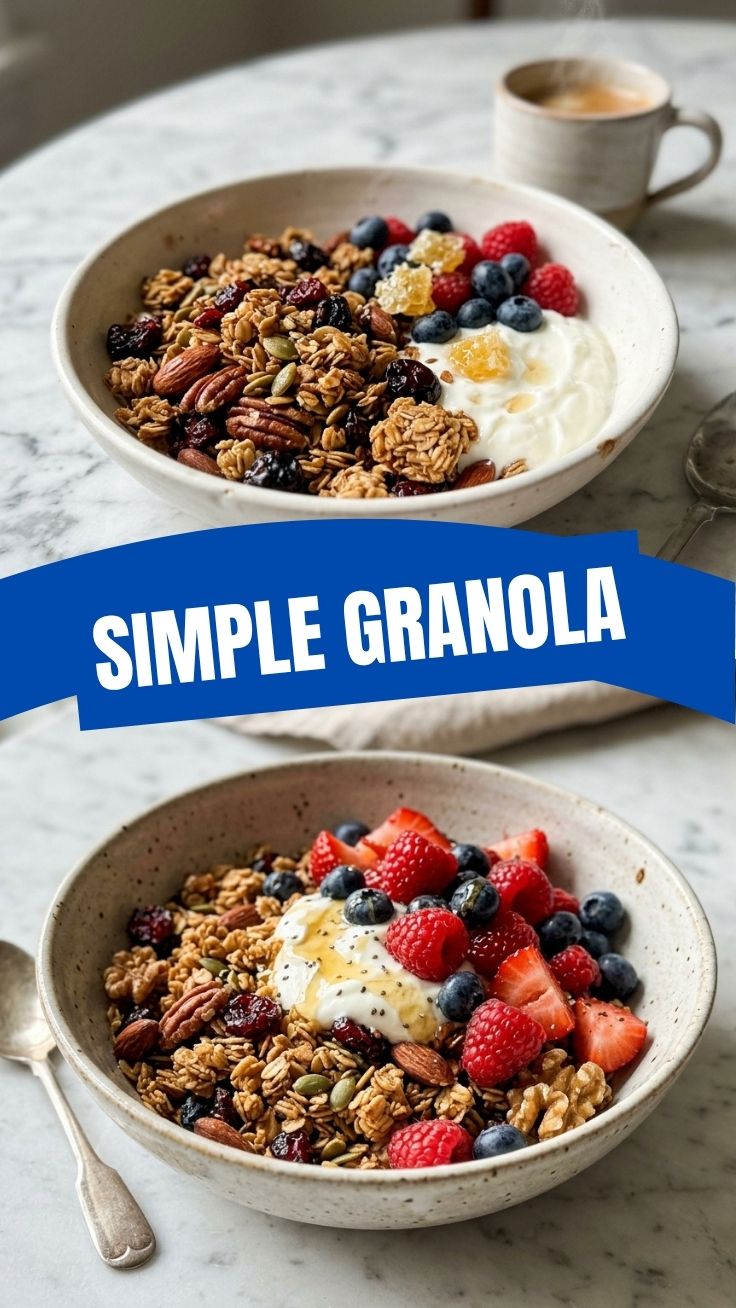
- Prep Time: 15 minutes
- Cook Time: 30-40 minutes
- Cooling Time: 30-60 minutes
This recipe is perfect for a weekend morning or a mid-week evening prep. The active prep is minimal, allowing you to focus on other tasks while your delicious creation bakes and cools. Plan for at least an hour from start to finish before it’s ready to be stored or enjoyed.
Step-by-Step Instructions
1. Preheat Oven & Prepare Baking Sheet: Preheat your oven to 300°F (150°C). Line a large baking sheet with parchment paper. This crucial step ensures easy removal and prevents sticking, leading to perfectly crispy Granola.
2. Combine Dry Ingredients: In a large mixing bowl, combine the rolled oats, mixed nuts, mixed seeds, cinnamon, and salt. Stir well to ensure an even distribution of all components.
3. Whisk Wet Ingredients: In a separate smaller bowl, whisk together the melted coconut oil, maple syrup (or honey), and vanilla extract until thoroughly combined.
4. Combine Wet and Dry: Pour the wet ingredient mixture over the dry ingredients. Using a spatula or wooden spoon, mix until everything is evenly coated. Ensure each oat flake and nut piece glistens with the sweet, oily mixture. This is key for developing that golden-brown, crunchy texture in your homemade granola.
5. Spread on Baking Sheet: Transfer the mixture to the prepared baking sheet. Spread it out into an even layer, pressing down lightly with your spatula. This helps create those coveted granola clusters.
6. Bake: Bake for 30-40 minutes, stirring gently halfway through (around the 15-20 minute mark) to ensure even browning. Keep a close eye on it during the last 10 minutes to prevent burning. The edges should be golden brown and the entire batch fragrant.
7. Cool Completely: Once baked, remove the baking sheet from the oven and let the granola cool completely on the baking sheet without disturbing it. This is a critical step for achieving maximum crispiness and for forming those delightful clusters. Resist the urge to touch it while it’s warm!
8. Add Dried Fruit (Optional): Once cooled, gently break the granola into desired cluster sizes. If using dried fruit, stir it in now.
Nutritional Benefits & Advantages
This homemade granola is a powerhouse of nutrition. Rolled oats are an excellent source of soluble fiber, aiding in digestion and helping to regulate blood sugar. The nuts and seeds contribute healthy monounsaturated and polyunsaturated fats, promoting heart health and providing sustained energy. They are also packed with protein, vitamins, and minerals like magnesium, zinc, and Vitamin E. By making it yourself, you control the sugar content and avoid artificial additives or excessive oils often found in commercial varieties, making it a truly wholesome start to your day.
Tips, Variations & Cooking Advice
- Spice It Up: Experiment with other spices like nutmeg, ginger, or even a pinch of cardamom for a different flavor profile.
- Chocolate Lover’s Dream: Once cooled, mix in chocolate chips or cocoa nibs for a delicious treat.
- Fruit Fiesta: Instead of just one type of dried fruit, use a blend of tropical fruits like mango or pineapple.
- Dairy-Free/Vegan: This recipe is naturally vegan and dairy-free!
- Gluten-Free: Ensure you use certified gluten-free rolled oats if you have gluten sensitivities.
- Sweetener Swaps: Agave nectar or brown rice syrup can be used in place of maple syrup or honey.
Common Mistakes to Avoid
- Overcrowding the Baking Sheet: Too much granola on one sheet will result in steaming instead of crisping. Use two sheets if necessary.
- Baking at Too High a Temperature: This will burn the outside before the inside cooks properly, leading to a bitter taste. Stick to 300°F (150°C).
- Not Cooling Completely: This is the most common mistake! If you try to move it warm, it will be soft and won’t form clusters. Patience is key for that perfect crunch.
- Forgetting to Stir Mid-Bake: This can lead to uneven browning, with some parts burnt and others still soft.
Storage & Meal Prep Tips
Once completely cooled, store your homemade granola in an airtight container at room temperature for up to 2-3 weeks. A glass jar or a sealed plastic container works wonderfully. For meal prepping, portion it out into small bags or containers for quick breakfasts or snacks on the go. It’s excellent on yogurt, with milk, or simply as a satisfying snack. Freezing is not typically recommended as it can affect the texture.
Conclusion
Crafting your own delicious and nutritious breakfast bowls, anchored by homemade Granola, is not just a cooking task; it’s an act of self-care and a commitment to healthier, more flavorful eating. This recipe empowers you to take control of your morning routine, offering a versatile base that can be customized to your heart’s content. We hope you’ve enjoyed this journey into making incredible homemade granola. Try this recipe today, share your results in the comments below, and get ready to transform your breakfast experience!
FAQs
Q1: Can I use quick oats instead of rolled oats?
A1: While technically possible, quick oats tend to absorb more liquid and can result in a softer, less textural granola. Rolled oats are highly recommended for the best chew and crunch.
Q2: How do I make my granola clumpier?
A2: For more clusters, press the granola down firmly onto the baking sheet before baking and resist stirring it much during baking. Ensure it cools completely and undisturbed on the sheet.
Q3: Can I cut down on the sugar?
A3: Absolutely! You can reduce the maple syrup or honey by a quarter to a third. Keep in mind it might be slightly less sticky and form fewer clusters, but it will still be delicious.
Q4: My granola isn’t crispy; what went wrong?
A4: Common culprits include overcrowding the baking sheet, insufficient baking time, or not allowing it to cool completely before storing. Ensure even spreading and full cooling for optimal crispiness.
Q5: What are some good serving suggestions for this granola?
A5: It’s fantastic with Greek yogurt and fresh berries, mixed into smoothie bowls, sprinkled over warm oatmeal, or simply enjoyed as a crunchy snack straight from the jar.