Unlock the Secret to Fluffy, Homemade Perfection: Your Ultimate Guide to Perfect Pancakes
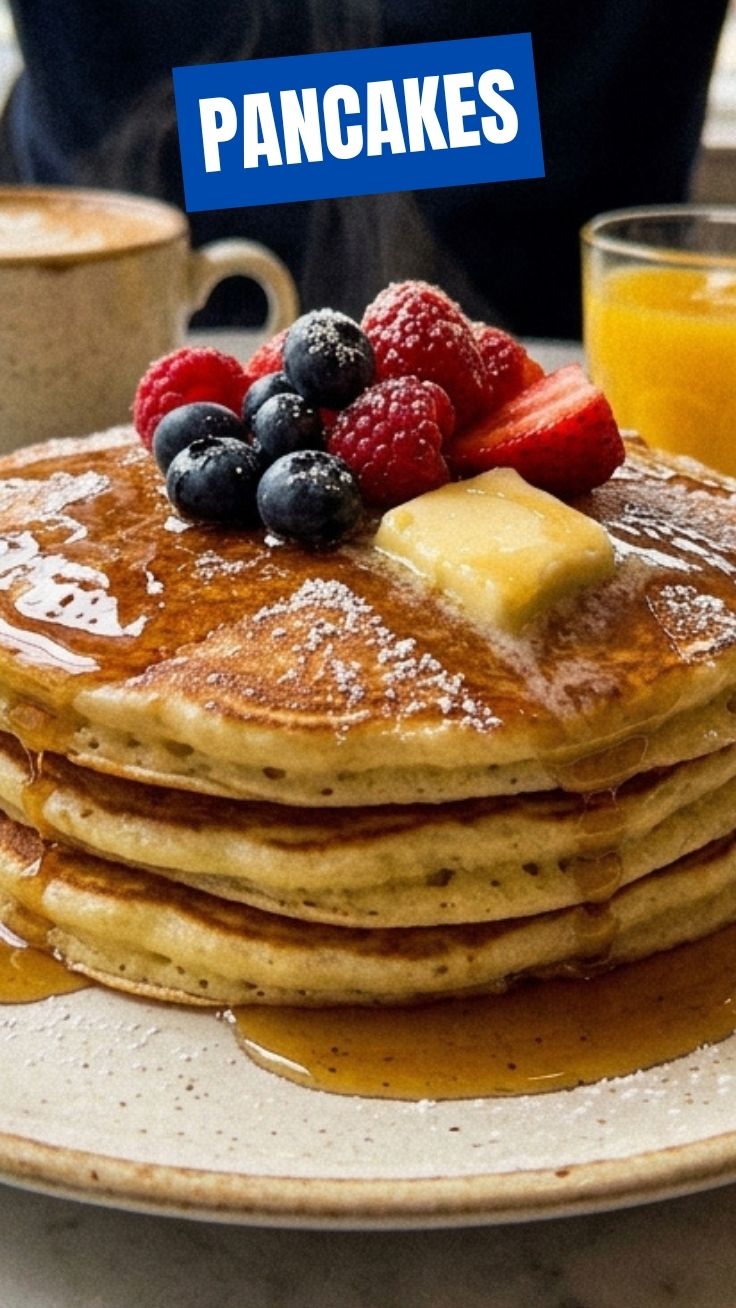
Ever wondered how to achieve those perfectly golden, impossibly fluffy Pancakes that taste straight out of a diner, but made in your own kitchen? The secret lies in understanding a few key techniques and choosing the right ingredients. Preparing delicious Pancake recipes at home not only offers unparalleled freshness and flavor but also allows you to control the quality of your ingredients and customize them to your dietary needs. Let’s dive into mastering the art of the perfect pancake, a comforting classic that brings joy to any breakfast table.
Ingredients & Kitchen Tools
- All-Purpose Flour (1 ½ cups): The base of our fluffy delight. For a gluten-free option, substitute with a 1:1 gluten-free baking blend.
- Granulated Sugar (2 tablespoons): Adds a touch of sweetness and helps with browning.
- Baking Powder (1 tablespoon): Our leavening agent, crucial for that airy texture. Ensure it’s fresh for maximum lift.
- Baking Soda (1 teaspoon): Reacts with the buttermilk for extra rise and tenderness.
- Salt (½ teaspoon): Balances the flavors and enhances sweetness.
- Large Egg (1): Binds the ingredients together and adds richness.
- Buttermilk (1 ¼ cups): The star for tender, moist pancakes. If you don’t have buttermilk, add 1 tablespoon of lemon juice or white vinegar to regular milk and let it sit for 5-10 minutes.
- Melted Unsalted Butter (3 tablespoons): Adds flavor and moisture.
- Vanilla Extract (1 teaspoon): For a warm, aromatic touch.
- Non-stick Skillet or Griddle: Essential for even cooking and preventing sticking.
- Whisk: For combining dry and wet ingredients.
- Large Mixing Bowls (2): To keep dry and wet ingredients separate initially.
- Ladle or ¼ cup measuring cup: For portioning the batter.
- Spatula: For flipping those golden delights.
Prep Time & Cooking Schedule
- Prep Time: 10 minutes
- Cook Time: 2-3 minutes per pancake
- Resting Time: 5-10 minutes (for the batter)
This recipe is designed for a quick and satisfying breakfast. The short resting time for the batter allows the gluten to relax and the leavening agents to start working, leading to a lighter, fluffier pancake. Plan to start your prep about 15-20 minutes before you want to serve, including cooking time.
Step-by-Step Instructions
1. Whisk Dry Ingredients: In a large bowl, combine the all-purpose flour, granulated sugar, baking powder, baking soda, and salt. Whisk well to ensure there are no lumps and all ingredients are evenly distributed. This step is crucial for achieving consistent results in your Pancakes.
2. Combine Wet Ingredients: In a separate medium bowl, whisk together the large egg, buttermilk, melted unsalted butter, and vanilla extract until thoroughly combined.
3. Combine Wet and Dry: Pour the wet ingredients into the dry ingredients. Stir just until combined. A few lumps are perfectly fine; overmixing will develop the gluten and result in tough pancakes. Let the batter rest for 5-10 minutes. This short rest allows the baking powder and soda to activate, contributing to their impressive rise.
4. Preheat and Grease: Heat your non-stick skillet or griddle over medium-low heat. Lightly grease with butter or cooking spray. The ideal temperature is critical – too hot and they burn, too cool and they won’t brown properly.
5. Cook the Pancakes: Pour ¼ cup of batter for each pancake onto the hot skillet. Cook for 2-3 minutes per side, or until bubbles appear on the surface and the edges look set. Flip with a spatula and cook for another 1-2 minutes until golden brown and cooked through. Take your time to perfect your flipping technique for all your Pancake recipes.
6. Serve Immediately: Serve your fluffy creations warm with your favorite toppings!
Nutritional Benefits & Advantages
These homemade pancakes, especially when made with whole wheat flour (as a variation), offer a good source of carbohydrates for energy. Using buttermilk not only enhances flavor and texture but also provides calcium. By making them at home, you avoid the excessive sugar and artificial ingredients often found in pre-made mixes. Adding fresh fruit reduces the need for sugary syrups and boosts vitamin and fiber intake.
Tips Variations & Cooking Advice
- Fruity Fun: Add blueberries, sliced bananas, or diced apples to the batter for a burst of flavor.
- Whole Grains: Substitute half of the all-purpose flour with whole wheat flour for added fiber and a nuttier taste.
- Spice It Up: A pinch of cinnamon or nutmeg can elevate the flavor profile.
- Dairy-Free: Use a dairy-free milk alternative (like almond or soy milk) and add 1 tablespoon of apple cider vinegar, along with vegan butter.
- Fluffy Secret: Do not overmix the batter! Lumps are signs of tenderness to come.
- Even Cooking: Adjust your heat as you go. The first pancake is often the “test” pancake – don’t be discouraged if it’s not perfect.
Common Mistakes to Avoid
- Overmixing the Batter: This leads to tough, chewy pancakes. Mix until just combined.
- Cooking on Too High Heat: Results in burned outsides and raw insides. Medium-low is your friend.
- Not Letting the Batter Rest: Skipping this step can lead to less fluffy pancakes.
- Greasing the Pan Too Much: Excess oil can make pancakes greasy and prevent them from browning evenly. Use a light application.
Storage & Meal Prep Tips
Leftover pancakes can be stored in an airtight container in the refrigerator for up to 3-4 days. For longer storage, freeze them between layers of parchment paper in a freezer-safe bag for up to 2 months. Reheat in a toaster, microwave, or oven until warmed through. Pre-made batches make for a quick and easy breakfast on busy mornings!
Conclusion
Mastering homemade Pancakes is a truly rewarding culinary skill. With the right ingredients and a little know-how, you can consistently create light, fluffy, and incredibly delicious breakfasts. Experiment with various toppings and ingredients to discover your favorite Pancake recipes and make every morning a special occasion. We encourage you to try this recipe and share your golden creations with us – happy flipping!
FAQs
Q1: Can I make the batter ahead of time?
A1: While fresh batter is best for fluffiness, you can make the wet ingredients ahead and combine them with the dry just before cooking if you’re short on time. Avoid mixing the full batter too far in advance, as the leavening agents will lose potency.
Q2: My pancakes aren’t fluffy. What went wrong?
A2: Common culprits are overmixing the batter (developing gluten makes them tough), old baking powder/soda, or not letting the batter rest. Ensure your leavening agents are fresh and mix gently.
Q3: What’s the best way to keep pancakes warm while cooking a large batch?
A3: Place cooked pancakes on a baking sheet in a single layer in a preheated oven set to a low temperature (around 200°F or 90°C). This keeps them warm without drying them out.
Q4: Can I use regular milk instead of buttermilk?
A4: Yes, but you’ll need to “sour” it first. Add 1 tablespoon of lemon juice or white vinegar to 1 ¼ cups of regular milk and let it sit for 5-10 minutes until it slightly curdles. This mimics buttermilk’s acidity, crucial for activating the baking soda.