Craving a Sweet Escape? Master the Art of Homemade Candy Apples!
Ever wondered how to capture that iconic carnival magic right in your own kitchen? The allure of a perfectly glazed Candy Apples (or their equally delightful cousin, caramel apples) is undeniably strong. While often associated with fairs and festivals, preparing these delightful treats at home offers a unique satisfaction. Not only do you get to control the quality of ingredients, ensuring a wholesome and delicious snack, but you also embark on a fun, creative culinary adventure. This comprehensive guide will walk you through every step, making the process effortless and the results absolutely irresistible.
Ingredients & Kitchen Tools
- Firm Apples (6 medium, e.g., Granny Smith, Fuji): These varieties hold their shape well under the hot candy coating and provide a pleasant tart contrast to the sweetness. Washed and thoroughly dried.
- Wooden Skewers or Lollipop Sticks (6): Essential for handling and serving.
- Granulated Sugar (2 cups): The base for our candy coating.
- Light Corn Syrup (1 cup): Prevents crystallization and creates that beautiful, glossy finish.
- Water (1/2 cup): Helps dissolve the sugar and corn syrup.
- Red Food Coloring (1-2 teaspoons, gel or liquid): For that classic festive hue. Adjust to your desired shade.
- Flavoring Extract (1/2 teaspoon, e.g., vanilla, cinnamon, or even cherry): Optional, but adds an extra layer of deliciousness.
- Candy Thermometer: Crucial for achieving the perfect candy consistency. Don’t skip this!
- Heavy-Bottomed Saucepan (3-4 quart): Distributes heat evenly and prevents scorching.
- Parchment Paper or Silicone Mat: For cooling the apples without sticking.
- Small Plate or Shallow Pan: To hold the food coloring and flavoring.
Prep Time & Cooking Schedule
- Prep Time: 15 minutes (washing apples, inserting sticks, gathering ingredients)
- Cook Time: 15-20 minutes (boiling sugar mixture until precise temperature is reached)
- Cooling Time: 30-60 minutes (until the candy coating hardens completely)
This recipe is relatively quick to execute once you have all your ingredients prepped. The longest part is waiting for the sugar mixture to reach the hard crack stage and then for the Candy Apples to cool. Plan to make these treats when you have a dedicated half-hour for active cooking and an hour for cooling without disturbance.
Step-by-Step Instructions
1. Prepare Your Apples: Wash and thoroughly dry each apple. Moisture is the enemy of a good candy coating! Insert a wooden skewer firmly into the stem end of each apple, pushing it about halfway through. Line a baking sheet with parchment paper or a silicone mat and set aside.
2. Combine Ingredients: In your heavy-bottomed saucepan, combine the granulated sugar, light corn syrup, and water. Stir gently over medium heat until the sugar dissolves completely. Avoid stirring once boiling begins to prevent crystallization.
3. Boil to Temperature: Insert your candy thermometer. Bring the mixture to a boil without stirring. Continue boiling until the thermometer reads precisely 300°F (149°C), which is the “hard crack” stage. This typically takes 10-15 minutes.
4. Add Color and Flavor: Once 300°F is reached, immediately remove the pan from the heat. Carefully stir in the red food coloring and optional flavoring extract. Swirl gently to incorporate the color evenly.
5. Dip the Apples: Working quickly, carefully dip each apple into the hot candy mixture. Tilt the pan to ensure full coverage, rotating the apple to coat it completely. Lift the apple, allowing any excess candy to drip back into the pan.
6. Cool and Set: Place each coated apple onto your prepared parchment-lined baking sheet. Allow them to cool undisturbed for at least 30-60 minutes, or until the candy coating is completely hardened and glossy. These delicious Candy Apples are almost ready to be enjoyed, similar to how one might prepare a batch of delectable caramel apples, both require careful attention to the coating.
Nutritional Benefits & Advantages
Apples, the star of our show, are packed with dietary fiber, which aids digestion and promotes satiety. They also provide valuable vitamins like Vitamin C and antioxidants that contribute to overall well-being. While the candy coating adds sugar, homemade versions allow for portion control and the use of fresh, unblemished fruit. Enjoyed in moderation, these treats can be a delightful and somewhat healthier alternative to highly processed sweets.
Tips, Variations & Cooking Advice
- Flavor Boosts: Experiment with different extracts like almond, cherry, or even a touch of cinnamon oil.
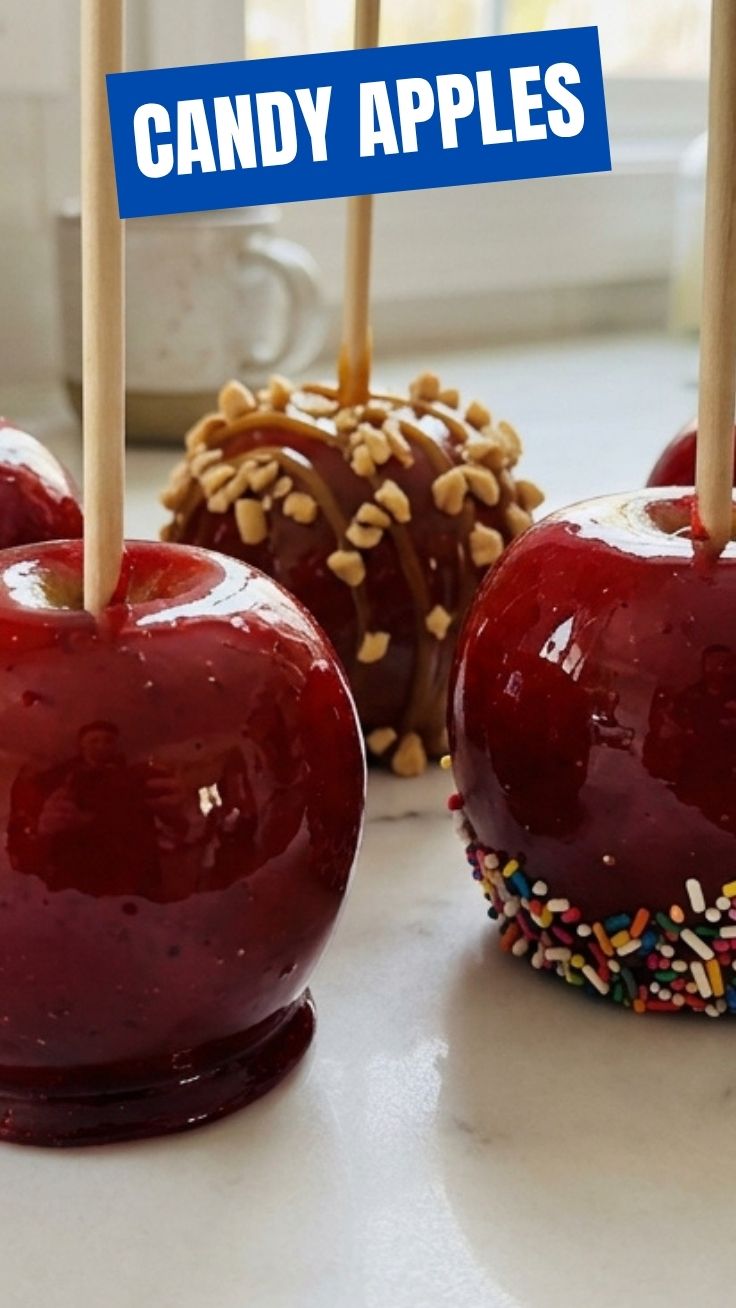
- Decorative Toppings: While traditionally plain, once the candy coating has slightly set but is still tacky, you can roll the apples in sprinkles, chopped nuts, or even crushed candies for extra flair.
- Mini Candy Apples: Use smaller apples for bite-sized versions, perfect for parties.
- Dairy-Free: This recipe is naturally dairy-free!
- Vegan: Ensure your food coloring is vegan-friendly.
Common Mistakes to Avoid
- Wet Apples: This is the most common culprit for a bumpy, uneven coating. Ensure apples are bone dry.
- Not Using a Candy Thermometer: Guessing the temperature will almost certainly lead to a sticky mess or a brittle, unpleasant coating. It’s truly non-negotiable.
- Stirring While Boiling: Once the sugar mixture boils, stirring can cause sugar crystals to form, resulting in a grainy, rather than smooth, coating.
- Humidity: High humidity can make it difficult for the candy coating to set properly. Choose a dry day if possible.
Storage & Meal Prep Tips
Store leftover Candy Apples at room temperature in an airtight container for up to 2-3 days. Refrigeration can cause the candy coating to become sticky and cloudy. If you need to store them for longer, it’s best to eat them fresh. These are not ideal for freezing. For meal prep, consider preparing the apples (washing, drying, skewering) in advance, so when you’re ready to cook, you only need to focus on the candy mixture.
Conclusion
Crafting your own Candy Apples is a truly rewarding experience, transforming simple ingredients into a dazzling, nostalgic treat. Similar to mastering the perfect batch of caramel apples, the key lies in precision and a little patience. With this guide, you’re now equipped to create homemade masterpieces that will delight your taste buds and impress everyone who tries them. Don’t hesitate to give this recipe a try and share your sweet results in the comments below! What’s your favorite apple variety to use?
FAQs
Q1: Why did my candy coating turn out sticky?
A: This often happens if the sugar mixture didn’t reach the correct temperature (300°F/149°C) or if there was too much moisture on the apples. Ensure you use a candy thermometer and that your apples are completely dry.
Q2: Can I use brown sugar instead of granulated sugar?
A: No, brown sugar contains molasses which will alter the texture and flavor of the candy coating, resulting in a less traditional candy apple. Stick to granulated sugar for this recipe.
Q3: My candy coating hardened too quickly – what went wrong?
A: The candy mixture cools and hardens fast. You might not have been quick enough in dipping the apples. If it hardens too much, you can gently reheat it over low heat, being careful not to exceed 300°F again, but this can affect the clarity.
Q4: How can I prevent air bubbles in the coating?
A: To minimize air bubbles, dip and rotate the apple slowly and evenly. Tapping the apple gently against the side of the pan as you lift it can also help release trapped air.
Q5: Can I make these ahead of time for a party?
A: While they can be made a day or two in advance, Candy Apples are best enjoyed the same day they are made. The coating can become sticky over time, especially in humid conditions.