Craving a Taste of Autumn? Unlock the Secret to Perfect Homemade Pumpkin Cookies!
As the leaves begin to turn and a crispness fills the air, does anything evoke the cozy comfort of fall quite like the aroma of freshly baked pumpkin goods? While store-bought treats are convenient, there’s an undeniable magic in creating culinary delights from scratch. Imagine biting into a soft, spiced cookie, perfectly balanced between sweetness and the earthy notes of autumn’s favorite squash. Today, we’re diving deep into crafting the ultimate Pumpkin Cookies right in your own kitchen. This isn’t just about baking; it’s about infusing your home with warmth and creating cherished memories with every delicious bite. Forget bland, dry cookies – this comprehensive guide will equip you with all the knowledge to master this delightful Pumpkin cookie recipe, making it a staple in your fall baking repertoire.
Ingredients & Kitchen Tools
Gather your culinary arsenal! Each ingredient plays a crucial role in the symphony of flavors in these cookies.
1 cup (2 sticks) unsalted butter, softened: Provides richness and a tender crumb. Substitution: Plant-based butter for a dairy-free option.*
- 1 cup granulated sugar: For sweetness and aiding in cookie browning.
- 1/2 cup packed light brown sugar: Adds moisture, depth of flavor, and a chewy texture.
1 teaspoon vanilla extract: Enhances overall flavor. Clarification: Use pure vanilla for best results.*
- 1 large egg: Acts as a binder and adds richness.
1 cup pure pumpkin puree: The star ingredient, providing moisture and that quintessential pumpkin flavor. Clarification: Ensure it’s 100% pumpkin, not pumpkin pie filling.*
2 1/4 cups all-purpose flour: The structural base for our cookies. Substitution: Use a 1:1 gluten-free baking blend for GF cookies.*
- 1 teaspoon baking soda: Leavening agent for softness and rise.
- 1/2 teaspoon baking powder: Another leavening agent for a lighter texture.
- 1 teaspoon ground cinnamon: Essential warming spice.
- 1/2 teaspoon ground nutmeg: Adds complexity and aromatic depth.
- 1/4 teaspoon ground cloves: A potent spice, use sparingly for balance.
- 1/4 teaspoon ground ginger: Contributes a gentle zing.
- 1/2 teaspoon salt: Balances sweetness and enhances flavors.
- Optional: 1 cup chocolate chips, walnuts, or pecans: For added texture and flavor customization.
Kitchen Tools:
- Large mixing bowls: For combining wet and dry ingredients.
- Electric mixer (stand or hand-held): For creaming butter and sugar efficiently.
- Rubber spatula: For scraping bowls and folding ingredients.
- Whisk: For combining dry ingredients evenly.
- Measuring cups and spoons: For precise ingredient measurements.
- Baking sheets: Preferably light-colored to prevent over-browning.
- Parchment paper or silicone baking mats: For non-stick baking and easy cleanup.
- Cookie scoop (1.5-2 tablespoon size): For uniform cookie size.
- Wire cooling rack: For cooling cookies evenly.
Prep Time & Cooking Schedule
Planning is key for a smooth baking experience!
- Prep Time: 15 minutes (this includes gathering ingredients and mixing).
- Chill Time (Optional but Recommended): 30 minutes (helps prevent spreading and deepens flavor).
- Cook Time: 10-12 minutes per batch.
- Resting Time: 5 minutes on the baking sheet after baking, then transfer to a wire rack to cool completely.
Allow approximately 1 hour from start to finish, not including the optional chilling time, to account for multiple batches.
Step-by-Step Instructions
Follow these clear steps to achieve bakery-quality Pumpkin Cookies:
1. Preheat & Prepare: Preheat your oven to 350°F (175°C). Line two baking sheets with parchment paper or silicone mats. This ensures easy removal and prevents sticking.
2. Combine Dry Ingredients: In a medium bowl, whisk together the flour, baking soda, baking powder, cinnamon, nutmeg, cloves, ginger, and salt. Set aside. This pre-mixing ensures spices and leavening agents are evenly distributed throughout the dough.
3. Cream Wet Ingredients: In a large bowl, using an electric mixer, cream together the softened butter, granulated sugar, and brown sugar until light and fluffy, about 2-3 minutes. This incorporates air, contributing to a soft cookie.
4. Add Egg & Vanilla: Beat in the egg and vanilla extract until well combined. Scrape down the sides of the bowl to ensure everything is incorporated.
5. Incorporate Pumpkin Puree: Add the pumpkin puree to the wet mixture and mix until just combined. Be careful not to overmix at this stage.
6. Combine Wet & Dry: Gradually add the dry ingredients to the wet ingredients, mixing on low speed until just combined. Overmixing at this stage can lead to tough cookies. If adding optional chocolate chips or nuts, fold them in now with a rubber spatula.
7. Scoop & Bake: Drop rounded tablespoons of dough (or use a cookie scoop) onto the prepared baking sheets, leaving about 2 inches between each cookie.
8. Bake: Bake for 10-12 minutes, or until the edges are lightly golden and the centers are set. The cookies should still look slightly soft in the middle when you take them out. This is key for a chewy texture.
9. Cool: Let the cookies cool on the baking sheets for 5 minutes before transferring them to a wire rack to cool completely. This prevents them from breaking and allows them to firm up. Enjoy your perfectly baked Pumpkin cookie recipe!
Nutritional Benefits & Advantages
These delectable Pumpkin Cookies offer more than just exquisite taste. Pumpkin itself is a nutritional powerhouse, rich in Vitamin A (from beta-carotene), which is vital for vision and immune function. It’s also a good source of Vitamin C, potassium, and fiber, contributing to digestive health and satiety. While cookies are a treat, incorporating natural pumpkin puree means you’re adding a dose of healthful nutrients compared to many other baked goods. Baking at home also gives you control over sugar content and the quality of ingredients.
Tips Variations & Cooking Advice
- Spiced Up: For extra spice, increase cinnamon, nutmeg, ginger, and cloves by 1/4 teaspoon each, or add 1/2 teaspoon of allspice.
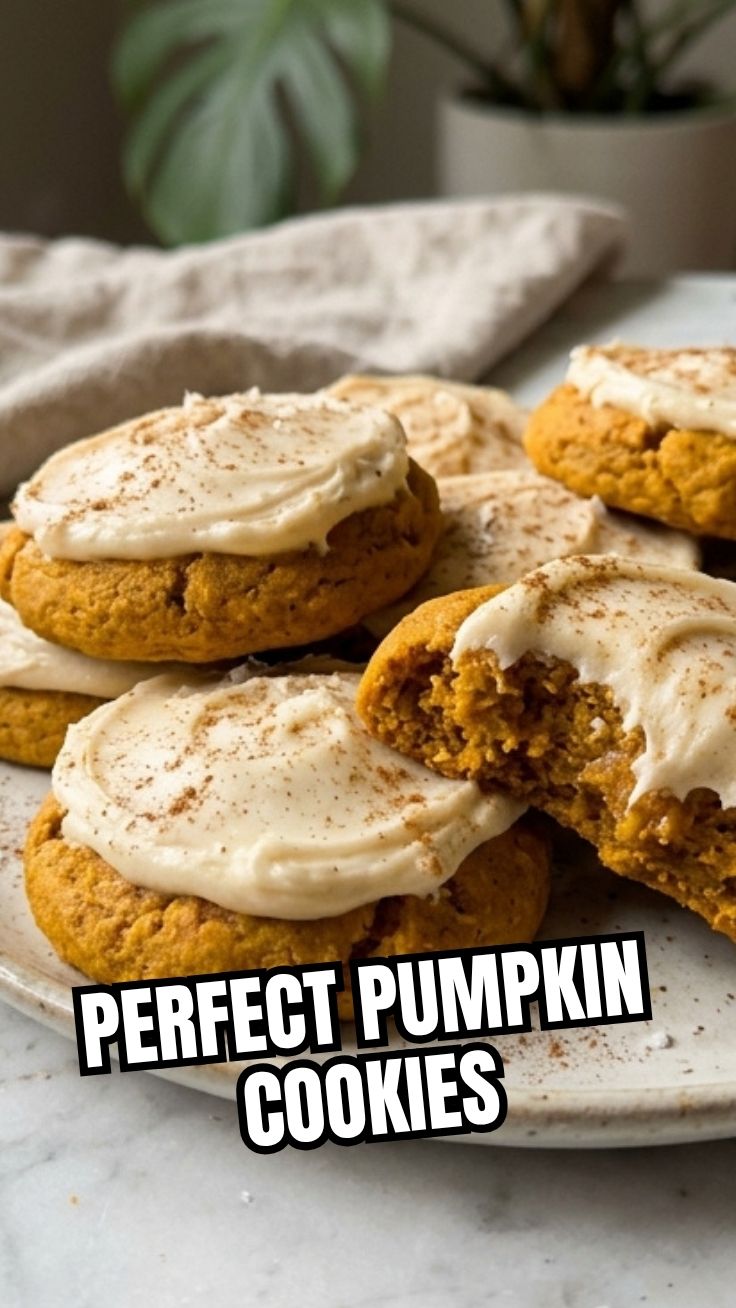
- Cream Cheese Frosting: A tangy cream cheese frosting (softened cream cheese, powdered sugar, butter, vanilla) is a classic accompaniment to Pumpkin Cookies.
- Gluten-Free: Substitute the all-purpose flour with a 1:1 gluten-free baking blend that contains xanthan gum.
- Vegan: Use plant-based butter and a flax egg (1 tbsp ground flaxseed mixed with 3 tbsp water, let sit for 5 minutes) instead of a regular egg.
- No Spices? No Problem! Use 2 teaspoons of pumpkin pie spice blend as a convenient alternative to individual spices.
- Perfectly Round Cookies: After baking, if your cookies aren’t perfectly round, use a large round cookie cutter or glass to gently scoot around the edges of the warm cookies for a perfectly circular shape.
Common Mistakes to Avoid
- Using Pumpkin Pie Filling: This is sweetened and spiced, throwing off the sugar and spice balance of the recipe. Always use pure pumpkin puree.
- Overmixing the Dough: Overmixing develops the gluten in the flour, leading to tough, chewy cookies instead of soft ones. Mix until just combined.
- Skipping the Softened Butter: Cold butter won’t cream properly, resulting in a dense cookie. Ensure your butter is at room temperature.
- Baking on Hot Sheets: Always allow baking sheets to cool between batches, or use multiple sheets. Baking on hot sheets will cause cookies to spread too much.
- Underbaking/Overbaking: Underbaked cookies will be too soft and fall apart; overbaked cookies will be dry and hard. Look for lightly golden edges and set centers.
Storage & Meal Prep Tips
- Storage: Store cooled Pumpkin Cookies in an airtight container at room temperature for up to 3-4 days. For longer freshness, store them in the refrigerator for up to a week.
- Freezing Baked Cookies: Place fully cooled cookies in a single layer on a baking sheet and freeze until solid. Then transfer them to a freezer-safe bag or container, separating layers with parchment paper. They will keep for up to 3 months. Thaw at room temperature.
- Freezing Dough: You can scoop the dough into balls, place them on a parchment-lined baking sheet, and freeze until solid. Transfer to a freezer-safe bag. Bake from frozen, adding a few extra minutes to the baking time. This is excellent for meal prep!
Conclusion
There you have it – a foolproof guide to creating the most delectable Pumpkin Cookies! By following these detailed steps and incorporating our expert tips, you’re not just baking; you’re mastering a skill and infusing your home with the unparalleled scent of homemade goodness. This Pumpkin cookie recipe is designed to be approachable yet yield professional results, offering a perfect blend of autumnal spices and tender texture. We encourage you to try this recipe, experiment with the variations, and share your baking journey with us. Happy baking, and may your autumn be filled with the sweet, spiced comfort of these homemade delights!
FAQs
Q1: Can I use fresh pumpkin instead of canned puree?
A1: Yes, you can! Just make sure it’s pure pumpkin puree and not stringy or watery. Roast your pumpkin, scoop out the flesh, and blend until smooth. Drain any excess liquid if it seems too wet.
Q2: My cookies spread too much. What went wrong?
A2: Common culprits include butter that’s too soft (or melted), too little flour, or your baking sheets being too hot. Chilling the dough for at least 30 minutes can also help prevent spreading.
Q3: How can I make these cookies taste even richer?
A3: Using bittersweet chocolate chips, adding a pinch more salt to balance the sweetness, or browning your butter before creaming (let it cool and solidify slightly first) can add incredible depth of flavor.
Q4: Can I adjust the spice level?
A4: Absolutely! If you prefer a milder spice, reduce the ground cloves and ginger by half. For a bolder flavor, feel free to increase all the spices by a quarter to half a teaspoon.
Q5: What’s the best way to reheat leftover cookies?
A5: While delicious at room temperature, a quick 5-10 second zap in the microwave can make them warm and soft again, almost like they just came out of the oven. Alternatively, warm them gently in a toaster oven for a slightly crisper exterior.