Unlock the Secret to Effortless Sweetness: Your Guide to Perfect No-Bake Peanut Butter Bars
Ever found yourself craving a decadent, sweet treat but lacking the time (or desire) for elaborate baking? What if I told you there’s a simple, incredibly satisfying solution that comes together faster than you can preheat an oven? Welcome to the wonderful world of No-Bake Peanut Butter Bars. Preparing these delightful bars at home isn’t just about saving time; it’s about customizing your indulgence, controlling ingredients, and creating pure, unadulterated joy with minimal fuss. This recipe for No-Bake Peanut Butter Bars is not only a fan-favorite but also a perfect entry point for those looking to explore an array of No-Bake Dessert Recipes. Dive in and discover how easy it is to whip up a batch of these irresistible treats!
Ingredients & Kitchen Tools
Gathering your provisions is the first step to creating these marvels. Here’s what you’ll need:
- 1 ½ cups graham cracker crumbs: The foundational element, providing a buttery, slightly sweet base. You can make these by crushing whole graham crackers.
- ½ cup unsalted butter, melted: Binds the crumbs and adds richness. Salted butter can be used, but you might want to slightly reduce any added salt in the recipe.
- 1 cup creamy peanut butter: The star of the show. Choose natural or regular, depending on your preference for sweetness and texture. Almond butter or cashew butter can be substituted for an alternative nut flavor.
- 2 cups powdered sugar (confectioners’ sugar): Sweetens the peanut butter layer and helps create a smooth consistency. Always sift to avoid lumps.
- 1 teaspoon vanilla extract: Enhances the overall flavor profile.
- 1 ½ cups semi-sweet chocolate chips: Forms the glorious top layer. Dark chocolate or milk chocolate chips work equally well.
- 2 tablespoons vegetable oil (or coconut oil): Helps create a smooth, pourable chocolate ganache that sets beautifully.
Kitchen Tools:
- 9×13 inch baking pan: The perfect size for an ample batch.
- Large mixing bowls (2): For preparing distinct layers separately.
- Measuring cups and spoons: Essential for precise ingredient ratios.
- Rubber spatula or wooden spoon: For mixing and spreading.
- Microwave-safe bowl or small saucepan: For melting butter and chocolate.
- Parchment paper: Lines the pan for easy removal and clean-up.
Prep Time & Cooking Schedule
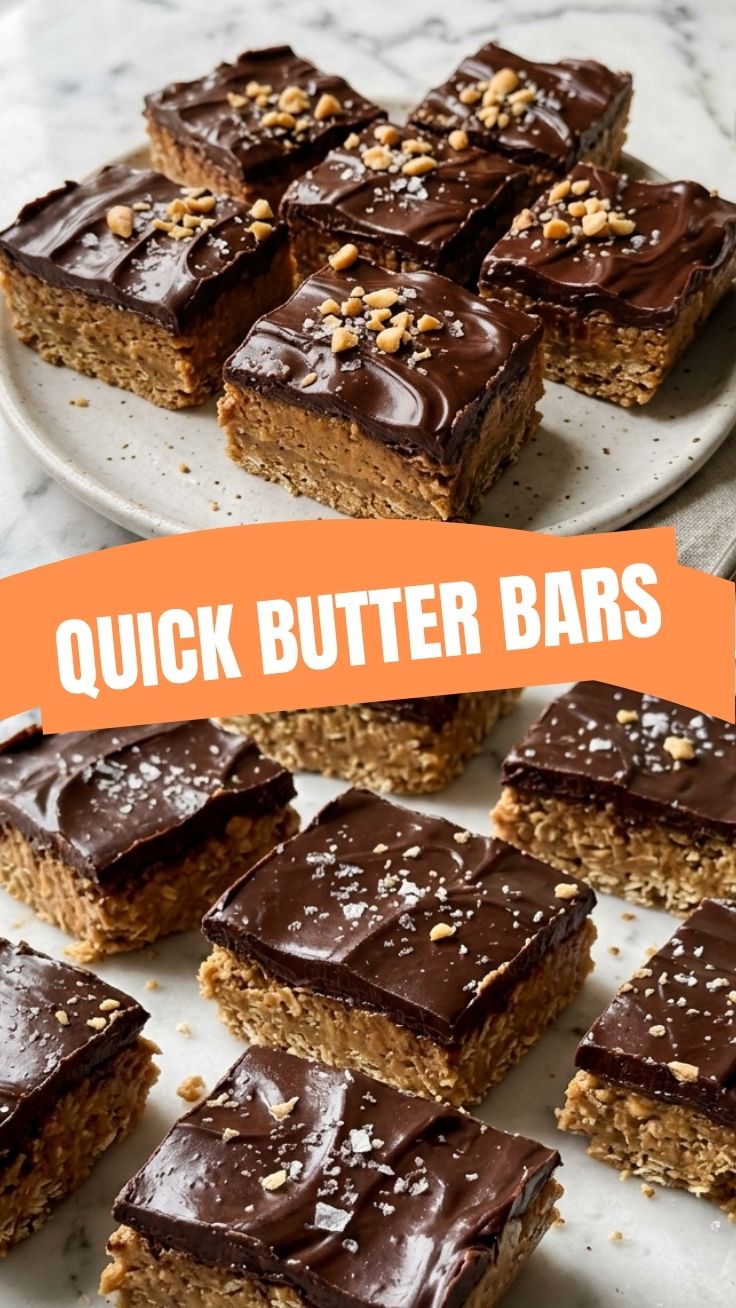
The beauty of these bars lies in their speed!
- Prep Time: 20 minutes
- Chill Time: 1-2 hours (minimum, for the layers to set properly)
- Total Time: Approximately 1 hour 20 minutes to 2 hours 20 minutes.
Plan to make these in advance, allowing ample time for chilling. They are perfect for preparing the night before an event or as an afternoon project for an evening treat. The chill time is crucial to achieve that satisfyingly firm texture, so resist the urge to cut them too soon!
Step-by-Step Instructions
Let’s get these delicious bars assembled!
1. Prepare the Pan: Line your 9×13 inch baking pan with parchment paper, leaving an overhang on the sides. This will make lifting the finished bars out incredibly easy.
2. Create the Crust: In a medium bowl, combine the graham cracker crumbs and melted butter. Mix until well combined and the crumbs resemble wet sand. Press this mixture firmly and evenly into the bottom of the prepared pan. Use the back of a spoon or your hands to ensure a compact base. Place in the freezer to chill while you prepare the next layer.
3. Whip up the Peanut Butter Layer: In a large bowl, beat together the creamy peanut butter, powdered sugar, and vanilla extract until smooth and creamy. This mixture will be thick. Scoop this glorious peanut butter mixture over the chilled graham cracker crust and spread it evenly with a spatula, making sure it reaches all corners.
4. Chocolate Topping: In a microwave-safe bowl, combine the semi-sweet chocolate chips and vegetable oil. Microwave in 30-second intervals, stirring after each, until the chocolate is completely melted and smooth. Alternatively, melt over a double boiler. Pour the melted chocolate evenly over the peanut butter layer, spreading quickly before it sets.
5. Chill to Perfection: Return the pan to the refrigerator and chill for at least 1-2 hours, or until the chocolate layer is firm.
6. Cut and Serve: Once thoroughly chilled, use the parchment paper overhangs to lift the entire slab out of the pan. Place on a cutting board and cut into squares or rectangles using a sharp knife. For the best No-Bake Peanut Butter Bars experience, allow them to sit at room temperature for 5-10 minutes before serving. This recipe is a fantastic addition to your repertoire of easy No-Bake Dessert Recipes.
Nutritional Benefits & Advantages
While these No-Bake Peanut Butter Bars are undeniably a treat, they offer some surprising advantages. Peanut butter is a good source of protein, healthy fats, and essential nutrients like magnesium and vitamin E. Making them at home gives you control over sugar levels and the quality of ingredients, bypassing artificial additives often found in store-bought counterparts. They provide a quick energy boost, making them a satisfying snack (in moderation, of course!).
Tips, Variations & Cooking Advice
- Nut Butter Swap: Don’t love peanut butter? Try almond butter or cashew butter for a different flavor profile.
- Chocolate Choices: Experiment with dark, milk, or even white chocolate for the topping. A sprinkle of sea salt on top of the chocolate before it sets adds a sophisticated touch.
- Add-ins: Fold in mini chocolate chips, chopped nuts (like peanuts or pecans), or shredded coconut into the peanut butter layer for extra texture and flavor.
- Gluten-Free: Use gluten-free graham cracker crumbs to make this recipe suitable for those with gluten sensitivities.
- Portion Control: Cut into smaller squares for bite-sized treats, perfect for sharing or managing portion sizes.
Common Mistakes to Avoid
- Not Chilling Long Enough: This is the most common error! Insufficient chilling leads to gooey, hard-to-cut bars. Be patient!
- Over-Melting Chocolate: Melting chocolate too quickly or with too much heat can cause it to seize and become grainy. Melt slowly and stir frequently.
- Skipping Parchment Paper: Without parchment paper, removing the bars from the pan will be a sticky, frustrating endeavor.
- Not Pressing Crust Firmly: A loose crust will crumble when cut. Press it down with conviction!
Storage & Meal Prep Tips
Store No-Bake Peanut Butter Bars in an airtight container in the refrigerator for up to one week. If stacking, place parchment paper between layers to prevent sticking. For longer storage, freeze the bars for up to three months. Wrap individual bars tightly in plastic wrap and then store them in a freezer-safe bag or container. Thaw in the refrigerator or at room temperature for a quick treat. These are excellent for meal prep as a pre-portioned sweet treat for lunchboxes or after-dinner snacks.
Conclusion
There you have it – a foolproof guide to crafting your own heavenly batch of No-Bake Peanut Butter Bars. These bars are a testament to the fact that incredibly delicious desserts don’t always require hours in the kitchen or complex techniques. They are a beloved classic for a reason, offering that perfect balance of sweet, salty, and utterly satisfying goodness. We hope this recipe empowers you to explore the vast and wonderful world of No-Bake Dessert Recipes. Give them a try, share your creations, and let us know your favorite variations in the comments below! Happy no-baking!
FAQs
Q1: Can I use crunchy peanut butter?
A1: Yes, you can! Crunchy peanut butter will add a delightful textural contrast to the peanut butter layer.
Q2: My chocolate isn’t spreading smoothly. What did I do wrong?
A2: This usually happens if the chocolate is too thick or has cooled too much. Add the oil (or a tiny bit more, like ½ teaspoon) to help thin it, and work quickly after melting. Ensure your peanut butter layer is chilled, as pouring warm chocolate onto a warm layer can make it harder to spread.
Q3: How do I get clean cuts?
A3: Ensure the bars are thoroughly chilled. Use a sharp knife and wipe the blade clean with a warm, damp cloth between each cut. This prevents the chocolate from dragging and creates crisp edges.
Q4: Can I halve this recipe?
A4: Absolutely! If you want a smaller batch, halve all the ingredients and use an 8×8 inch baking pan. Adjust chilling time slightly if needed.