Master the Art of Rustic Baking: Your Guide to the Perfect Peach Galette
Tired of complicated dessert recipes that leave you scratching your head? Imagine creating a stunning, incredibly flavorful Peach Galette (Rustic) right in your own kitchen – a dessert that looks like it came from a gourmet bakery but is surprisingly simple to make. This isn’t just about baking; it’s about embracing the joy of fresh, seasonal ingredients and transforming them into a delightful Summer fruit pastry that will impress everyone. Homemade never tasted so good, and with this comprehensive guide, you’ll unlock the secrets to a perfect dessert creation that highlights the natural sweetness of summer peaches.
Ingredients & Kitchen Tools
Crafting the perfect rustic peach galette requires a few essential ingredients and tools. Here’s what you’ll need:
Ingredients:
- For the Dough:
* 2 ½ cups All-Purpose Flour: The structural backbone of our flaky crust.
* 1 teaspoon Salt: Enhances flavor and balances sweetness.
* 1 cup (2 sticks) Unsalted Butter, very cold and cubed: Crucial for a flaky, tender crust. Unsalted allows you to control the salt content.
* ½ cup Ice Water, plus more if needed: Cold water prevents gluten development, ensuring a tender dough.
- For the Filling:
* 5-6 Medium Peaches, ripe but firm (about 2 ½ lbs): The star of our galette; choose peaches that yield slightly to pressure but aren’t mushy.
* ¼ cup Granulated Sugar: Sweetens the peaches and helps create a lovely syrup.
* 2 tablespoons All-Purpose Flour or Cornstarch: Thickens the peach juices, preventing a soggy crust.
* 1 teaspoon Lemon Juice: Brightens the peach flavor and prevents browning.
* ½ teaspoon Vanilla Extract: Adds a warm, complementary aroma and flavor.
- For the Topping:
* 1 Large Egg, beaten (for egg wash): Gives the crust a beautiful golden sheen.
* 1 tablespoon Coarse Sugar (turbinado or demerara): Adds a delightful sparkle and slight crunch to the crust.
Kitchen Tools:
- Large Mixing Bowl: For combining dry ingredients and mixing the dough.
- Pastry Blender or Food Processor: To cut in the cold butter efficiently.
- Rolling Pin: Essential for rolling out the dough.
- Parchment Paper: Prevents sticking and makes transferring easy.
- Baking Sheet: The foundation for baking your galette.
- Paring Knife or Mandoline: For slicing peaches evenly.
- Pastry Brush: For applying the egg wash.
Prep Time & Cooking Schedule
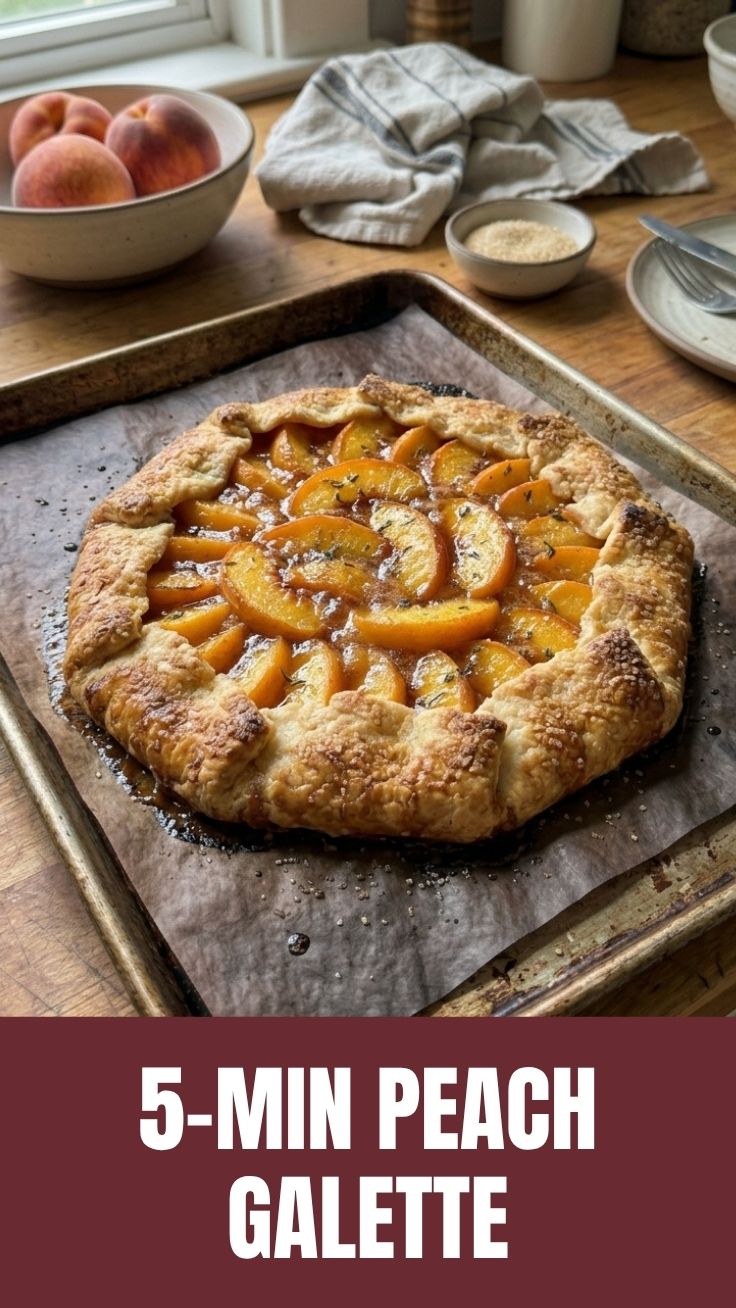
Planning is key to a stress-free baking experience. Here’s your schedule:
- Prep Time: 30 minutes (Dough preparation: 15 minutes, Peach slicing and filling prep: 15 minutes)
- Chilling Time: 30-60 minutes (for the dough, crucial for flakiness)
- Cook Time: 45-55 minutes
- Resting Time (after baking): 15-20 minutes (allows the juices to set and prevents the galette from falling apart when sliced).
This timeline allows for ample chilling time for the dough, which is a non-negotiable step for a truly flaky crust. Factor in the post-baking resting period to ensure your galette is perfectly set for serving.
Step-by-Step Instructions
Follow these detailed steps to create a beautiful and delicious Peach Galette (Rustic):
1. Prepare the Dough: In a large bowl, whisk together the flour and salt. Cut the very cold, cubed butter into the flour using a pastry blender or your fingertips until the mixture resembles coarse crumbs with some pea-sized pieces of butter remaining. Gradually add the ice water, 1 tablespoon at a time, mixing until the dough just comes together. Be careful not to overmix. Form the dough into a disk, wrap it in plastic, and chill in the refrigerator for at least 30 minutes. This chilling step is vital for a tender, flaky crust and easier handling.
2. Prepare the Peach Filling: While the dough chills, wash and slice your peaches. In a separate bowl, gently toss the sliced peaches with granulated sugar, flour (or cornstarch), lemon juice, and vanilla extract. Ensure the peaches are evenly coated. The flour acts as a thickener, preventing a watery filling and ensuring your Summer fruit pastry remains structurally sound.
3. Roll Out the Dough: On a lightly floured surface or between two sheets of parchment paper, roll out the chilled dough into a rough 12-14 inch circle, about ¼ inch thick. Don’t worry about perfection; the rustic charm is part of its appeal!
4. Assemble the Galette: Carefully transfer the rolled-out dough to a baking sheet lined with parchment paper. Arrange the peach filling in the center of the dough, leaving a 2-inch border around the edges.
5. Fold the Edges: Gently fold the edges of the dough over the peaches, pleating them as you go to create a rustic, free-form crust.
6. Egg Wash and Sugar: In a small bowl, beat the egg with a tablespoon of water to create an egg wash. Brush the folded crust with the egg wash and sprinkle generously with coarse sugar. This will give your galette a beautiful golden-brown finish and a touch of sweetness.
7. Bake: Preheat your oven to 400°F (200°C). Bake for 45-55 minutes, or until the crust is golden brown and the peach filling is bubbly and tender. If the crust browns too quickly, loosely tent it with aluminum foil.
8. Cool and Serve: Allow the galette to cool on the baking sheet for at least 15-20 minutes before slicing and serving. This allows the fruit juices to set, preventing a runny mess. Serve warm, perhaps with a scoop of vanilla ice cream or a dollop of whipped cream.
Nutritional Benefits & Advantages
Peaches are not only delicious but also packed with health benefits. They are an excellent source of Vitamin C, an antioxidant that supports immune health, and Vitamin A, crucial for vision and skin health. They also provide dietary fiber, aiding digestion and promoting satiety. By making your own Peach Galette (Rustic), you control the sugar content and can opt for organic peaches, reducing exposure to pesticides. This allows you to create a naturally sweet and satisfying Summer fruit pastry with fewer artificial ingredients than store-bought options.
Tips, Variations & Cooking Advice
- Flavor Variations:
* Spiced Peach: Add a pinch of cinnamon, nutmeg, or cardamom to the peach filling for a warm, aromatic twist.
* Berry Blend: Incorporate a handful of raspberries, blueberries, or blackberries with the peaches for a multi-fruit experience.
* Almond Hint: Add a few drops of almond extract to the filling or sprinkle flaked almonds over the peaches before folding the crust.
- Ingredient Swaps:
* Gluten-Free: Use a good quality gluten-free all-purpose flour blend (ensure it contains xanthan gum) for the dough.
* Dairy-Free: Substitute the butter with a high-quality dairy-free butter alternative.
- Serving Suggestions: Serve warm with a scoop of vanilla bean ice cream, a dollop of crème fraîche, or freshly whipped cream. A drizzle of honey also complements the peaches beautifully.
- Perfect Peaches: Don’t use overripe peaches as they will become too watery during baking. Slightly firm but ripe peaches hold their shape best.
Common Mistakes to Avoid
- Overmixing the Dough: This develops gluten, leading to a tough, rather than flaky, crust. Mix until just combined.
- Warm Butter: Using warm butter will result in a greasy, less flaky crust. Always ensure your butter is very cold.
- Skipping the Chill Time: Chilling the dough allows the butter to solidify, preventing it from melting too quickly in the oven and ensuring those desirable flaky layers.
- Not Thickening the Filling: Neglecting to add flour or cornstarch to the peaches can lead to a watery filling and a soggy crust.
- Cutting Too Soon: Resist the urge to slice the galette immediately after baking. The resting time allows the fruit juices to set, preventing a messy serving.
Storage & Meal Prep Tips
Leftover Peach Galette (Rustic) can be stored at room temperature, covered, for up to 2 days. For longer storage, refrigerate in an airtight container for up to 3-4 days. To reheat, warm individual slices in a toaster oven or oven at 300°F (150°C) for 10-15 minutes until warmed through and the crust regains some crispness. Freezing is generally not recommended for baked galettes as the fruit can become mushy upon thawing.
Conclusion
Creating a homemade Peach Galette (Rustic) is a rewarding experience that yields a truly spectacular dessert. This guide provides all the tools and knowledge you need to master this elegant yet approachable Summer fruit pastry. From simple ingredients to practical techniques, you’re now equipped to bake a show-stopping dessert that celebrates the season’s finest peaches. Don’t be afraid to experiment and make it your own! We encourage you to try this recipe and share your delicious results in the comments below. Happy baking!
FAQs
Q1: Can I use frozen peaches for this recipe?
A1: Yes, you can use frozen peaches. Thaw them completely and drain any excess liquid before tossing them with the sugar and thickener to prevent a watery galette.
Q2: My dough is too sticky. What should I do?
A2: If your dough is too sticky, it might be too warm or you’ve added too much water. Briefly chill it in the refrigerator. When rolling, use a lightly floured surface and rolling pin.
Q3: How do I know when the galette is fully cooked?
A3: The crust should be deeply golden brown, and the fruit filling should be bubbly and tender when pierced with a fork.
Q4: Can I prepare the dough ahead of time?
A4: Absolutely! The dough can be made up to 2 days in advance and stored tightly wrapped in the refrigerator. You can also freeze it for up to 1 month; thaw overnight in the fridge before rolling.
Q5: What if I don’t have fresh peaches?
A5: While fresh peaches are ideal, you can substitute with other fruits like apples, berries, or plums. Adjust sugar and thickener as needed based on the fruit’s juiciness.