Master the Art of Flavor: Your Guide to Perfect Blackened Chicken
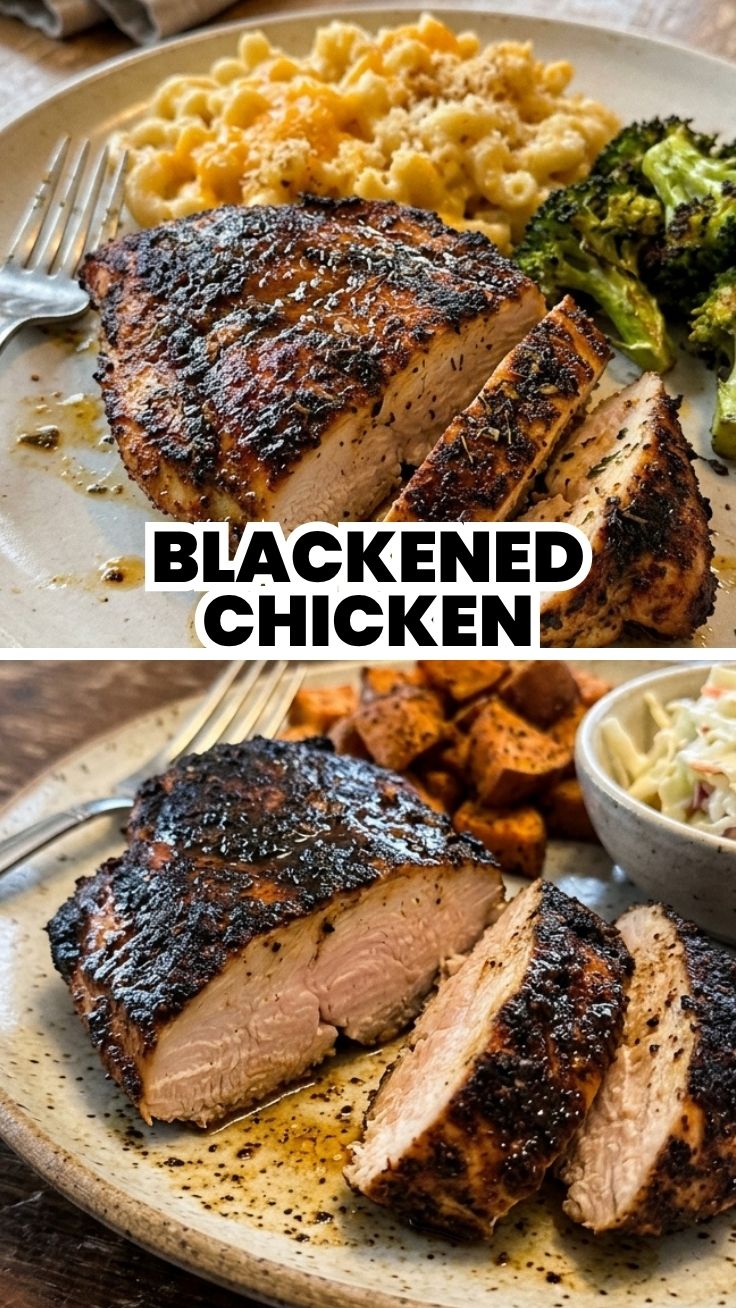
Are you ready to transform ordinary chicken into an extraordinary culinary experience? Imagine a dish bursting with smoky, spicy, and perfectly seared flavors, all achievable in your own kitchen. Today, we’re diving deep into crafting the ideal Blackened Chicken, a versatile meal that promises a flavor explosion with every bite. Forget complicated restaurant techniques; with the right approach and a stellar Blackened Seasoning blend, you can create a dish that’s both impressive and surprisingly simple to master. This guide will walk you through every step, ensuring your homemade version rivals any gourmet offering, proving that delicious, restaurant-quality food is well within your reach.
Ingredients & Kitchen Tools
- Boneless, Skinless Chicken Breasts or Thighs (4 pieces, ~6 oz each): Choose quality poultry for the best results. Thighs offer more moisture and richness, while breasts are leaner.
- Blackened Seasoning (2-3 tablespoons): A crucial blend of paprika, cayenne, garlic powder, onion powder, thyme, and oregano. You can buy pre-made or mix your own.
- Unsalted Butter (4 tablespoons): Essential for that signature crust and rich flavor. Ghee or clarified butter can be used for a higher smoke point.
- Olive Oil (1 tablespoon): Used in conjunction with butter to prevent burning and aid in blackening.
- Cast Iron Skillet (10-12 inch): Non-negotiable for achieving the perfect crust and high-heat cooking. Its heat retention is key.
- Tongs: For safely flipping the chicken.
- Cutting Board & Sharp Knife: For preparing the chicken.
- Shallow Dish: For dredging the chicken in seasoning.
- Instant-Read Meat Thermometer: Ensures chicken is cooked through to a safe internal temperature (165°F / 74°C).
- Aluminum Foil: For resting the chicken.
Prep Time & Cooking Schedule
- Prep Time: 10 minutes
- Cooking Time: 8-12 minutes (depending on thickness)
- Resting Time: 5 minutes
This dish comes together incredibly quickly, making it perfect for a weeknight meal. Start by gathering all your ingredients (mise en place) so you can focus on the high-heat cooking. The high temperature is vital, but so is not overcooking the chicken, so having everything ready will help you manage the short cook time effectively.
Step-by-Step Instructions
1. Prepare the Chicken: Pat the chicken pieces thoroughly dry with paper towels. This is a critical step for achieving a crisp crust. If using chicken breasts, you may want to butterfly them or pound them to an even 1/2-inch thickness for quicker, more consistent cooking.
2. Season Generously: Place the Blackened Seasoning in a shallow dish. Dredge each piece of chicken in the seasoning, pressing firmly to ensure it adheres well to all sides. Don’t be shy; this is where all the flavor comes from!
3. Heat the Skillet: Place your cast iron skillet over high heat. Add the olive oil and 2 tablespoons of butter. Heat until the butter is melted and just sizzling, almost to the smoke point. You’re looking for it to be smoking lightly, indicating it’s hot enough to create that beautiful blackened crust.
4. Sear the Chicken: Carefully place two pieces of the seasoned Blackened Chicken into the hot skillet. Let them cook undisturbed for 2-4 minutes per side, depending on thickness, until a dark, crusty char forms. The key is to keep the heat high, but don’t let the butter burn to black. Adjust if necessary.
5. Flip and Finish: Flip the chicken and cook for another 2-4 minutes until the second side is equally charred and the internal temperature reaches 165°F (74°C) with an instant-read thermometer. Add the remaining butter during the final minute of cooking, letting it melt and baste the chicken for added richness.
6. Rest the Chicken: Remove the chicken from the skillet and transfer to a cutting board. Tent loosely with aluminum foil and let it rest for 5 minutes. This step allows the juices to redistribute, resulting in incredibly moist and tender chicken.
Nutritional Benefits & Advantages
Blackened Chicken, particularly when made with lean chicken breasts, offers a fantastic source of lean protein, essential for muscle repair and satiety. The cooking method, while using some butter, primarily relies on dry heat to cook the chicken, minimizing added fats compared to deep frying. Spices used in Blackened Seasoning, such as paprika and cayenne, are rich in antioxidants and can even offer anti-inflammatory benefits. This dish is also naturally gluten-free and can be made dairy-free by substituting ghee or a plant-based butter alternative.
Tips Variations & Cooking Advice
- Spice Level: Adjust the cayenne pepper in your Blackened Seasoning to control the heat. For a milder version, reduce or omit it.
- Flavor Boost: Add a squeeze of fresh lemon juice over the cooked chicken just before serving for a brighter flavor.
- Other Proteins: This blackening technique works wonderfully with fish (swordfish, salmon, tilapia) and even shrimp. Adjust cooking times accordingly.
- Vegetarian Option: Try blackening firm tofu or tempeh for a delicious plant-based alternative.
- Serving Suggestions: Serve with rice, quinoa, a fresh salad, steamed vegetables, or in tacos and sandwiches.
Common Mistakes to Avoid
- Not Drying the Chicken: Wet chicken will steam instead of sear, preventing that signature crust. Pat it very dry!
- Overcrowding the Pan: Cooking too many pieces at once lowers the skillet’s temperature, leading to steaming and uneven cooking. Cook in batches if necessary.
- Not Enough Heat: A scorching hot cast iron skillet is crucial for blackening. If your pan isn’t hot enough, you won’t achieve the proper crust.
- Burning the Butter: While high heat is needed, keep an eye on the butter. If it starts to burn, reduce the heat slightly or add a touch more oil.
- Skipping the Rest: Resting the chicken is vital for juicy results. Don’t cut this step short.
Storage & Meal Prep Tips
Leftover Blackened Chicken can be stored in an airtight container in the refrigerator for 3-4 days. It’s excellent for meal prepping; slice it and add to salads, wraps, or grain bowls throughout the week. For reheating, gently warm in a skillet over medium-low heat or in the microwave until just heated through to avoid drying it out. Freezing is possible for up to 2-3 months, but the texture may change slightly upon thawing.
Conclusion
Embracing the art of blackening brings a world of flavor right to your kitchen. This Blackened Chicken recipe, perfected with the right technique and an aromatic Blackened Seasoning, is more than just a meal; it’s a testament to how simple ingredients can deliver extraordinary taste. We hope this guide empowers you to fearlessly tackle this iconic dish and customize it to your heart’s content. Give it a try tonight, and share your delicious results in the comments below – your culinary journey awaits!
FAQs
Q1: Can I make my own Blackened Seasoning?
A1: Absolutely! A common blend includes paprika, cayenne pepper, garlic powder, onion powder, dried thyme, dried oregano, salt, and black pepper. Adjust ratios to your taste.
Q2: What if I don’t have a cast iron skillet?
A2: While a cast iron skillet is ideal for its heat retention and ability to create a deep crust, a heavy-bottomed stainless steel skillet can be used as a substitute, though results may vary slightly.
Q3: How do I know when the chicken is done without a thermometer?
A3: While a thermometer is recommended for food safety, you can often tell by looking: the chicken should be opaque throughout, and the juices should run clear. However, a thermometer ensures perfect doneness.
Q4: My chicken burned instead of turned black. What went wrong?
A4: This usually happens if the heat is too high or if the butter burned. Ensure the butter is sizzling but not entirely smoking or turning deep brown before adding the chicken, and adjust heat as needed.
Q5: Can I use boneless, skinless chicken thighs?
A5: Yes, chicken thighs are an excellent choice! They are more forgiving and remain incredibly moist. Cooking times might be similar or slightly longer depending on thickness.