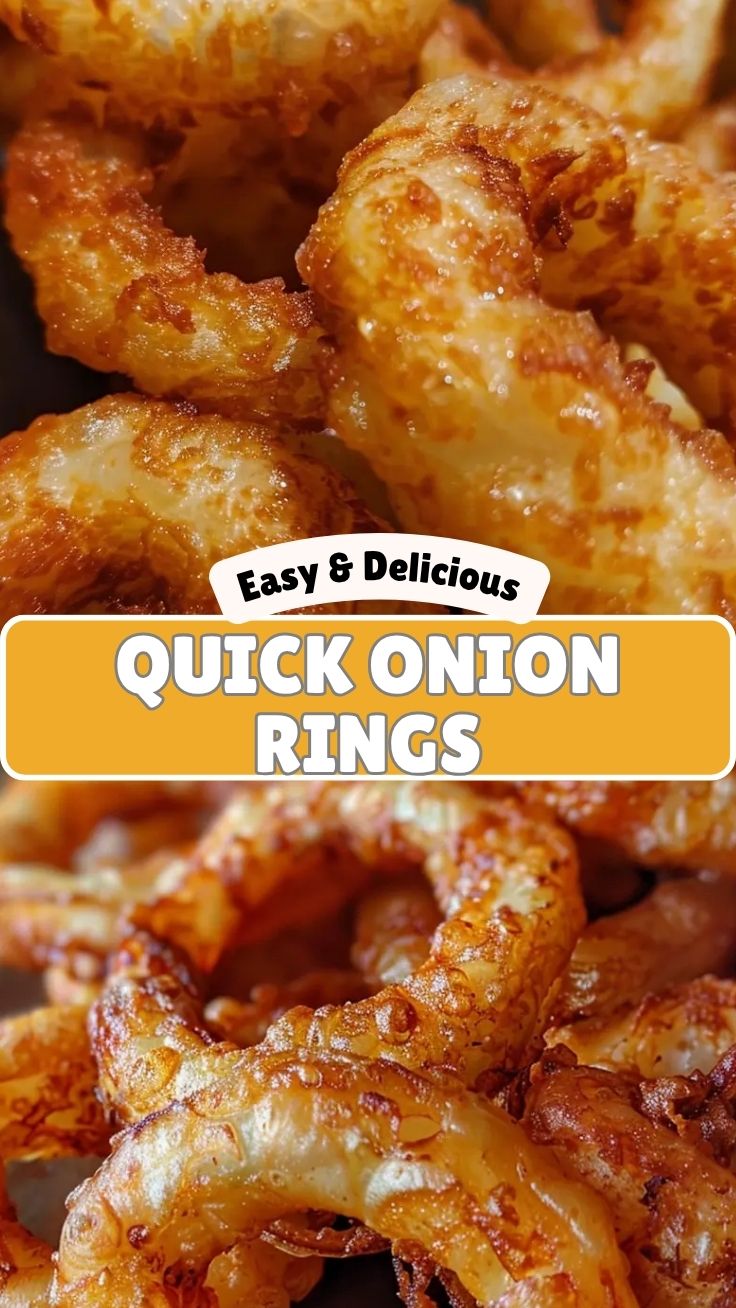
Crispy Perfection: Your Ultimate Guide to Homemade Onion Rings
Ever found yourself craving that irresistible crunch and sweet-savory flavor of perfectly golden onion rings? While restaurant versions are tempting, mastering the art of homemade Onion Rings (Crispy) at home is a culinary superpower. Not only does it allow you to control the ingredients for a healthier, fresher bite, but it also elevates your snack game to an entirely new level. Forget soggy, lackluster rings; we’re diving deep into creating the ultimate crispy experience, including the genius of Air Fryer Onion Rings for a lighter twist. This comprehensive guide will equip you with everything you need to transform humble onions into an extraordinary treat.
Ingredients & Kitchen Tools
- Large Yellow Onions (2-3): Sweet, mild flavor perfect for frying. Red onions can be used for a slightly sharper taste.
- All-Purpose Flour (1.5 cups): The base for our dredge, providing structure and crispness.
- Cornstarch (0.5 cup): The secret weapon for extra crispiness and preventing sogginess.
- Baking Powder (1 tsp): Adds lightness and helps create a puffy batter.
- Salt (1 tsp): Essential seasoning for flavor. Adjust to taste.
- Black Pepper (0.5 tsp): Adds a subtle kick.
- Paprika (1 tsp): For color and a hint of smoky sweetness.
- Garlic Powder (0.5 tsp): Enhances savory notes.
- Buttermilk (12-16 oz): Tenderizes the onions and helps the dredge adhere. If you don’t have buttermilk, add 1 tablespoon of lemon juice or white vinegar to regular milk and let it sit for 5 minutes.
- Cold Water (0.5 cup, or as needed): Used to adjust batter consistency.
- Vegetable Oil or Canola Oil (4-6 cups): For deep frying. Choose a high smoke point oil.
- Large Mixing Bowls (3): For wet and dry ingredients.
- Whisk: To combine dry ingredients and batter.
- Tongs: For safely handling onions in hot oil.
- Slotted Spoon or Spider Strainer: To remove fried items from oil.
- Wire Rack with Baking Sheet: For draining excess oil and maintaining crispness.
- Mandoline or Sharp Knife: For evenly slicing onions.
- Deep Pot or Dutch Oven: For deep frying.
- Thermometer (Candy or Deep-Fry): Crucial for maintaining optimal oil temperature.
- Paper Towels: For blotting excess oil.
- Air Fryer (Optional): For making Air Fryer Onion Rings.
Prep Time & Cooking Schedule
- Prep Time: 20 minutes (slicing, soaking, batter preparation)
- Cook Time: 15-20 minutes (in batches)
- Soaking Time (Optional): 30 minutes (helps reduce onion pungency)
- Total Time: Approximately 1 hour
To plan your cooking, start by slicing and soaking the onions. While they soak, prepare your dry dredging mixture and wet batter. This allows for a smooth workflow when it’s time to fry.
Step-by-Step Instructions
1. Prepare the Onions: Peel and slice onions into 1/4 to 1/2-inch thick rings. Carefully separate the rings. For maximum crispiness and reduced raw onion bite, soak the separated rings in ice water for 30 minutes, then pat them thoroughly dry.
2. Set Up Dredging Stations: In one bowl, whisk together the buttermilk and cold water to create your wet batter. In a second shallow bowl, combine the flour, cornstarch, baking powder, salt, pepper, paprika, and garlic powder. This will be your dry dredge.
3. Batter and Bread: Dip each onion ring into the buttermilk mixture, allowing excess to drip off. Then, transfer to the dry flour mixture, ensuring it’s completely coated. Press gently to help the flour adhere. Place the coated rings on a wire rack while you prepare the oil. This double-dredging technique is key for achieving truly Onion Rings (Crispy) texture.
4. Heat the Oil: In a deep pot or Dutch oven, heat 4-6 cups of vegetable oil to 350-375°F (175-190°C). Use a thermometer to monitor the temperature; maintaining it is crucial for perfect results.
5. Fry in Batches: Carefully drop a few onion rings into the hot oil, ensuring not to overcrowd the pot. Overcrowding lowers the oil temperature, leading to soggy rings. Fry for 2-4 minutes per batch, or until beautifully golden brown and crispy.
6. Drain and Season: Remove fried onion rings with a slotted spoon or spider strainer and transfer them to a wire rack placed over a baking sheet to drain excess oil. Immediately sprinkle with a pinch of extra salt.
7. For Air Fryer Onion Rings: For a lighter option, preheat your air fryer to 375°F (190°C). Lightly spray the breaded onion rings with cooking spray. Arrange them in a single layer in the air fryer basket (work in batches). Air fry for 8-12 minutes, flipping halfway through, until golden and crispy.
Nutritional Benefits & Advantages
Onions themselves are a powerhouse of nutrients, rich in vitamin C, B vitamins, and potassium. They also contain antioxidants and beneficial compounds like quercetin, which has anti-inflammatory properties. While deep-frying adds calories, homemade onion rings allow you to control the type of oil used, and opting for Air Fryer Onion Rings significantly reduces fat content, making them a more heart-friendly indulgence. Preparing them at home avoids excessive sodium and artificial additives often found in commercially prepared versions.
Tips, Variations & Cooking Advice
- Spice it up: Add a pinch of cayenne pepper or chili powder to the dry dredge for a spicy kick.
- Herbaceous notes: Incorporate dried parsley or oregano into the flour mixture.
- Cheesy Twist: Mix a tablespoon of grated Parmesan cheese into the dry dredge for a savory, cheesy crust.
- Gluten-Free: Substitute all-purpose flour with a gluten-free all-purpose flour blend.
- Dairy-Free: Use a dairy-free milk alternative (like almond or soy milk) with lemon juice for a dairy-free buttermilk substitute.
- Even Slicing: A mandoline slicer ensures consistently thick rings, leading to even cooking.
- Don’t Rush the Fryer: Frying in small batches is critical for maintaining oil temperature and achieving superior crispness.
Common Mistakes to Avoid
- Overcrowding the Fryer: As mentioned, this drops oil temperature and results in greasy, limp rings.
- Insufficiently Dried Onions: Excess moisture prevents the batter from adhering properly and can cause oil to splatter.
- Incorrect Oil Temperature: Too low, and the rings absorb too much oil; too high, and they burn before cooking through. A thermometer is your best friend.
- Skipping the Double-Dredge: This two-step process is crucial for a thick, crispy coating.
- Seasoning Too Late: Season immediately after frying for the best flavor adhesion.
Storage & Meal Prep Tips
For best results, Onion Rings (Crispy) are best enjoyed immediately after frying. If you have leftovers, store them in an airtight container in the refrigerator for up to 2-3 days. To reheat and restore crispness, spread them in a single layer on a baking sheet and bake at 350°F (175°C) for 5-10 minutes, or reheat in an air fryer at 350°F (175°C) for 3-5 minutes. Freezing is not recommended as it significantly affects texture. For meal prep, you can slice and soak the onions ahead of time, storing them in a covered container in the fridge.
Conclusion
There you have it – your definitive guide to crafting the most delicious homemade Onion Rings (Crispy). Whether you opt for the classic deep-fried method or the healthier Air Fryer Onion Rings, the satisfaction of biting into that perfectly crunchy, flavorful ring is unparalleled. Don’t be shy; give this recipe a try and share your crispy creations with us! We guarantee you’ll impress yourself and anyone lucky enough to get a taste.
FAQs
Q: Can I use different types of onions?
A: Yellow onions are generally preferred for their sweetness and mildness, but Vidalia or Walla Walla are excellent choices too. Red onions can work if you don’t mind a slightly bolder flavor, though they are often smaller.
Q: Why do my onion rings turn out soggy?
A: Common culprits include overcrowding the fryer, oil not being hot enough, or not drying the onions sufficiently before battering. Make sure to adhere to the ideal oil temperature and fry in small batches.
Q: Can I prepare the batter ahead of time?
A: You can prepare the dry dredge ahead of time and store it in an airtight container. The wet batter is best made just before frying, as the baking powder’s leavening power is most effective when freshly mixed.
Q: How do I prevent the batter from falling off the onion rings?
A: Ensure your onion rings are thoroughly dry before dipping them in the buttermilk and then the flour. Pressing the flour onto the rings helps it adhere better. A two-step breading process (wet, then dry) is crucial.
Q: What oil is best for deep frying?
A: Vegetable oil, canola oil, and peanut oil are all excellent choices due to their high smoke points and neutral flavor. Avoid olive oil for deep frying.