Unleash Your Inner Chef: Master the Ultimate Homemade Grilled Cheese
Ever wondered why the simplest meals often hold the most comfort? Today, we’re diving into the heartwarming world of the classic Grilled Cheese – a dish so universally loved, it transcends generations and palates. Forget those bland fast-food renditions; preparing this culinary icon at home allows for unparalleled customization, fresh ingredients, and a truly soul-satisfying experience. This blog post will guide you through crafting a perfect Grilled Cheese, inviting you to explore the vast possibilities within sandwich recipes and elevate your everyday meals. Get ready to transform humble ingredients into a masterpiece of golden-brown perfection and gooey, melted delight.
Ingredients & Kitchen Tools
Crafting the perfect Grilled Cheese requires a few key players. Here’s what you’ll need:
- Bread (2 slices per sandwich): Opt for sturdy, white, or sourdough bread that crisps beautifully without disintegrating. Brioche or challah also work for a richer flavor.
- Cheese (2-3 slices or 1/2 cup shredded per sandwich): A melty dream team! Think sharp cheddar, Gruyère, Monterey Jack, or even a creamy Fontina. Shredded cheese melts more evenly.
- Unsalted Butter (1-2 tablespoons per sandwich): The golden ticket for that perfect, crispy exterior. Margarine or olive oil can be substituted, but butter offers superior flavor.
- Mayonnaise (optional, 1 teaspoon per sandwich): A secret weapon for an even crispier, more golden-brown crust. Spreads easier than butter.
- Kitchen Spatula: Essential for flipping with ease.
- Large Skillet or Griddle: A non-stick pan is ideal for even cooking and easy release. Cast iron also works wonders for a deep, even sear.
- Butter Knife or Spreader: For applying butter/mayo evenly.
- Cutting Board and Sharp Knife: For slicing your culinary creation.
Prep Time & Cooking Schedule
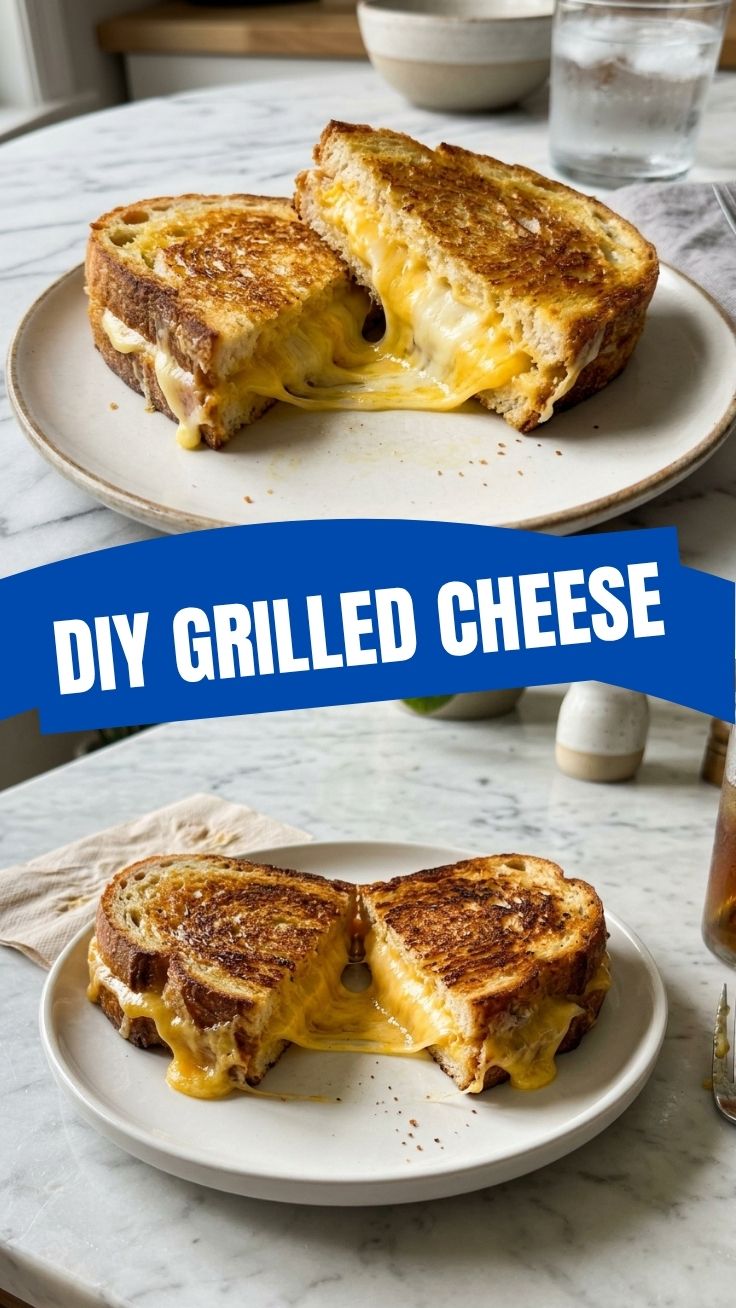
The beauty of a homemade Grilled Cheese lies in its speed and simplicity. You’ll be enjoying your creation in no time!
- Prep Time: 5 minutes
* This includes gathering your ingredients, slicing cheese (if not pre-sliced), and buttering your bread.
- Cook Time: 6-8 minutes per sandwich
* This accounts for cooking both sides until golden brown and the cheese is beautifully melted.
- Resting Time: 1-2 minutes (optional but recommended)
* Allows the cheese to set slightly and prevents immediate structural collapse.
Plan to make a single sandwich at a time for optimal results, or use a larger griddle to make multiple if serving a crowd.
Step-by-Step Instructions
Follow these steps for a truly exceptional Grilled Cheese experience:
1. Prepare the Bread: Evenly spread butter (or mayonnaise for extra crispiness) on one side of each slice of bread. This buttered side will eventually be facing the hot pan.
2. Assemble the Sandwich: Place one slice of bread, butter-side down, in a cold skillet. Layer your chosen cheese generously over the unbuttered side. Top with the second slice of bread, butter-side up. This specific order ensures even cooking and promotes superior melting.
3. Heat and Cook: Place the skillet over medium-low heat. This is crucial! Too high heat will burn the bread before the cheese melts. Allow to cook for 3-4 minutes, or until the bottom slice is deeply golden brown and the cheese begins to soften.
4. Flip with Care: Using your spatula, carefully flip the sandwich. Cook for another 3-4 minutes on the second side, until it’s also golden brown and the cheese is fully melted and gooey. You want to see that beautiful ooze!
5. Serve Immediately: Transfer the Grilled Cheese to a cutting board. For that Instagram-worthy shot and easier eating, slice it diagonally. Enjoy your perfect sandwich recipes creation immediately!
Nutritional Benefits & Advantages
Beyond its undeniable deliciousness, the humble Grilled Cheese offers some surprising benefits. Dairy-based cheeses are excellent sources of calcium, vital for bone health, and protein, which aids in muscle repair and satiety. Opting for whole-wheat bread can increase fiber intake, promoting digestive health. While it’s a comfort food, it can be a relatively quick and efficient way to get essential nutrients, especially when paired with a side of homemade tomato soup or a fresh salad.
Tips, Variations & Cooking Advice
- The Cheese Blend: Don’t limit yourself to one cheese! A blend of two or three different cheeses adds complexity and a superior melt. Try cheddar for tang and Gruyère for nuttiness.
- Add-ins: Elevate your sandwich with thin slices of tomato, caramelized onions, pesto, a sprinkle of fresh herbs, or even a slice of ham or turkey for a heartier meal.
- Umami Boost: A dash of Worcestershire sauce or a smear of Dijon mustard on the inside of the bread before adding cheese can add a surprising depth of flavor.
- Press It: For an extra-level crispness, gently press down on the sandwich with your spatula during cooking.
Common Mistakes to Avoid
- Heat Too High: This is the most common culprit for burnt bread and unmelted cheese. Always cook on medium-low heat. Patience is key!
- Not Enough Fat: Skimping on butter (or mayo) results in a dry, pale crust. Don’t be afraid to be generous.
- Flipping Too Soon: Resist the urge! Let the first side develop a good crust before flipping to ensure structural integrity and maximum crispiness.
- Overcrowding the Pan: Trying to cook too many sandwiches at once lowers the pan temperature, leading to steaming instead of crisping.
Storage & Meal Prep Tips
While a Grilled Cheese is undeniably best enjoyed fresh, if you have leftovers (unlikely!), cool them completely before storing in an airtight container in the refrigerator for up to 2 days. Reheat on a low-heated skillet or in a toaster oven for best results, avoiding the microwave, which will make the bread soggy. For a quick weekday lunch, you can pre-slice and shred your cheeses ahead of time.
Conclusion
There you have it – the definitive guide to crafting the perfect homemade Grilled Cheese. By paying attention to a few simple details, you can elevate this humble dish into a culinary masterpiece. Whether you’re seeking a nostalgic comfort food or a quick yet satisfying meal, mastering the Grilled Cheese is a foundational skill in any home cook’s repertoire. Experiment with different cheeses and bread types, and don’t be afraid to get creative with your sandwich recipes to truly make it your own. Why not whip one up tonight and rediscovered the joy of cheesy, buttery perfection?
FAQs
Q1: What’s the best cheese for a grilled cheese?
A1: A classic choice is sharp cheddar, but Gruyère, Fontina, Monterey Jack, and even Swiss melt beautifully and offer great flavor. A blend often yields the best results.
Q2: Can I use olive oil instead of butter?
A2: Yes, olive oil can be used for a slightly different flavor profile and can achieve a crispy crust. However, butter provides a rich, classic taste that’s hard to beat.
Q3: How do I prevent my bread from burning before the cheese melts?
A3: The key is low heat! Cook on medium-low and be patient. This allows the bread to toast slowly while giving the cheese ample time to melt evenly.
Q4: Can I make this gluten-free or dairy-free?
A4: Absolutely! Use your favorite gluten-free bread and a high-quality dairy-free cheese alternative that’s designed for melting. Nutritional yeast can also add a cheesy flavor to dairy-free versions.