Unlock the Secret to the Juiciest Homemade Turkey: Your Guide to Perfecting Turkey Breast
Are you tired of dry, bland turkey? Imagine sinking your teeth into succulent, flavorful Turkey Breast, perfectly cooked and bursting with aromatic flavors. Preparing a show-stopping turkey doesn’t have to be intimidating, even for beginner chefs. This comprehensive guide will not only demystify the process but also empower you to create a culinary masterpiece right in your own kitchen. We’ll delve into the nuances of achieving that golden-brown skin and tender interior, while also exploring various Turkey Breast Recipes that elevate this classic protein. Get ready to impress your family and friends with a dish that tastes as good as it looks, guaranteeing rave reviews and requests for seconds!
Ingredients & Kitchen Tools
Crafting the perfect turkey requires a few key ingredients and the right culinary arsenal. These items are carefully selected for optimal flavor and texture.
- 1 (5-7 pound) Boneless, Skin-on Turkey Breast: The star of our show. Choose quality meat for the best results.
- 2 tbsp Olive Oil: For searing and promoting a beautiful crust.
- 1 tbsp Fresh Rosemary (chopped): Adds an earthy, fragrant note.
- 1 tbsp Fresh Thyme (chopped): Complements the rosemary with its delicate, minty undertones.
- 1 tsp Garlic Powder: Provides a savory depth of flavor.
- ½ tsp Paprika: Adds a hint of sweetness and vibrant color.
- Salt and Freshly Ground Black Pepper (to taste): Essential for seasoning and enhancing natural flavors.
- 1 cup Chicken Broth (low sodium): Used for basting and maintaining moisture.
- Optional Aromatic Vegetables: 1 onion (quartered), 2 celery stalks (chopped), 2 carrots (chopped) – for adding depth to pan drippings.
Kitchen Tools:
- Roasting Pan with a Rack: Crucial for even cooking and allowing air circulation.
- Meat Thermometer: Non-negotiable for ensuring food safety and perfect doneness.
- Large Mixing Bowl: For seasoning preparations.
- Sharp Knife: For carving.
- Basting Brush: For applying broth during cooking.
- Aluminum Foil: For resting the turkey and covering during cooking if needed.
Prep Time & Cooking Schedule
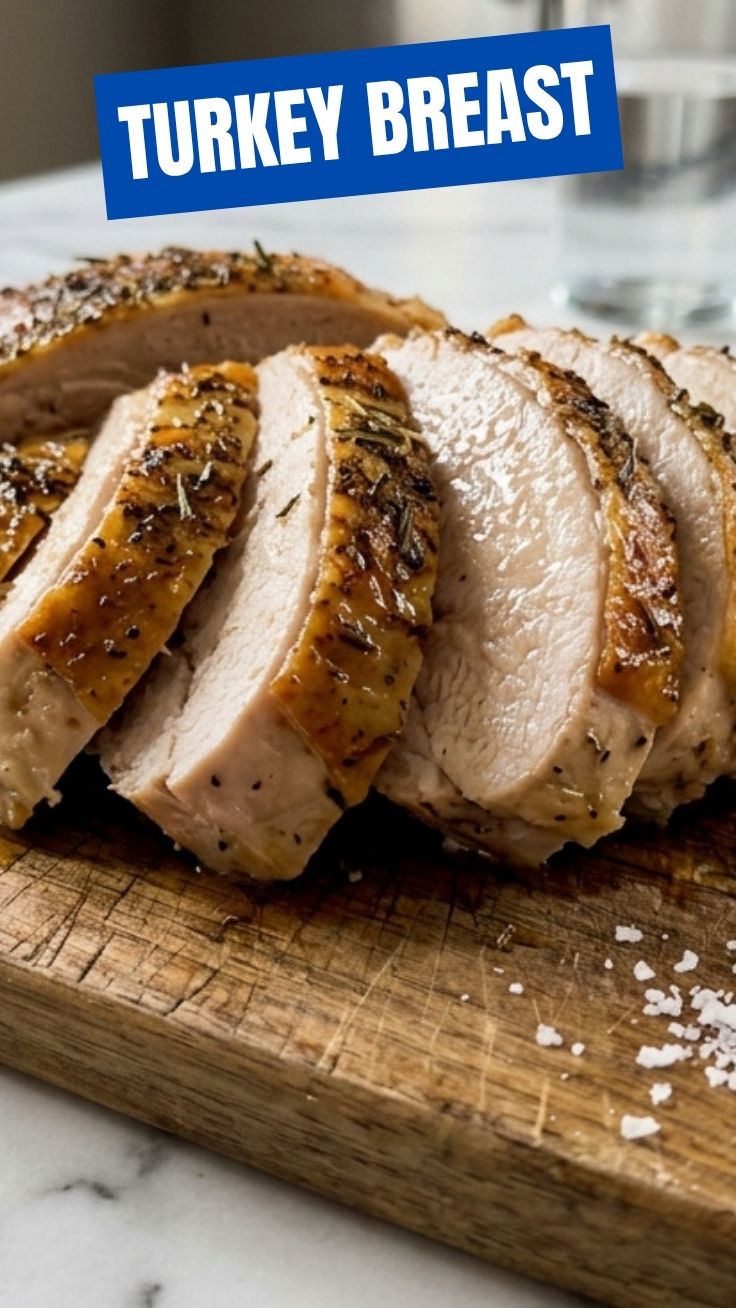
Planning is key to a stress-free cooking experience. This schedule ensures your turkey is ready when you are.
- Prep Time: 20 minutes (includes seasoning and bringing to room temperature)
- Cooking Time: 1.5 – 2 hours (approximately 20 minutes per pound, or until internal temperature reaches 165°F / 74°C)
- Resting Time: 15-20 minutes
Remember to remove the Turkey Breast from the refrigerator at least 30 minutes before cooking to allow it to come closer to room temperature. This promotes more even cooking.
Step-by-Step Instructions
Follow these detailed steps to achieve a perfectly cooked, tender, and juicy Turkey Breast.
1. Preheat Oven & Prepare Roasting Pan: Preheat your oven to 375°F (190°C). If using, scatter the optional aromatic vegetables at the bottom of the roasting pan. Place the roasting rack over the vegetables.
2. Season the Turkey: Pat the Turkey Breast completely dry with paper towels. In a small bowl, combine olive oil, rosemary, thyme, garlic powder, paprika, salt, and pepper. Rub this mixture generously all over the turkey, including under the skin if desired.
3. Roast the Turkey: Place the seasoned Turkey Breast, skin-side up, on the prepared roasting rack. Pour the chicken broth into the bottom of the roasting pan.
4. Initial Roasting & Basting: Roast for 30 minutes, then reduce the oven temperature to 325°F (160°C). Continue roasting, basting every 20-30 minutes with the pan juices and adding more broth if the pan becomes dry. This keeps the turkey moist and contributes to a beautiful glaze, making it ideal for future Turkey Breast Recipes.
5. Check for Doneness: Insert a meat thermometer into the thickest part of the turkey, avoiding the bone. The turkey is done when the internal temperature reaches 165°F (74°C). If the skin is browning too quickly, loosely tent the turkey with aluminum foil.
6. Rest the Turkey: Once cooked, remove the turkey from the oven and transfer it to a cutting board. Tent it loosely with aluminum foil and let it rest for 15-20 minutes. This crucial step allows the juices to redistribute, resulting in a significantly more tender and flavorful turkey.
7. Carve and Serve: Carve the rested Turkey Breast into slices and serve immediately with your favorite side dishes.
Nutritional Benefits & Advantages
Turkey is a powerhouse of lean protein, making it an excellent choice for a healthy diet. It’s rich in essential amino acids, crucial for muscle repair and growth. Furthermore, turkey breast is a good source of B vitamins (B3, B6, B12), which play vital roles in energy metabolism and nervous system function. It also provides essential minerals like selenium and zinc, supporting immune health. Opting for Turkey Breast over darker cuts can significantly reduce fat and calorie intake while still delivering immense flavor and satiety.
Tips Variations & Cooking Advice
- Brining: For an exceptionally juicy turkey, consider brining it overnight. A simple salt and sugar brine can dramatically improve moisture retention.
- Flavor Variations: Experiment with different herbs like sage or marjoram. Add citrus zest (lemon or orange) to your rub for a brighter flavor profile.
- Spice Rubs: For a bolder taste, create a spice rub with smoked paprika, chili powder, and cumin.
Stuffing: While this recipe focuses on the breast, you can add stuffing around* the turkey in the roasting pan for added flavor.
- Gravy: Don’t discard those pan drippings! They are the foundation for a delicious homemade gravy. Deglaze the pan with a bit of wine or more broth, thicken with a cornstarch slurry, and season to taste.
- Gluten-Free/Dairy-Free: This recipe is naturally gluten-free and dairy-free, making it suitable for a wide range of dietary needs.
Common Mistakes to Avoid
- Overcooking: The most common mistake! Always use a meat thermometer. Overcooked turkey is dry and tough.
- Not Resting the Turkey: Skipping the resting step results in juices flowing out when carved, leaving the meat dry.
- Crowding the Roasting Pan: Ensure there’s good air circulation around the turkey for even cooking and crispier skin.
- Ignoring Pan Juices: These flavorful drippings are gold! Use them for basting and gravy.
- Not Patting Dry: A dry surface ensures better browning and crispier skin.
Storage & Meal Prep Tips
Leftover Turkey Breast is incredibly versatile.
- Refrigeration: Store cooked turkey in an airtight container in the refrigerator for up to 3-4 days.
- Freezing: For longer storage, slice the turkey and freeze in a single layer on a parchment-lined baking sheet. Once frozen, transfer to freezer-safe bags or containers for up to 3 months.
- Reheating: Gently reheat slices in a pan with a splash of broth or in the oven at a low temperature to prevent drying out.
- Meal Prep Ideas: Use leftover turkey for sandwiches, salads, wraps, quick stir-fries, or even add it to soups and stews.
Conclusion
Mastering the art of cooking a juicy and flavorful Turkey Breast is a rewarding culinary journey that elevates any meal. By following these detailed steps, embracing the power of proper seasoning, and understanding the importance of temperature control and resting, you’ll consistently achieve tender, succulent results. We’ve explored not just the fundamental techniques but also dipped our toes into the world of diverse Turkey Breast Recipes, ensuring that your home-cooked turkey becomes a canvas for endless delicious possibilities. Don’t be afraid to experiment with flavors and make this recipe truly your own. Give it a try, share your triumph in the comments below, and prepare to be amazed by the deliciousness you can create!
FAQs
Q1: How do I prevent my Turkey Breast from drying out?
A1: The key is not to overcook it! Use a meat thermometer to ensure it reaches 165°F (74°C) and no more. Basting and proper resting time are also crucial.
Q2: Can I use a frozen Turkey Breast for this recipe?
A2: Yes, but ensure it’s completely thawed in the refrigerator before beginning the recipe. Thawing can take 24-48 hours depending on size.
Q3: What are some good sides to serve with roasted Turkey Breast?
A3: Mashed potatoes, roasted vegetables (like Brussels sprouts or asparagus), cranberry sauce, and a simple green salad are excellent accompaniments that complement most Turkey Breast Recipes.
Q4: How can I get crispy skin on my turkey?
A4: Patting the skin very dry before seasoning, roasting at an initial high temperature, and avoiding over-basting directly on the skin can help achieve a crispier exterior.
Q5: Can I make this with bone-in Turkey Breast?
A5: Yes, a bone-in turkey breast can also be used. It might require slightly longer cooking time, so always rely on your meat thermometer for accurate doneness.